Haltian Thingsee Entry User Guide
The purpose of Thingsee Entry application is to provide a simple and fast way to access sensor data without the need for setting up a dedicated cloud or application environment. The application has everything you need for basic use of Thingsee sensors.
Thingsee Entry supports light and dark themes.
Basic functionalities:
- Add sensors and give them logical names.
- View sensor values and check the history.
- Set alerts so that you receive a push notification when a threshold is triggered.
- Share your sensors.
Thingsee Entry follows the standard application/solution architecture by building the solution on top of the default Thingsee APIs.
Install Thingsee Entry
The application is available in Google Play and AppStore as Thingsee Entry.
The application requires software versions iOS 11/Android 10 or newer to run properly.
Login
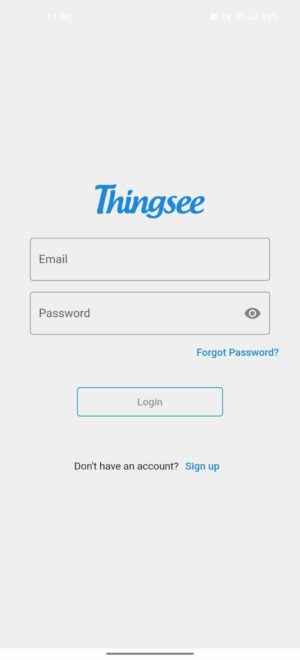
- Tap Sign Up to create a new user account.
- Tap Sign In to sign in using your email and password.
- Tap Forgot my password if you need to reset your password.
Create an account
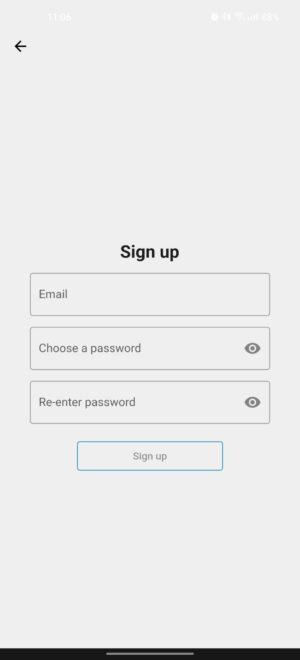
- Enter email.
- Enter password.
- Tap Sign Up.
Verify your email address
- You will receive an email from noreply@play.thingsee.com
- Follow the instructions in the email to verify your email address
Note! Use your desktop browser to open the link in case you have trouble activating the account on your mobile phone.
- After you have verified your email address, finalize your verification process within the application.
- As soon as the verification is completed, use your newly created account to sign in.
Reset password
- You will receive a password reset link to your email.
- Use a browser to set a new password.
Sensor management
Add a sensor
Your account doesn’t have any devices by default. The only way to add new devices is to read the QR code either from the device itself, or a shared QR code from another other source.
Read the sensor QR code
- Select the QR-code reader from the upper right corner of the application.
- Scan the QR code from any of your sensors, or try some of our Haltian sensors.
You can also read the QR code from another Thingsee Entry app if your friend shares a device, or read the QR code from a shared device from Gallery.
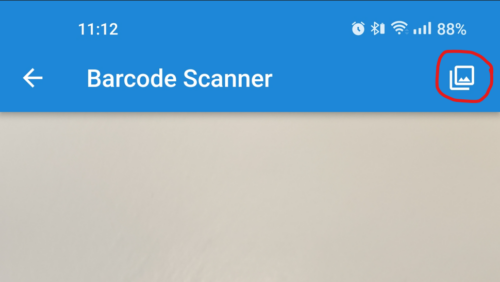
1. Open the QR-code reader and select the icon from the right upper corner.
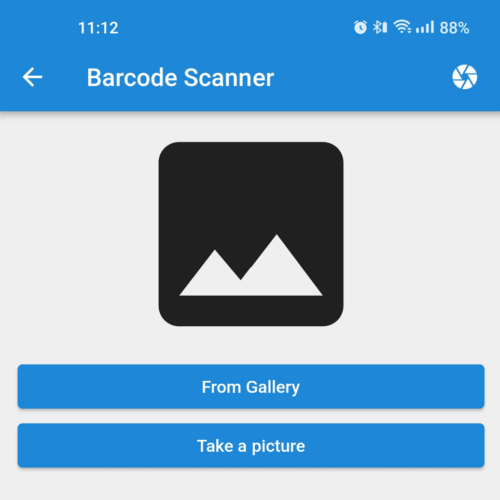
2. Select “From Gallery” and search for the image with QR code.
3. After reading the QR code you will see the device info.
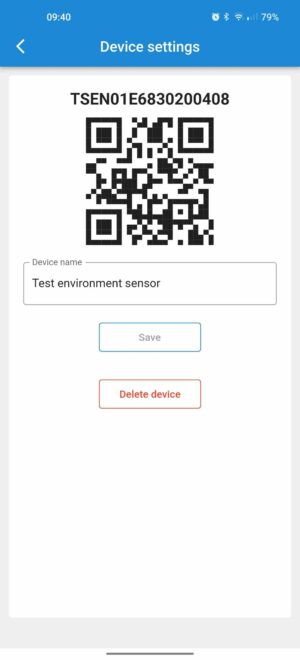
4. Enter the device name and press Save.
5. As soon as the application identifies the device, it will show you some basic information and the latest data.
View sensor in the list
The scanned device is added to the Things list
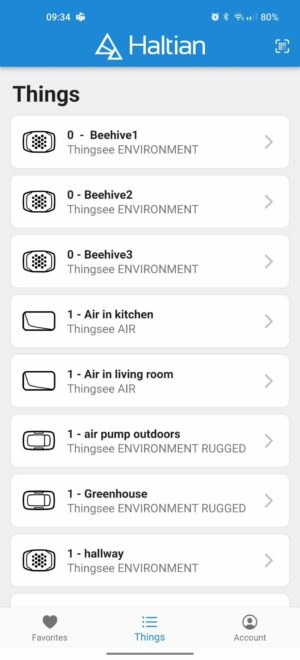
Add a sensor to favorites
You can open any sensor data you want to follow easily by adding the sensor to your favorites.
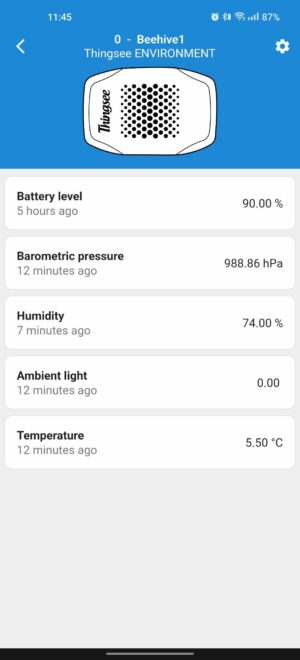
Select the heart from the upper right corner of the application. The heart turns red when the sensor is added to favorites.
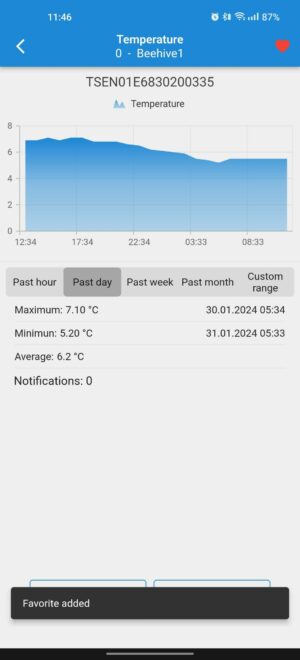
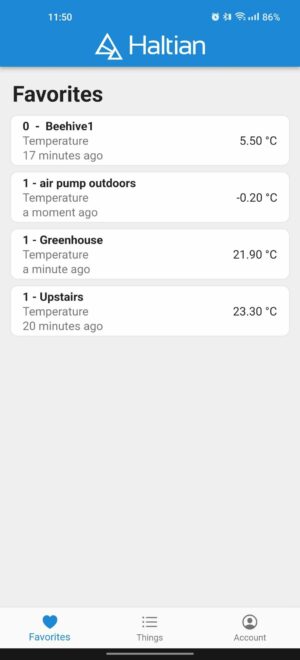
Favorite measurements are shown in the Favorites -view.
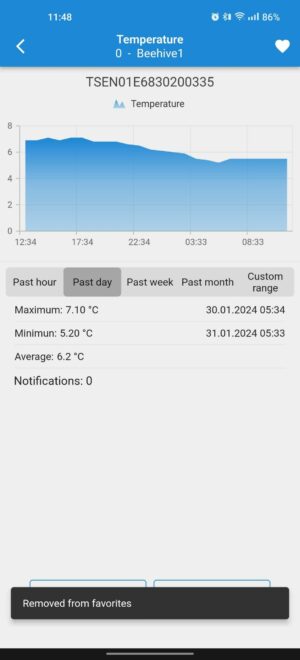
Remove the measurement from favorites by selecting the heart again, and it turns white when the sensor is removed.
Share a sensor
You can share a sensor from your sensor view.
1. Select a sensor from the Things list, so that the sensor main view is shown.
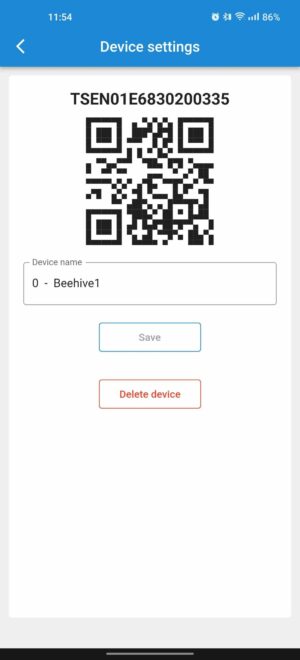
2. On the top right menu bar, tap the Settings button.
3. Take a screenshot of the view (Android: power+volume down, iOS: power+volume up).
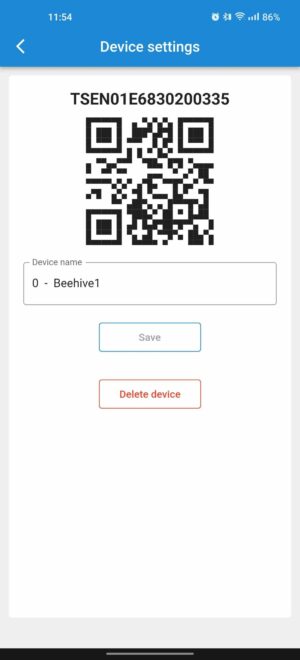
4. You can show this QR code to your friend, or share it via email, WhatsApp, Instagram, or any application capable of sending bitmap images.
If the QR code is read with Thingsee Entry app, the code behaves just like reading any Thingsee sensor QR code.
Remove a sensor
1. Select a device from the Things list.
2. On the top right menu bar, tap the Settings button.
3. Select Delete device.
4. Confirm the delete.
Sensor data management
View the latest sensor data
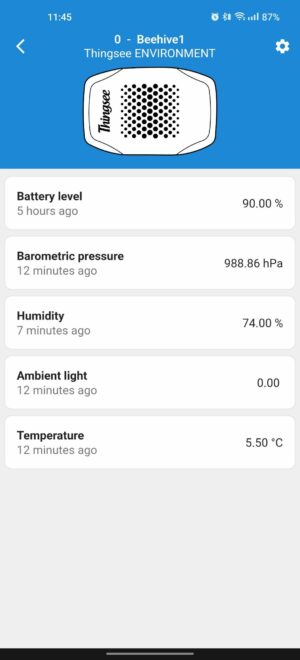
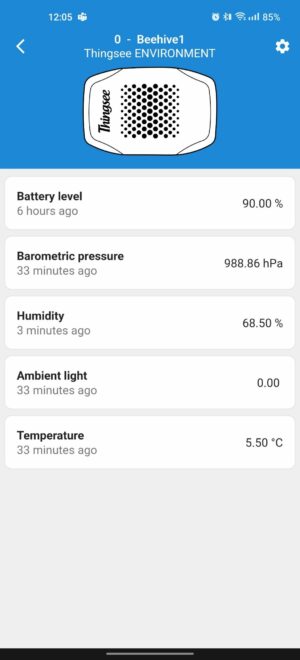
Select any sensor to view the latest sensor data
- Select a sensor from the Things list.
- Last known sensor values are shown as a list with timestamp and value.
View history data
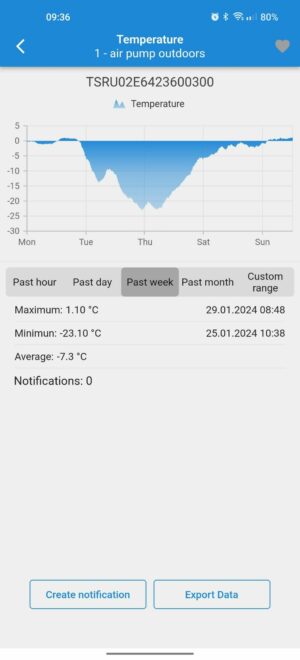
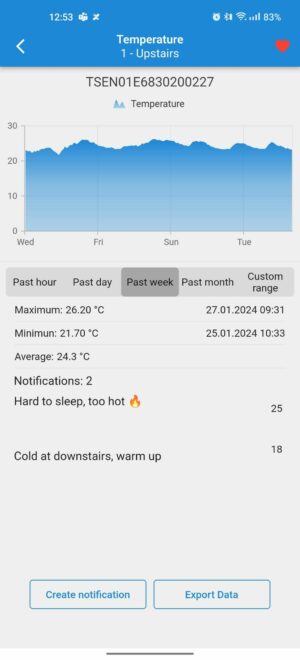
You can view history data from the past day, week, month, or any custom date range.
In a sensor data view, tap any of the last known sensor values to open the history view.
History view shows a chart from the specified time range.
- Past hour shows the last 60 minutes of historical data.
- Past day shows the last 24 hours of historical data (default when the view opens).
- Past week shows the last 7 days of historical data.
- Past month shows the last 30 days of historical data.
You can use the Custom time frame option to set any date and time
History view shows the detected minimum and maximum values from the specified time range. This helps to detect the lows and highs easily.
Export data
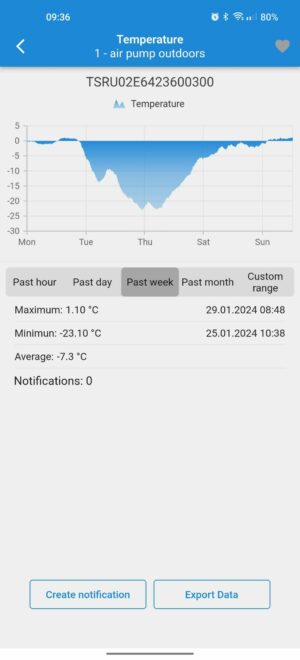
Select any data from your sensors.
Open the data view.
Select “Export data” and either send data or store it in the place you want (Drive, File Manager, …)
Notifications
Create notification
Notifications can be created for any sensor property.
- In a sensor data view, tap any of the last known sensor values to open the data view.
- Tap Create notification.
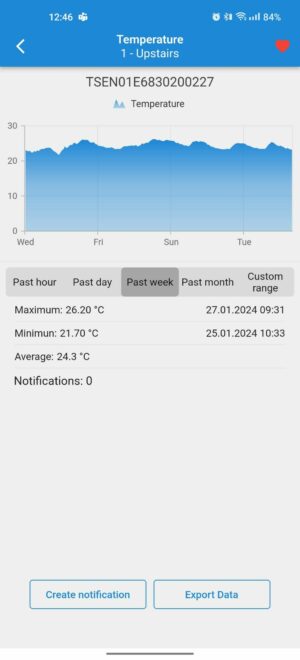
Create fun notifications to make a boring IoT more interesting
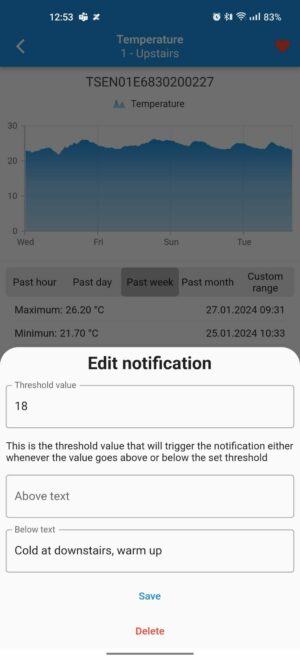
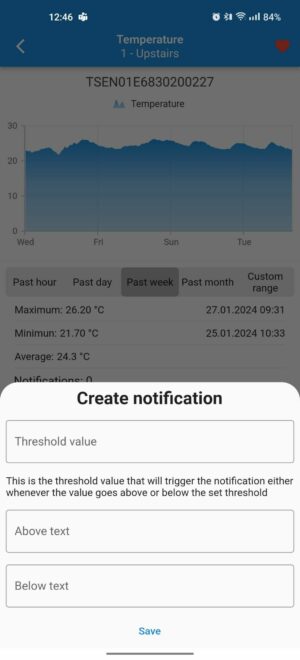
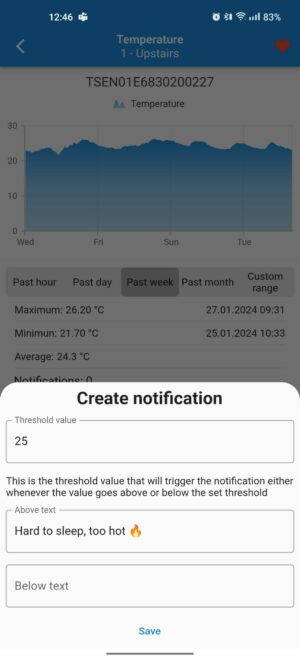
- Set the threshold value that will trigger the notification.
- Write descriptive text for the notification.
- Tap Save to save the notification and close the editor.
View active notifications
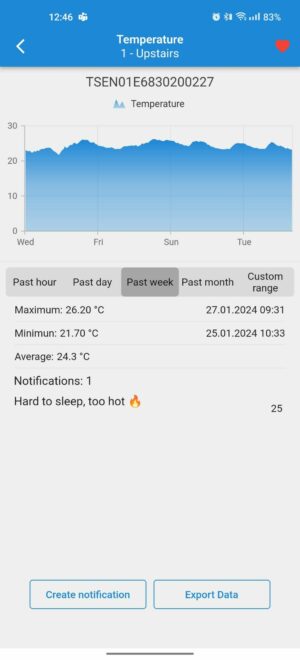
Sensor data view shows a list of set notifications.
- You will see a list of your notification settings.
- You can create as many notifications as you need.
All notifications are personal and stored only under your account even if the same sensor is shared with someone else. So feel free to go crazy with the notification text!
Edit or delete a notification
- Open the notification from a notification list by pressing the notification text.
- Edit Threshold value, Above text or Below text, and Save or
- To delete the whole notification: Press Delete and confirm the operation.
