Download PDF
Thingsee Toolbox
Thingsee Toolbox is an application for deploying and managing Haltian Thingsee IoT installations. With Thingsee Toolbox you can, for example, add stacks, replace devices, and export a CSV file for easy IoT management.
Thingsee Toolbox is your guide in all the installation and maintenance phases of Haltian Thingsee IoT solutions. In the installation phase, the application helps you set the sensors to the correct deployment groups. In the maintenance phase, you can change deployment groups, change settings and remove or replace devices.
The application also has a light view for messages where you can check that the data traffic is correct. Thingsee Toolbox is designed to be used on mobile phones.
Using Thingsee Toolbox
First, download the application from AppStore or Google Play and have the QR codes sent to you at hand.
Supported operating systems Android OS versions 10 or newer, and iOS versions 12 or newer.
Remember to grant Camera and Storing access for the application.
Example of how to do installations with Thingsee Toolbox
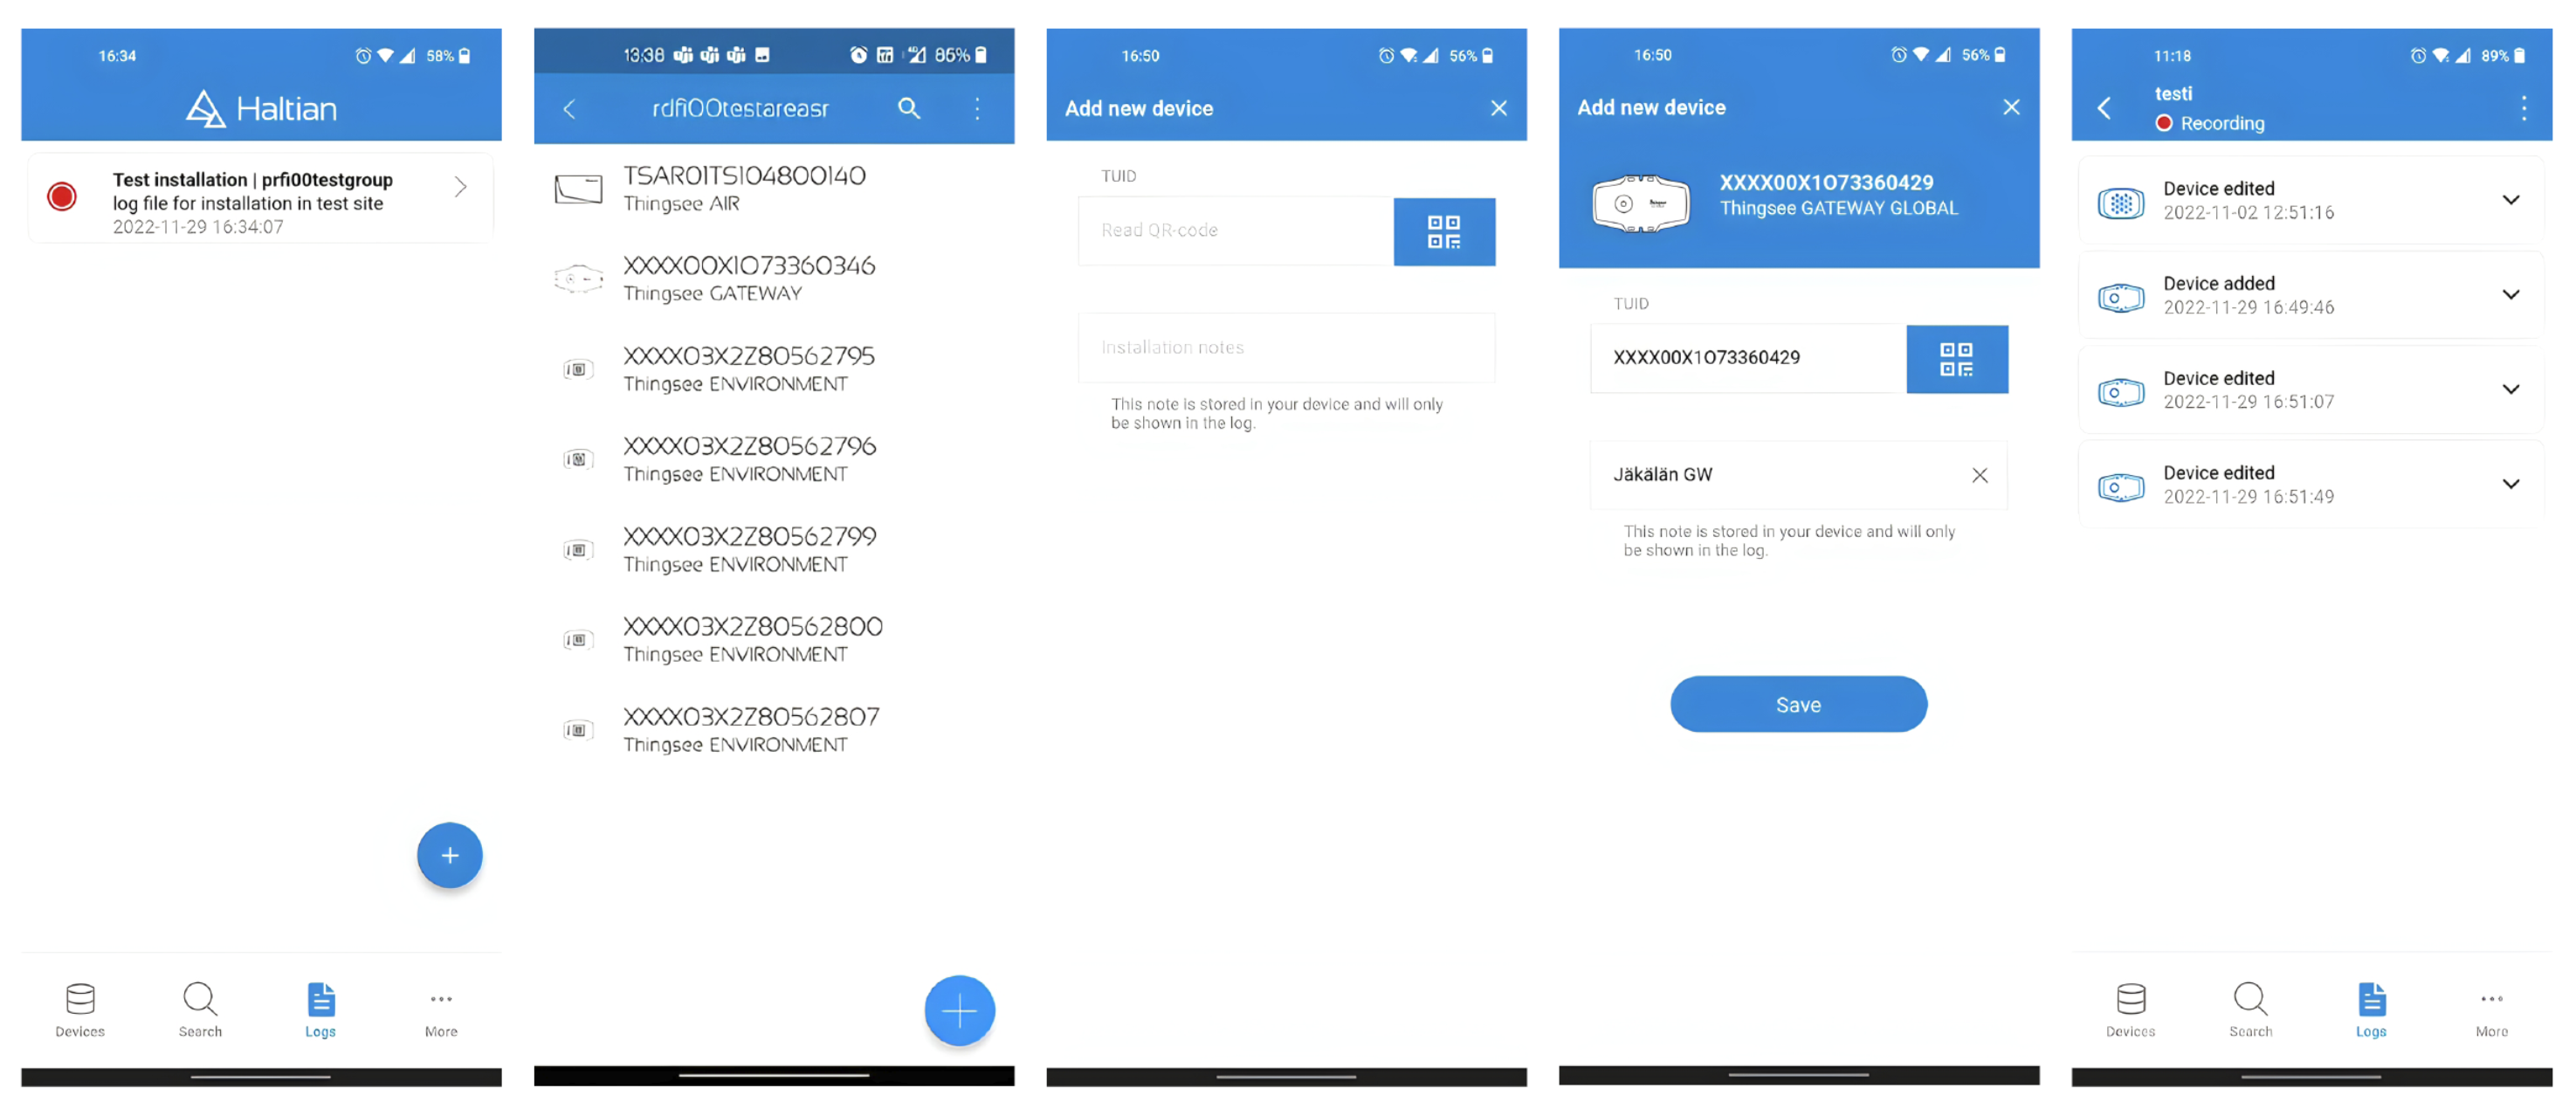
1. Create a deployment group for your installation.
2. Create a log file to add sensors to that specific deployment group.
3. Go to the selected deployment group and select + in the lower right corner.
4. Read the QR code on the device.
5. Give the description and make the needed configurations and press Save.
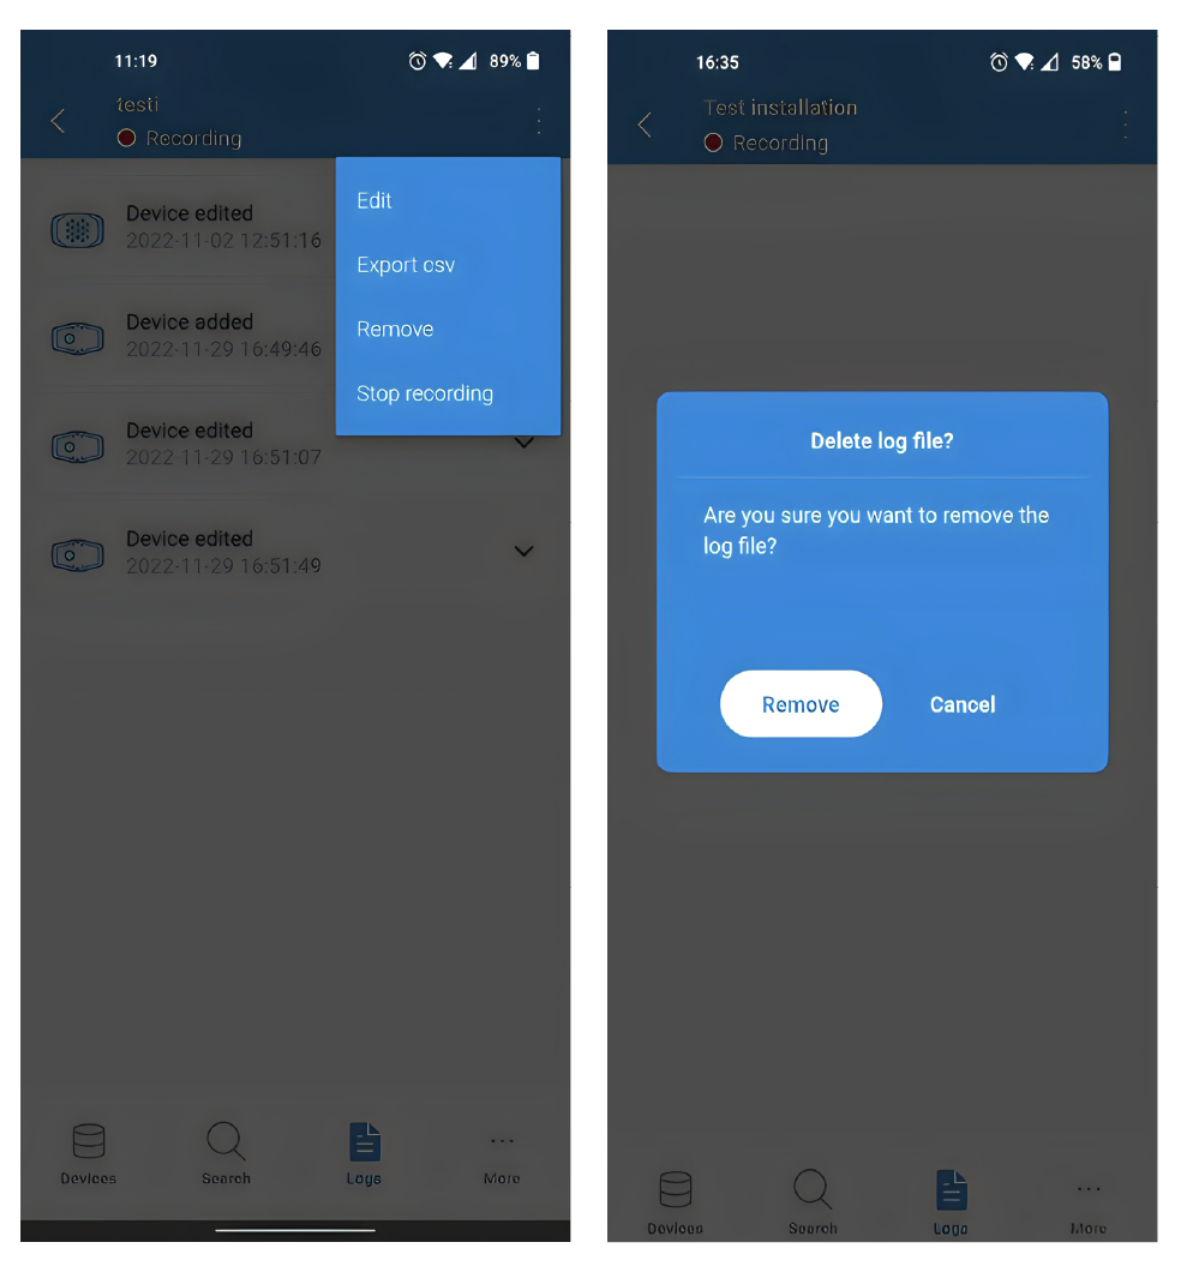
6. When you have added all sensors go to Logs and select the specific log, stop it, and export a CSV file.
Adding a stack
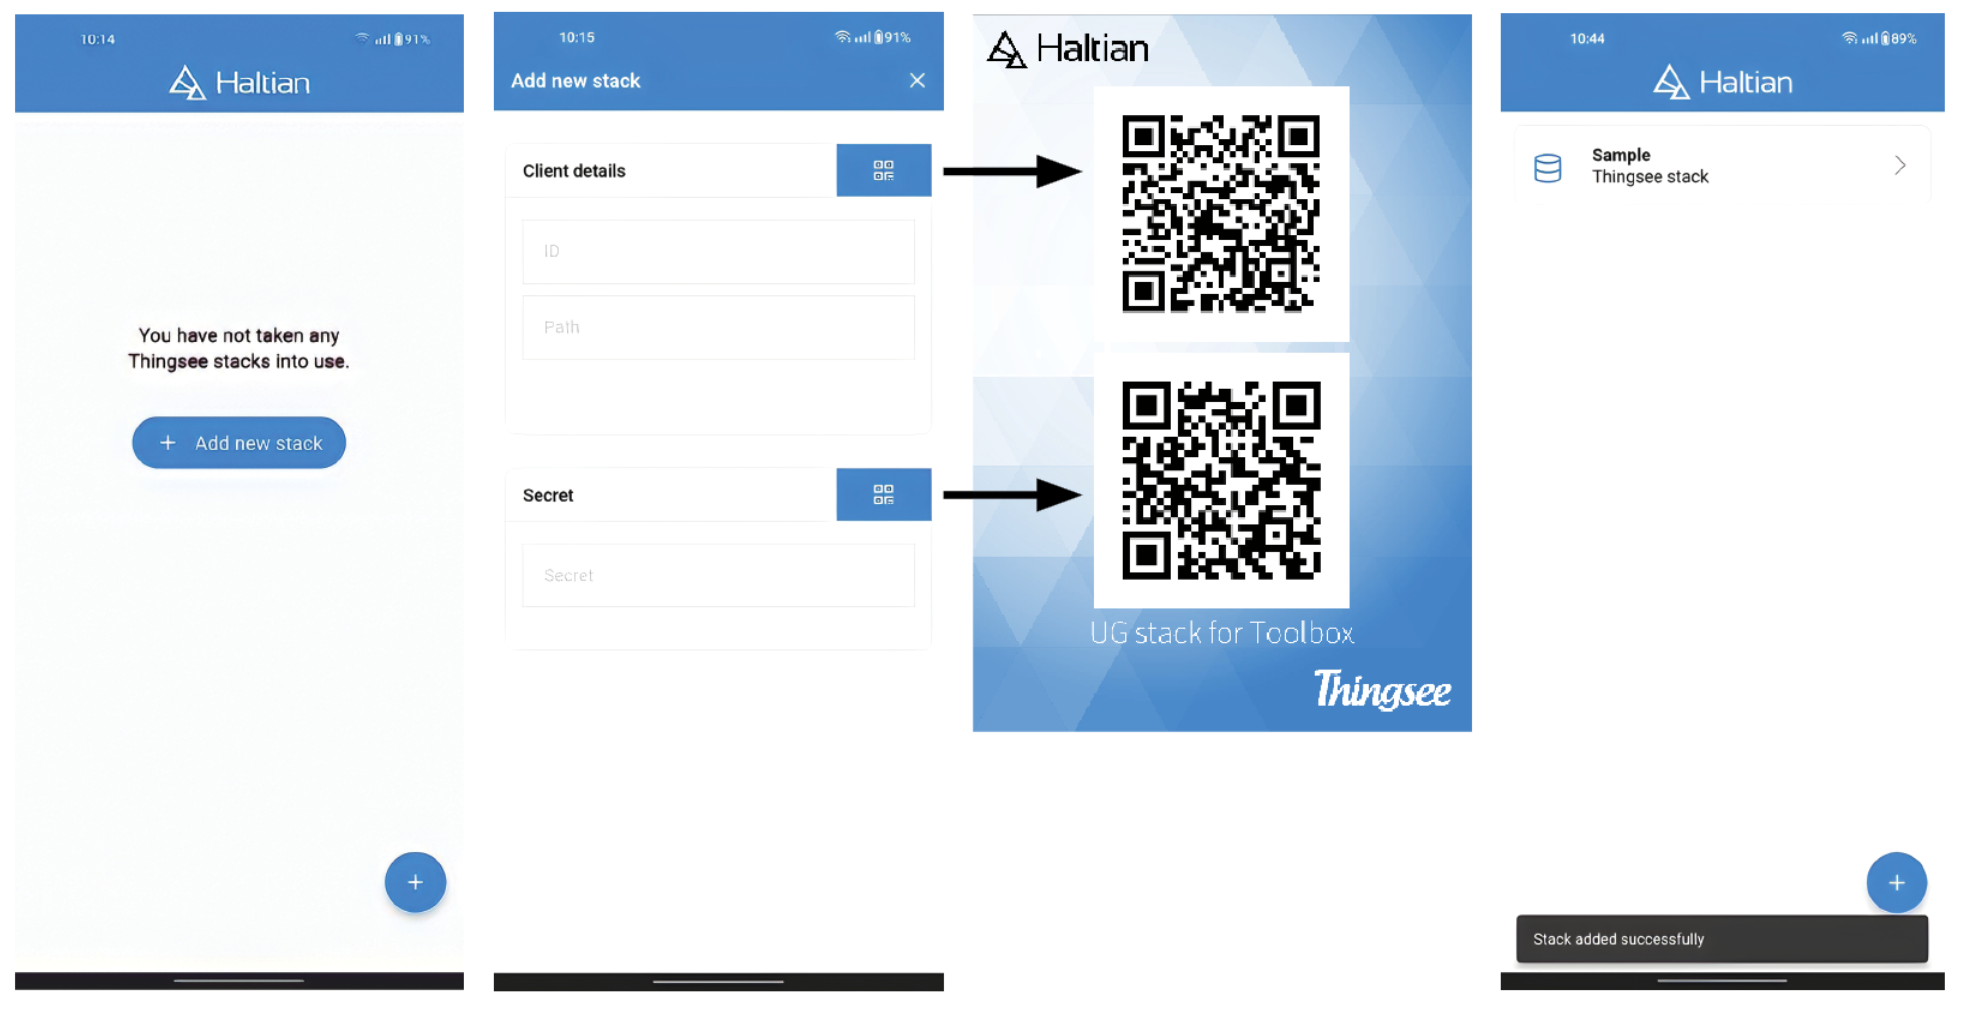
Start by adding a stack. A stack is a database where your devices are stored.
Read the QR codes in order.
Remember to press Save after the stack information is visible.
Main view
By choosing a stack, you get to see the main view with all the stack’s information, including the deployment groups, search function, and logging. Here, you can also add new deployment groups.
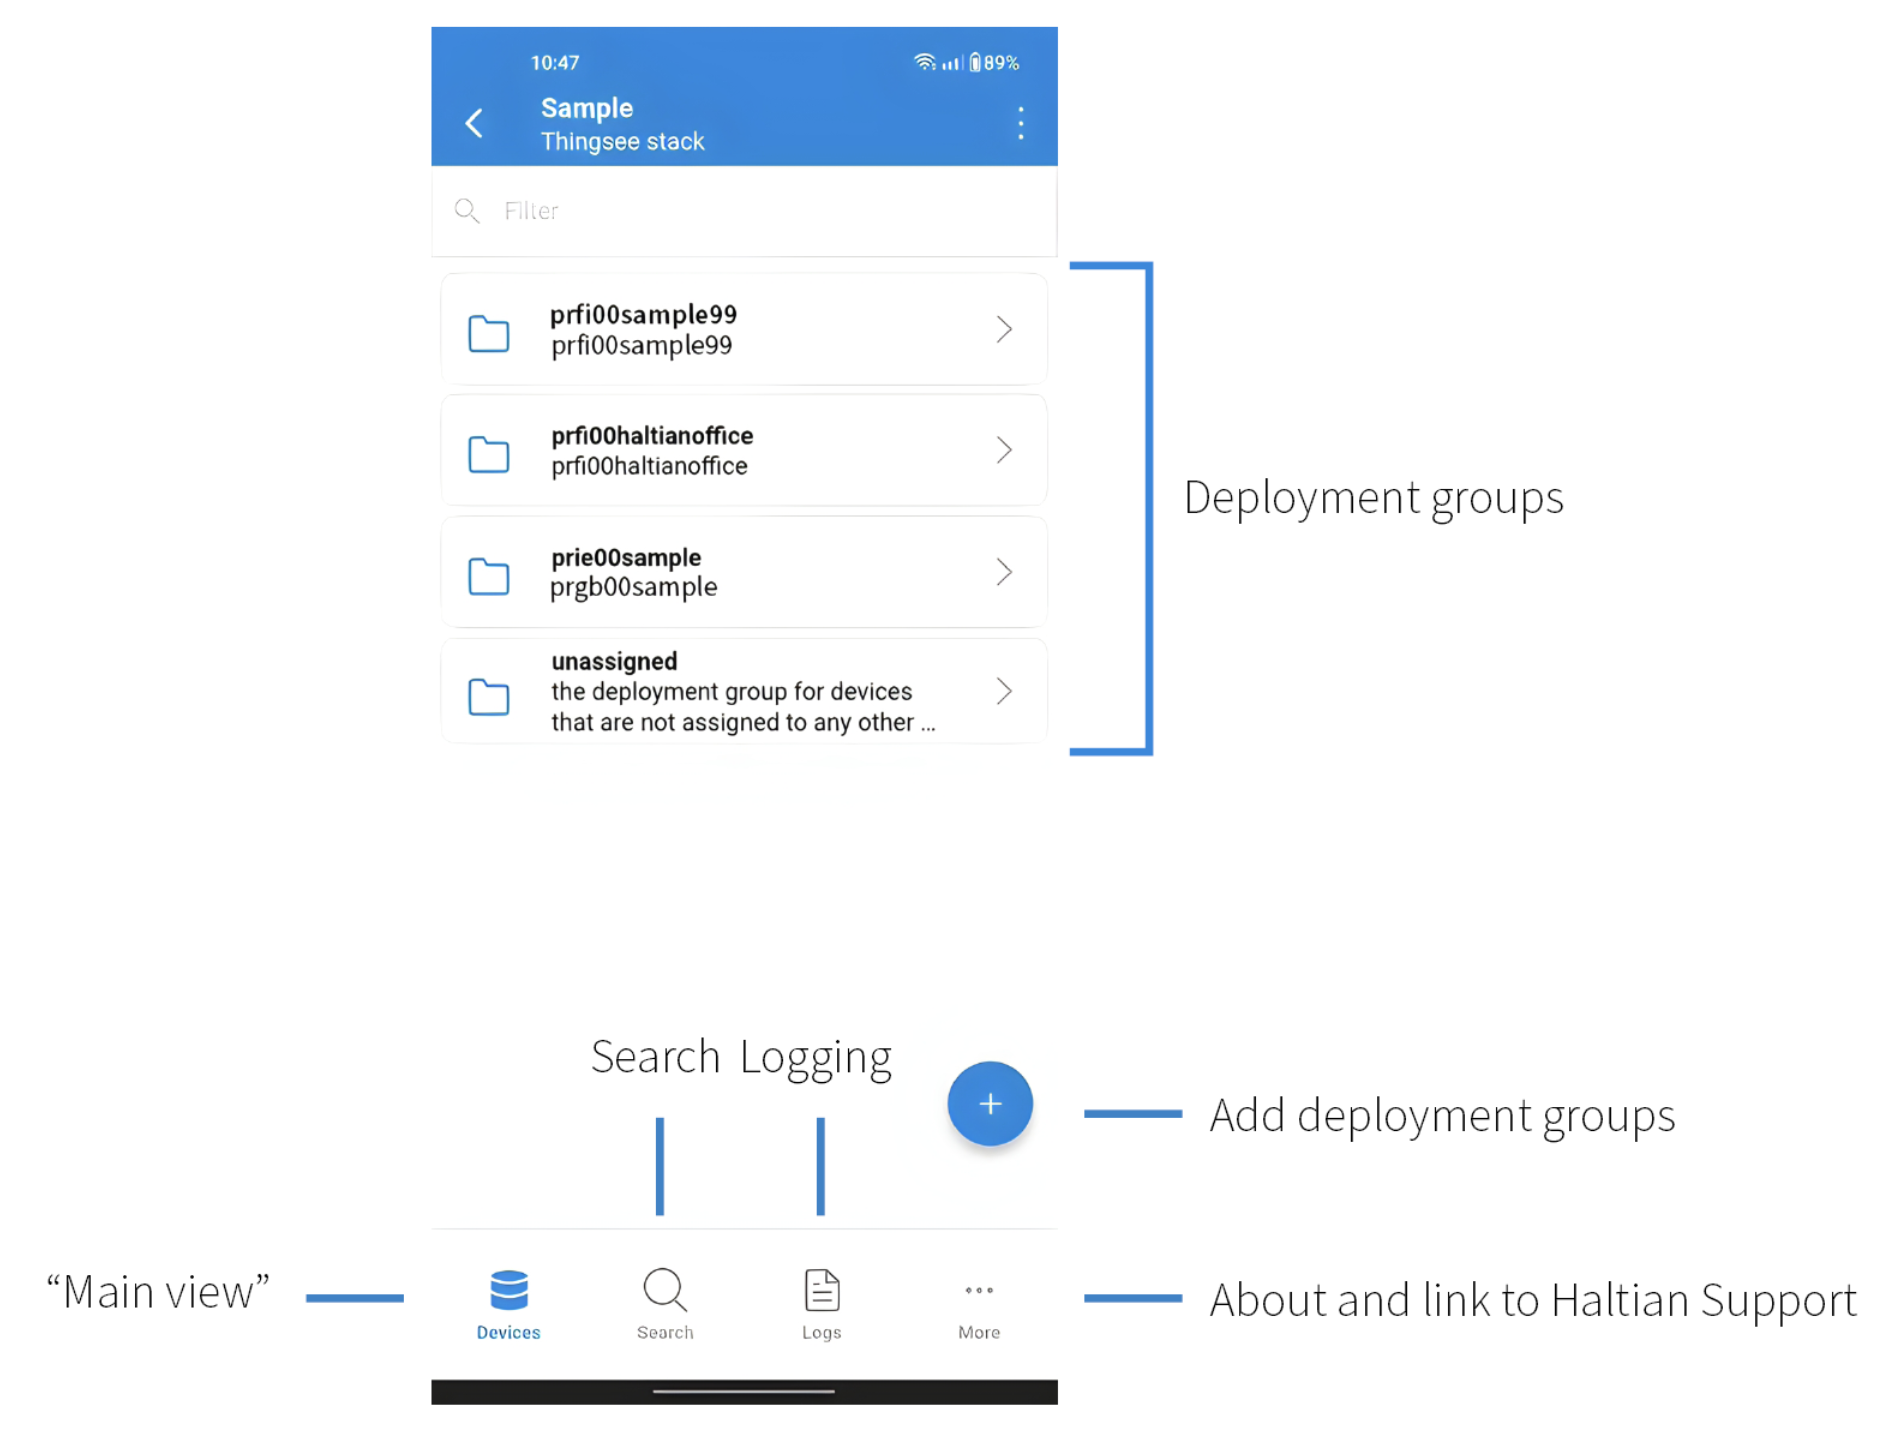
Deployment groups
Deployment groups are a list of devices. There can be several deployment groups in one stack.
It’s recommended to create a deployment group for each logical group of devices, e.g., a floor, room, or wing. While doing the installation and moving the devices to specific deployment groups, you can use logging and afterward export a CSV file of installed devices.
Note: All installations are visible only on the mobile phone which was used to create them.
Devices in deployment groups
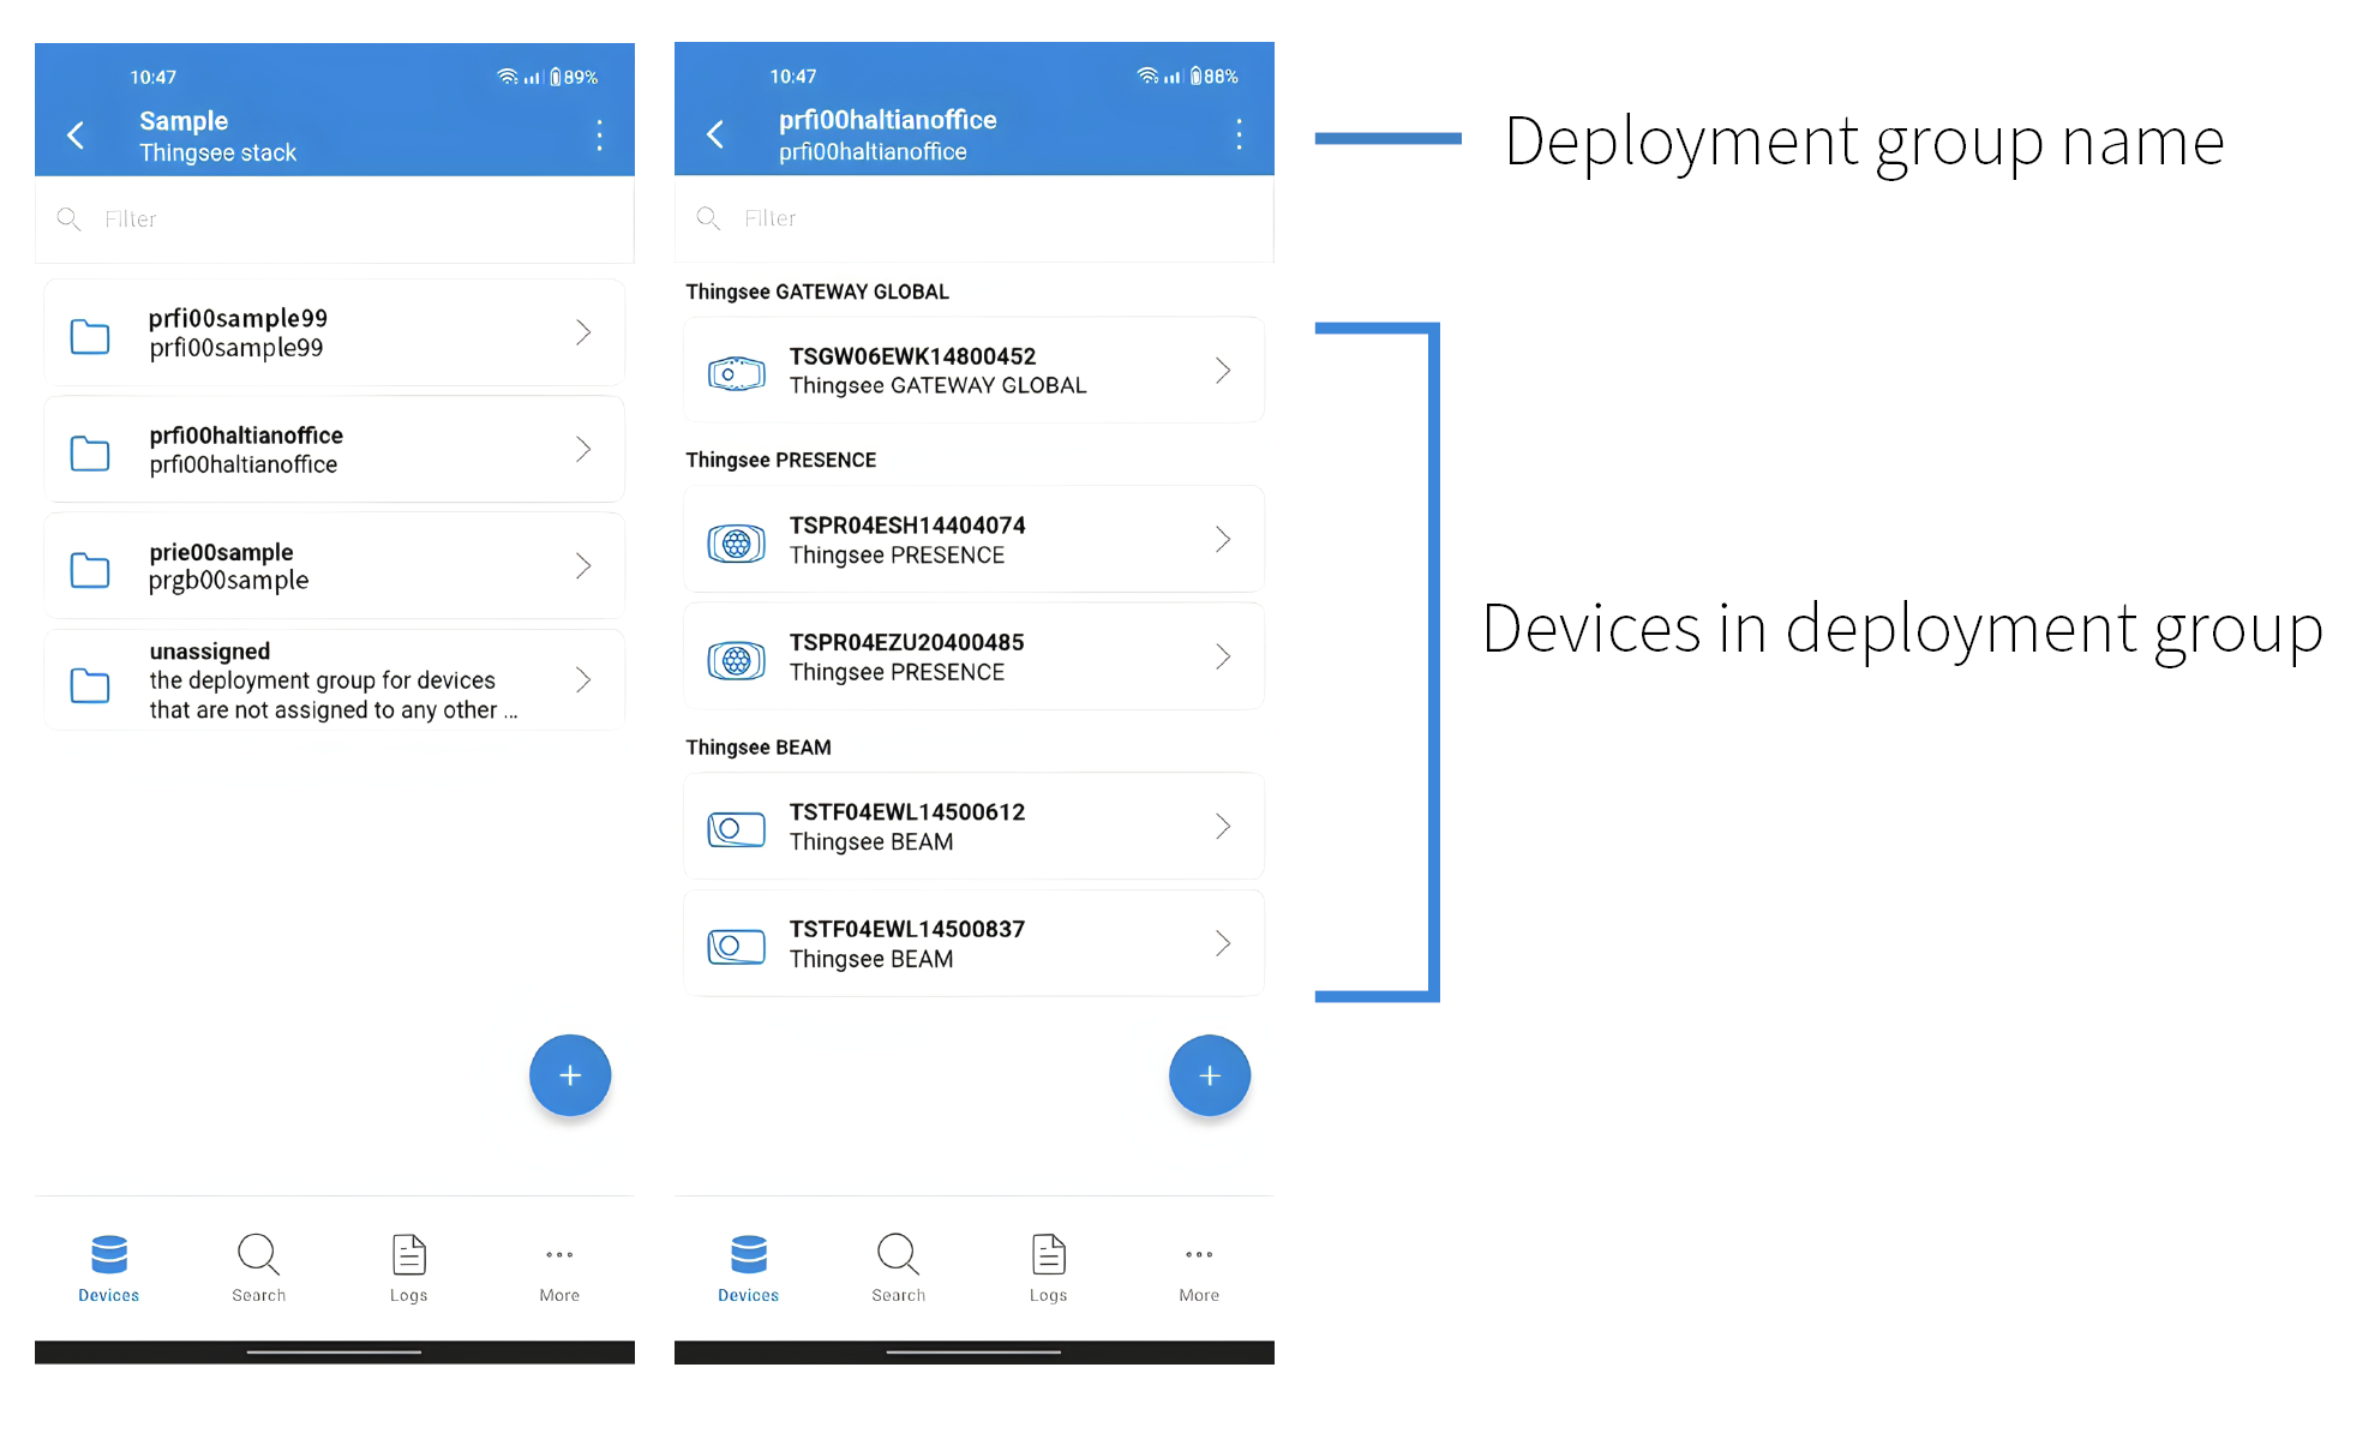
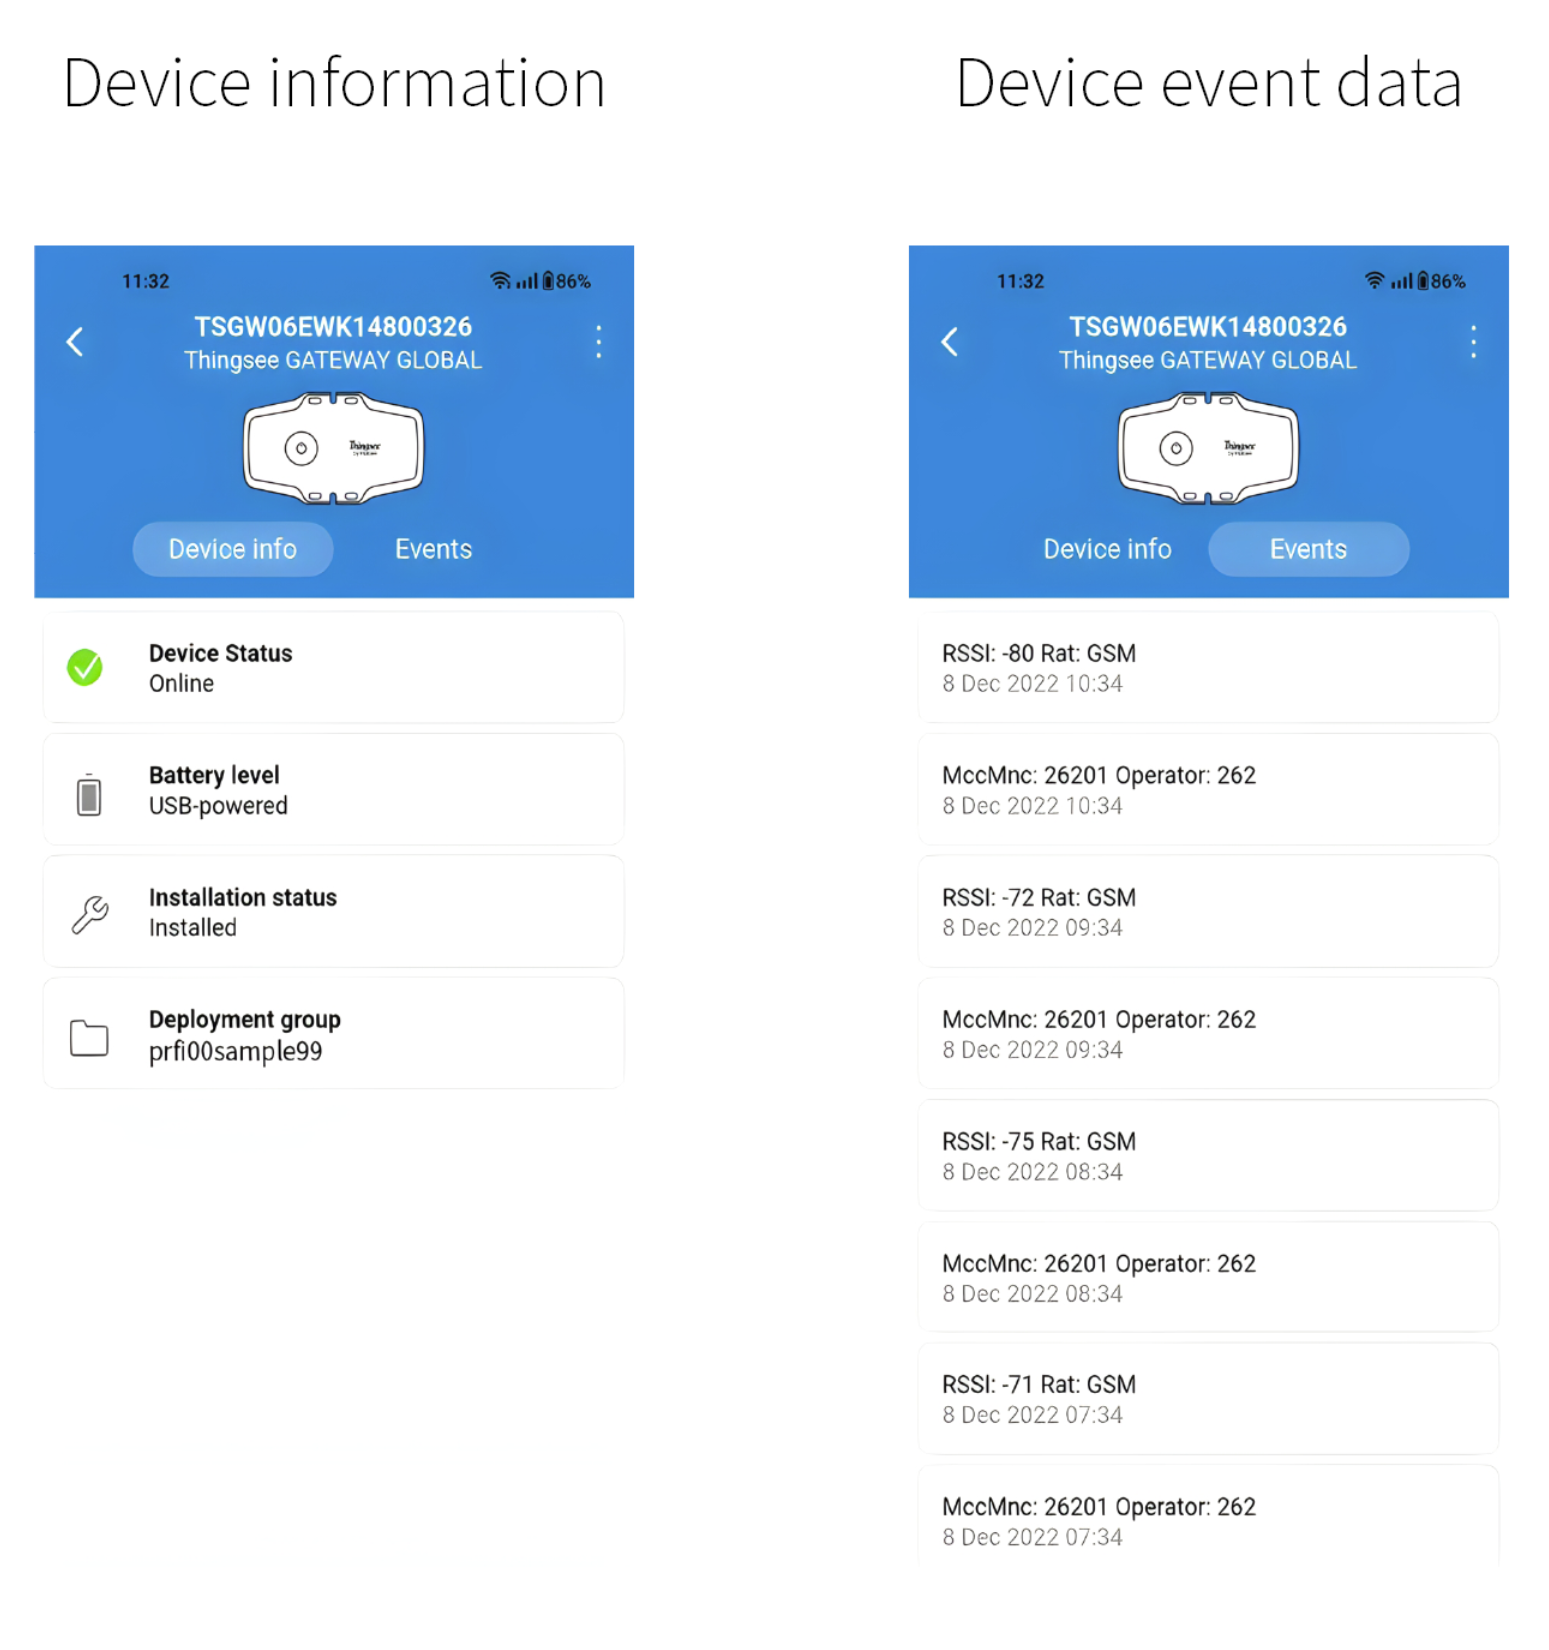
To view all devices in a deployment group, select “Devices” from the main and select a deployment group from the list. From here, you can view all devices, check their status, and view devices' event data.
You can add new devices to the deployment group by selecting the + sign.
Note: To export CSV files, you need to start the Logging first.
Create new deployment groups
- ppr - for devices in production use
- prd - for devices in R&D use
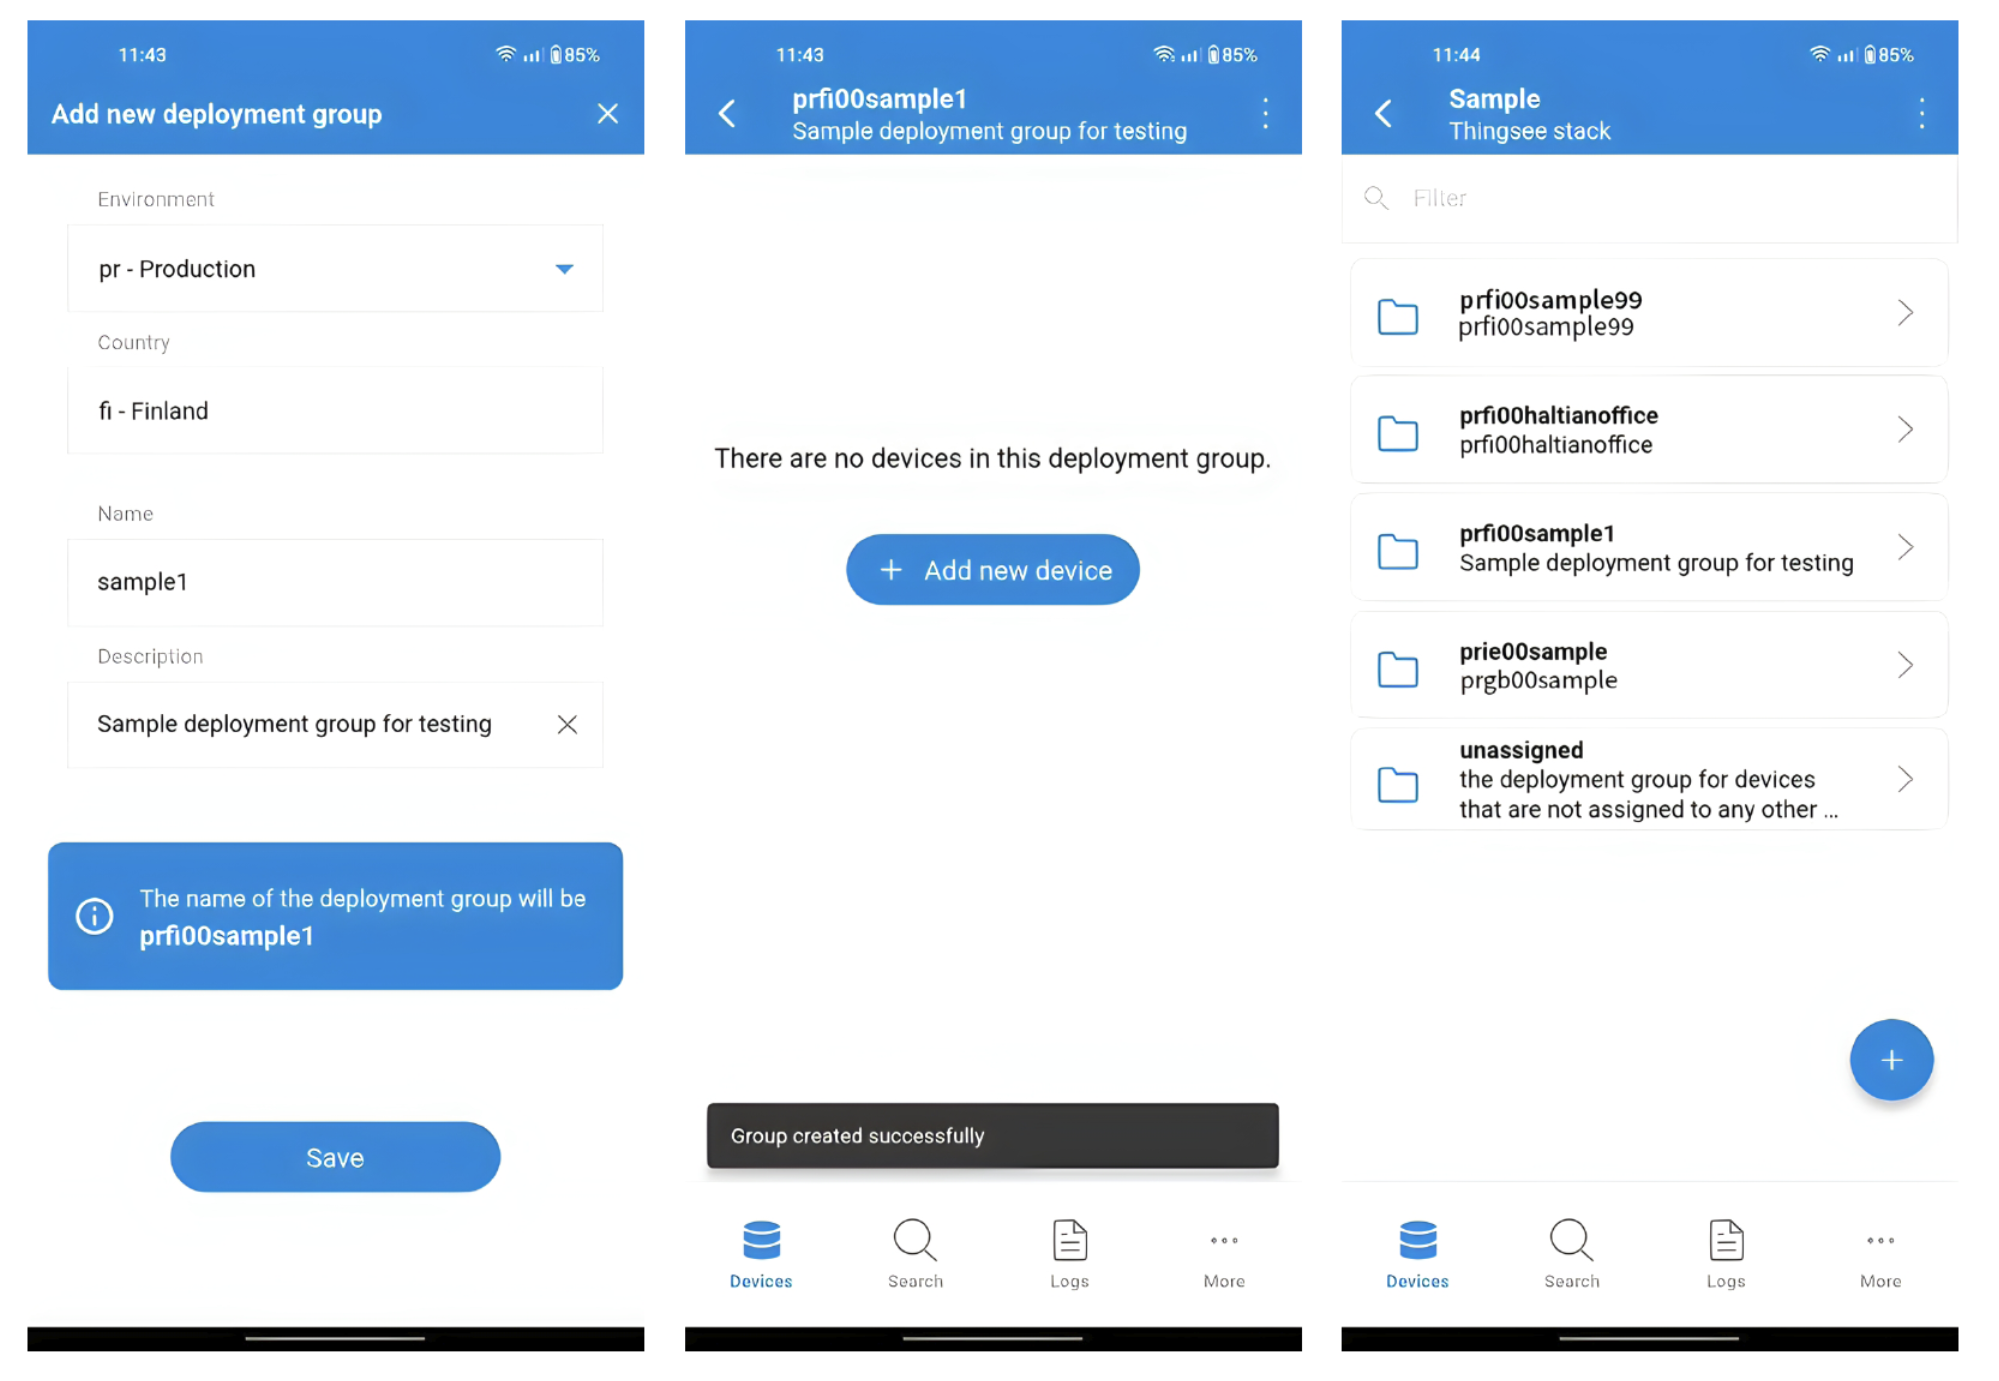
1. Create new deployment groups in the Devices main view and select +.
2. Select the environment:
3. Select the correct country code in “Select country”.
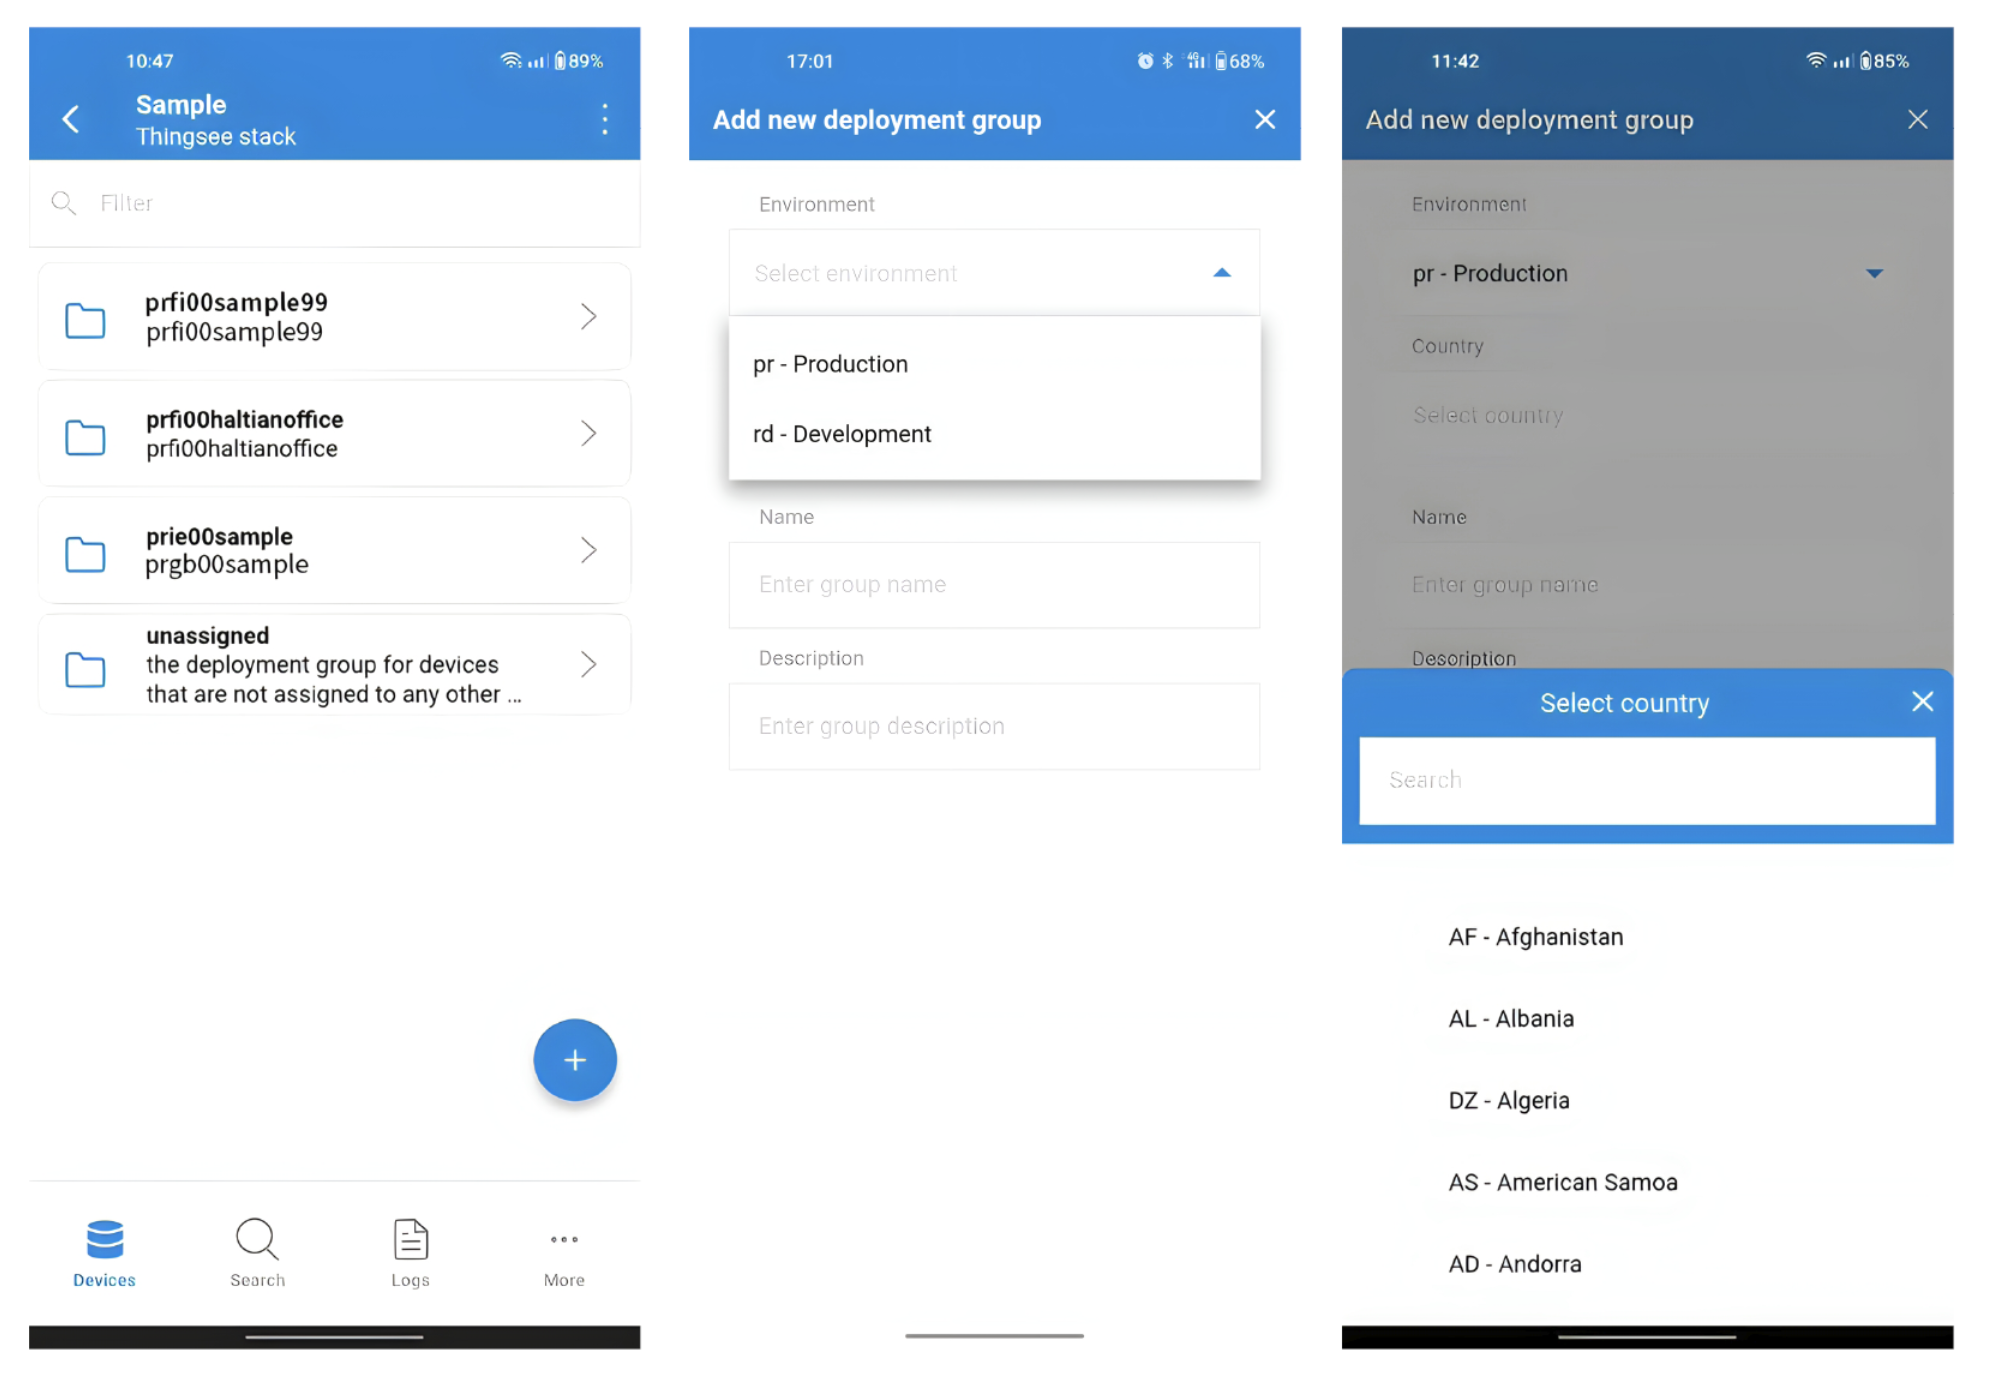
4. Give your deployment group a name. The name can be a location, code, etc., that maintenance can later use to identify any needed maintenance actions easily.
5. Enter a short description of your deployment group. This will help you organize and separate different deployment groups later.
6. Press Save and your deployment groups have been created and are visible on the Devices main view list.
Edit deployment group
If you need to edit your deployment groups:
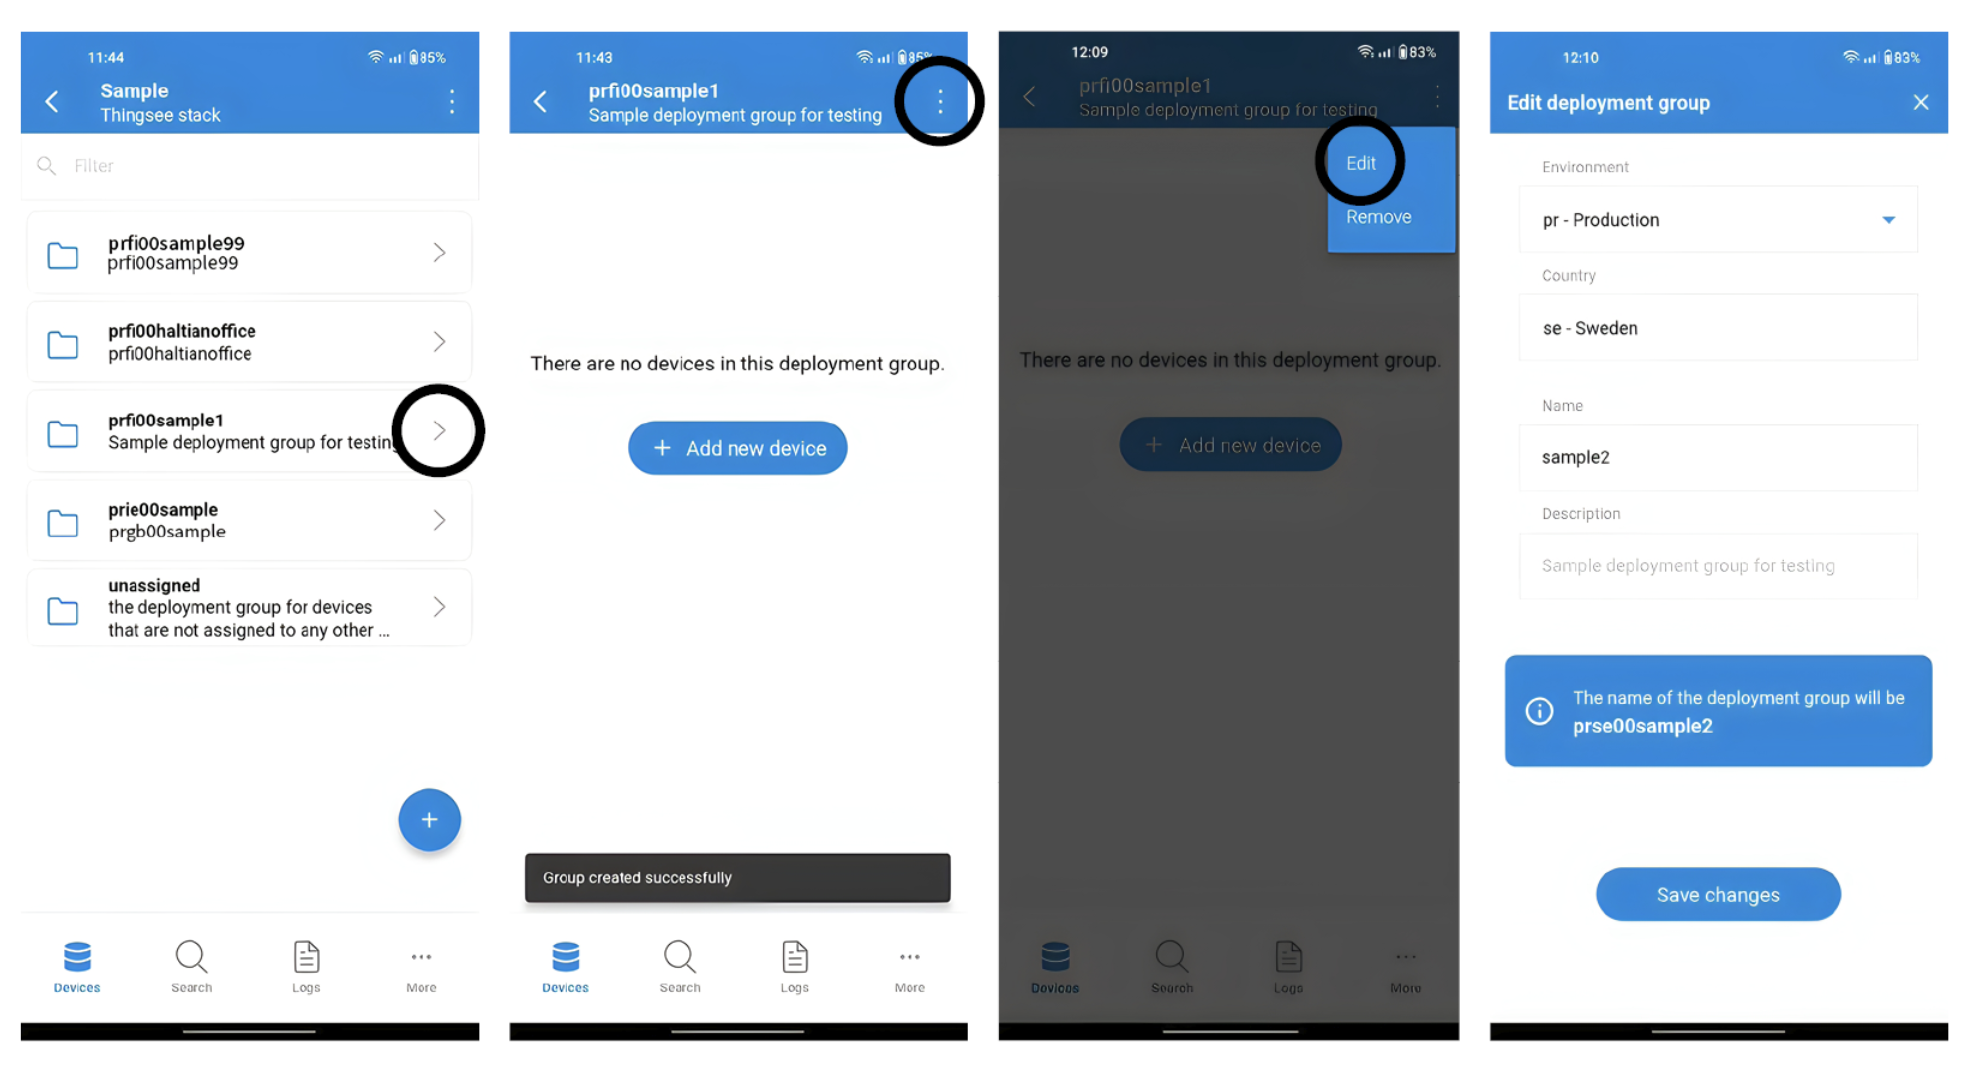
1. Go to the Devices main view and select the deployment group you want to edit.
2. Select the menu from the upper right corner and select edit.
3. Here, it’s possible to change the environment, country code, and name of the deployment group.
4. Remember to select Save and the changes become visible in the group name.
Remove deployment group
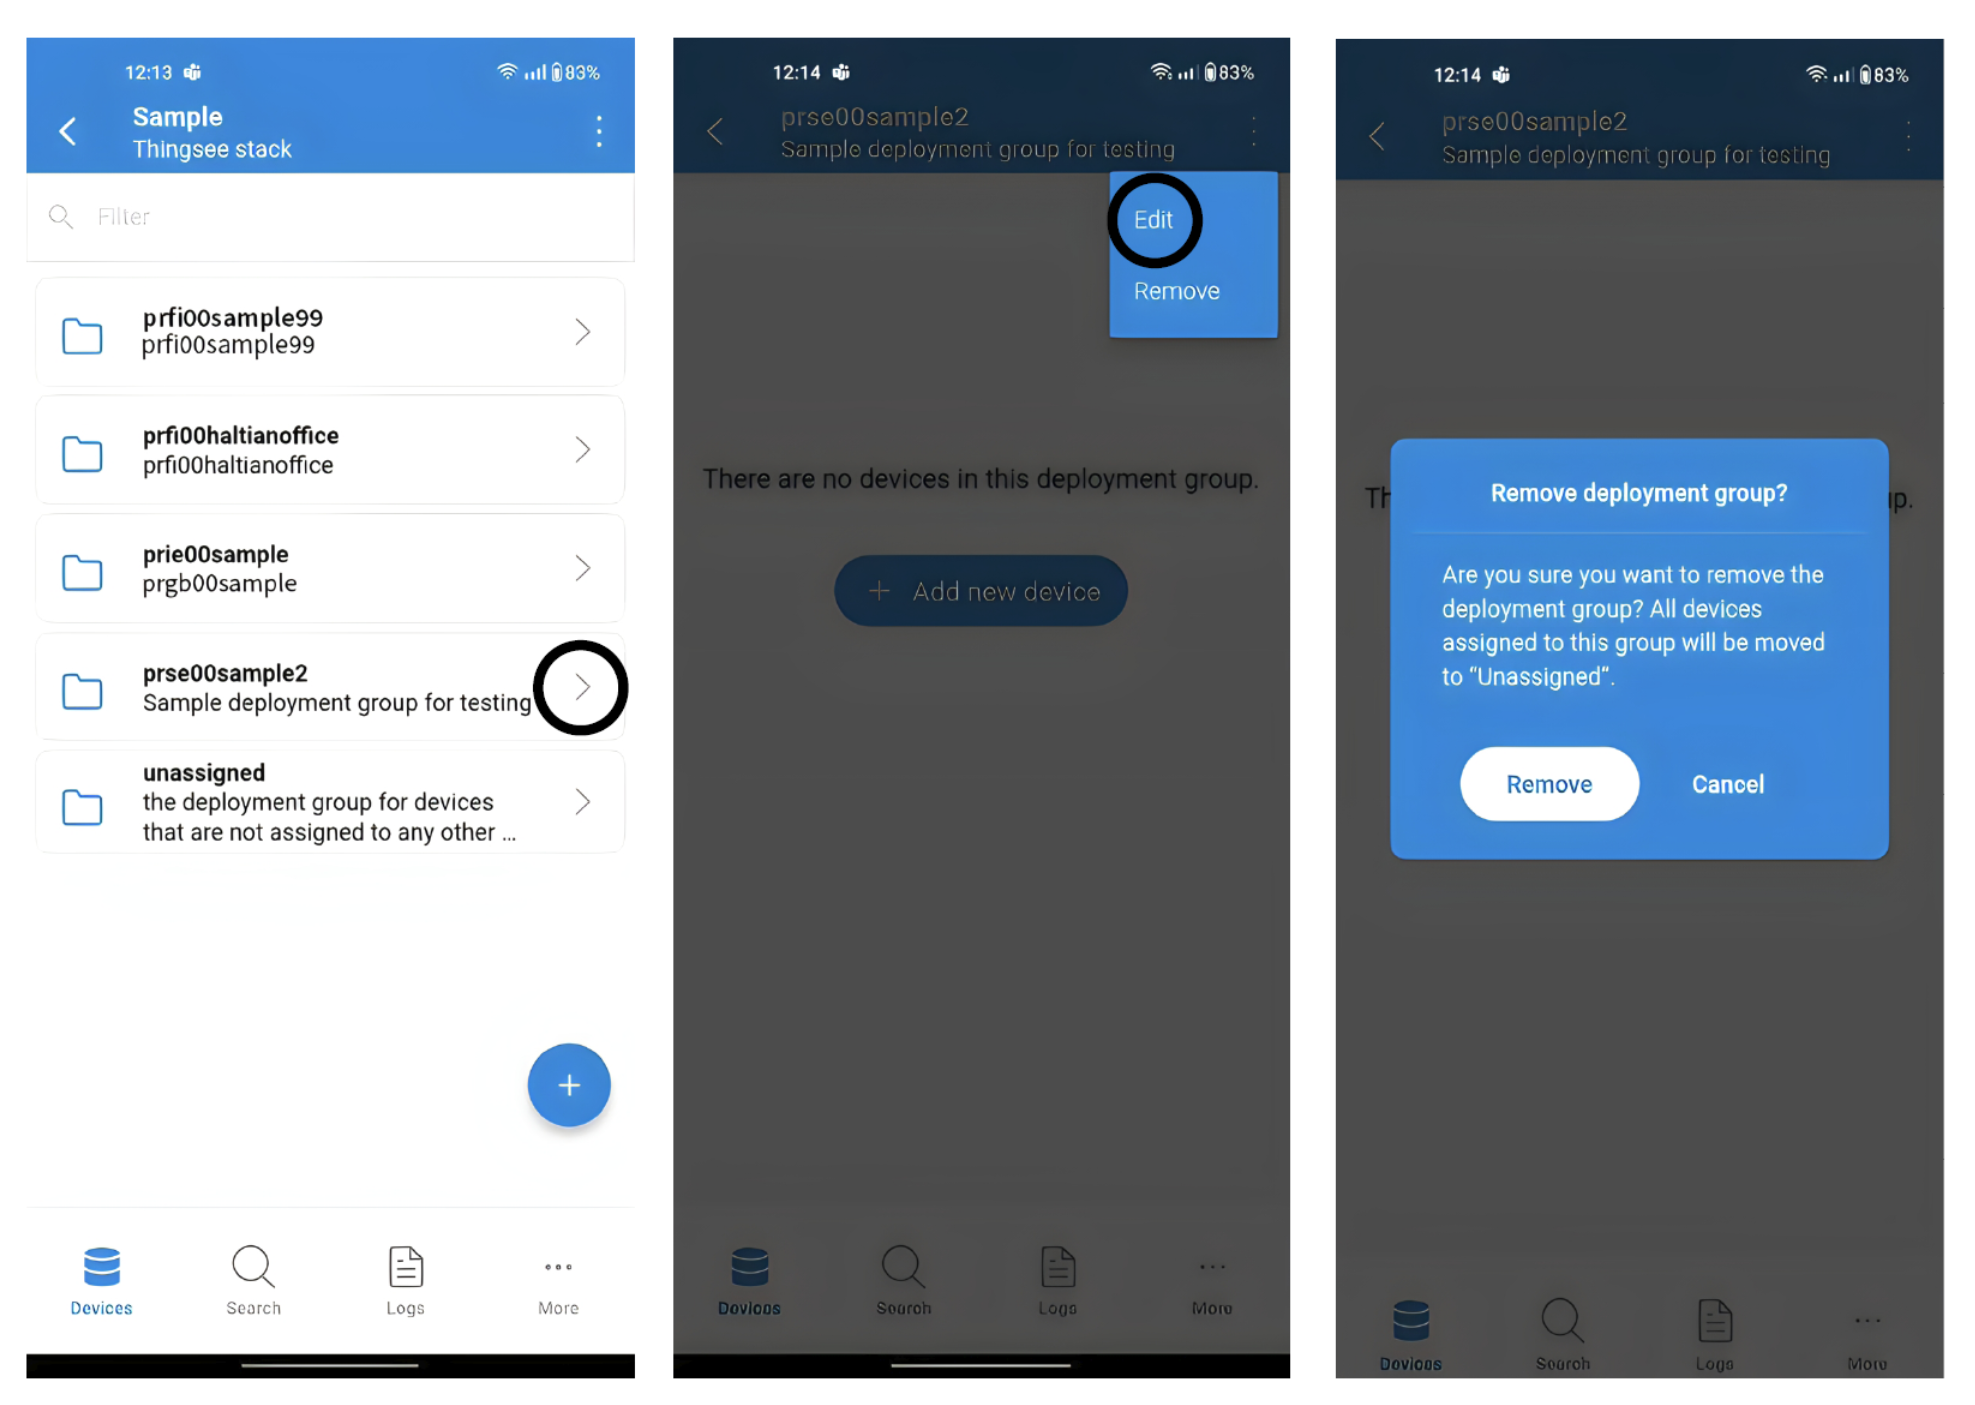
To remove a deployment group, select the group on the main view. Select settings from the top right corner and select Remove.
Select Remove from the confirmation message, or Cancel if you don’t want to remove the group.
Existing devices
Adding and maintaining your devices
There are several functionalities in Toolbox, here are some of them listed, with example use cases:
- Searching for device information by sensor ID (good when you do the maintenance and someone brings you a found sensor)
- Add new devices. You may add new or existing devices to deployment groups during the installation and by logging that application creates a CSV file to help, for example, to map the sensor ID’s to your system.
- For maintenance purposes, these are Replace and Remove functions for devices.
- You may also do some configurations for Thingsee PRESENCE, ENVIRONMENT, and COUNT sensors.
And all these functions can be logged which enables follow-up for done maintenance and configuration actions
Search
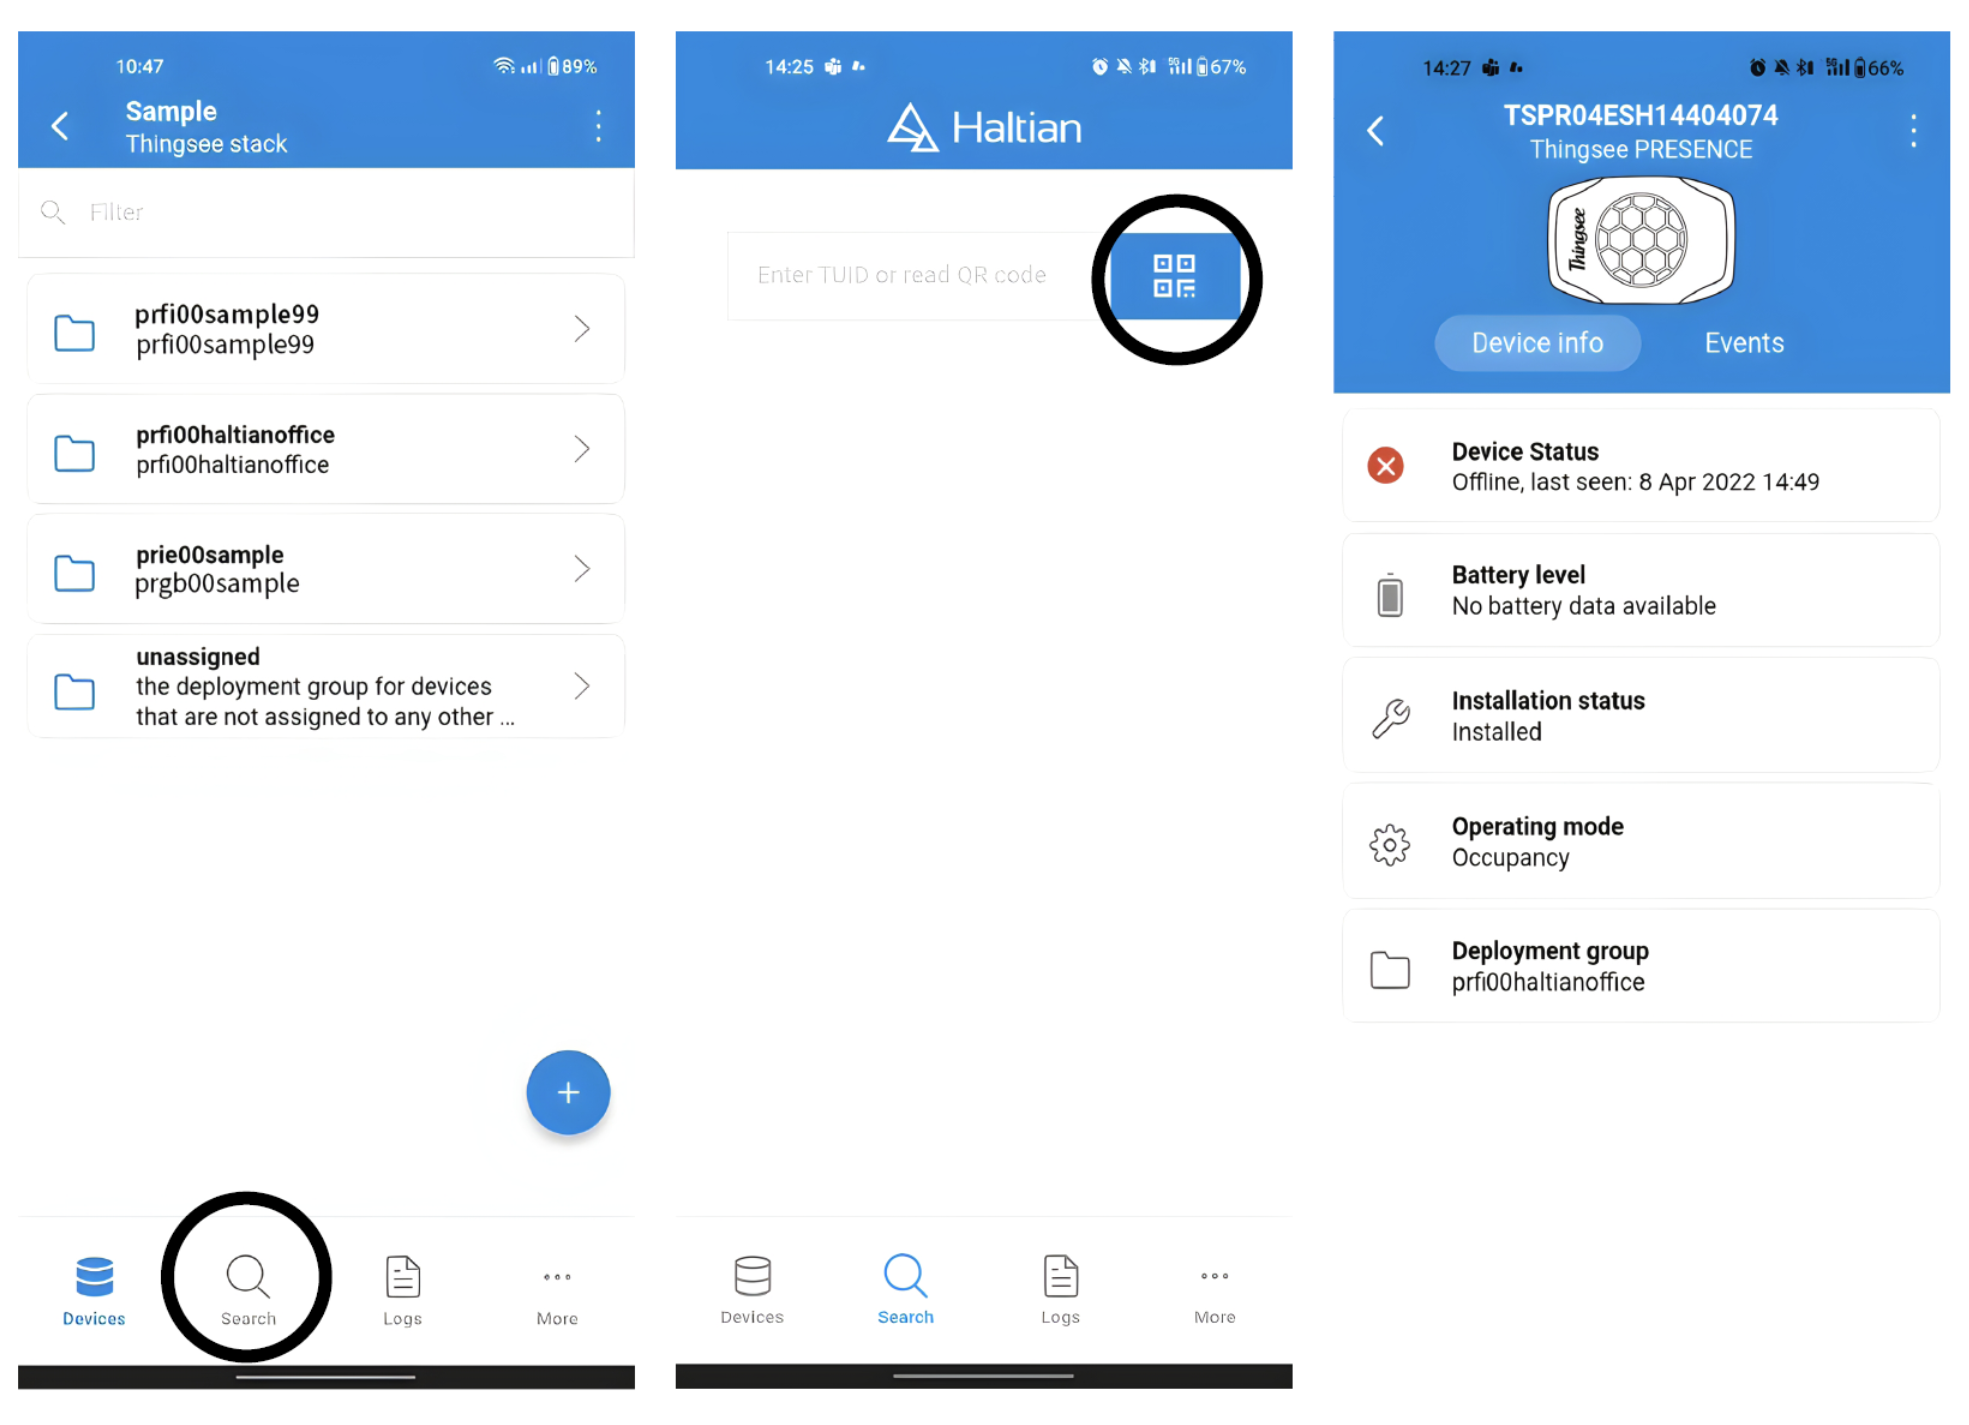
The search function helps you find all information about a specific device in your device database. You can search for a device by simply reading the QR code or typing the 6-digit sensor identification code on the device. The application will show the basic info about the device.
Edit existing devices
1. Select the device you want to edit and go to the menu in the top right corner and choose Edit.
2. From the editing view, you can, e.g., change the mode of the device from the drop-down menu.
3. Remember to select Save changes.
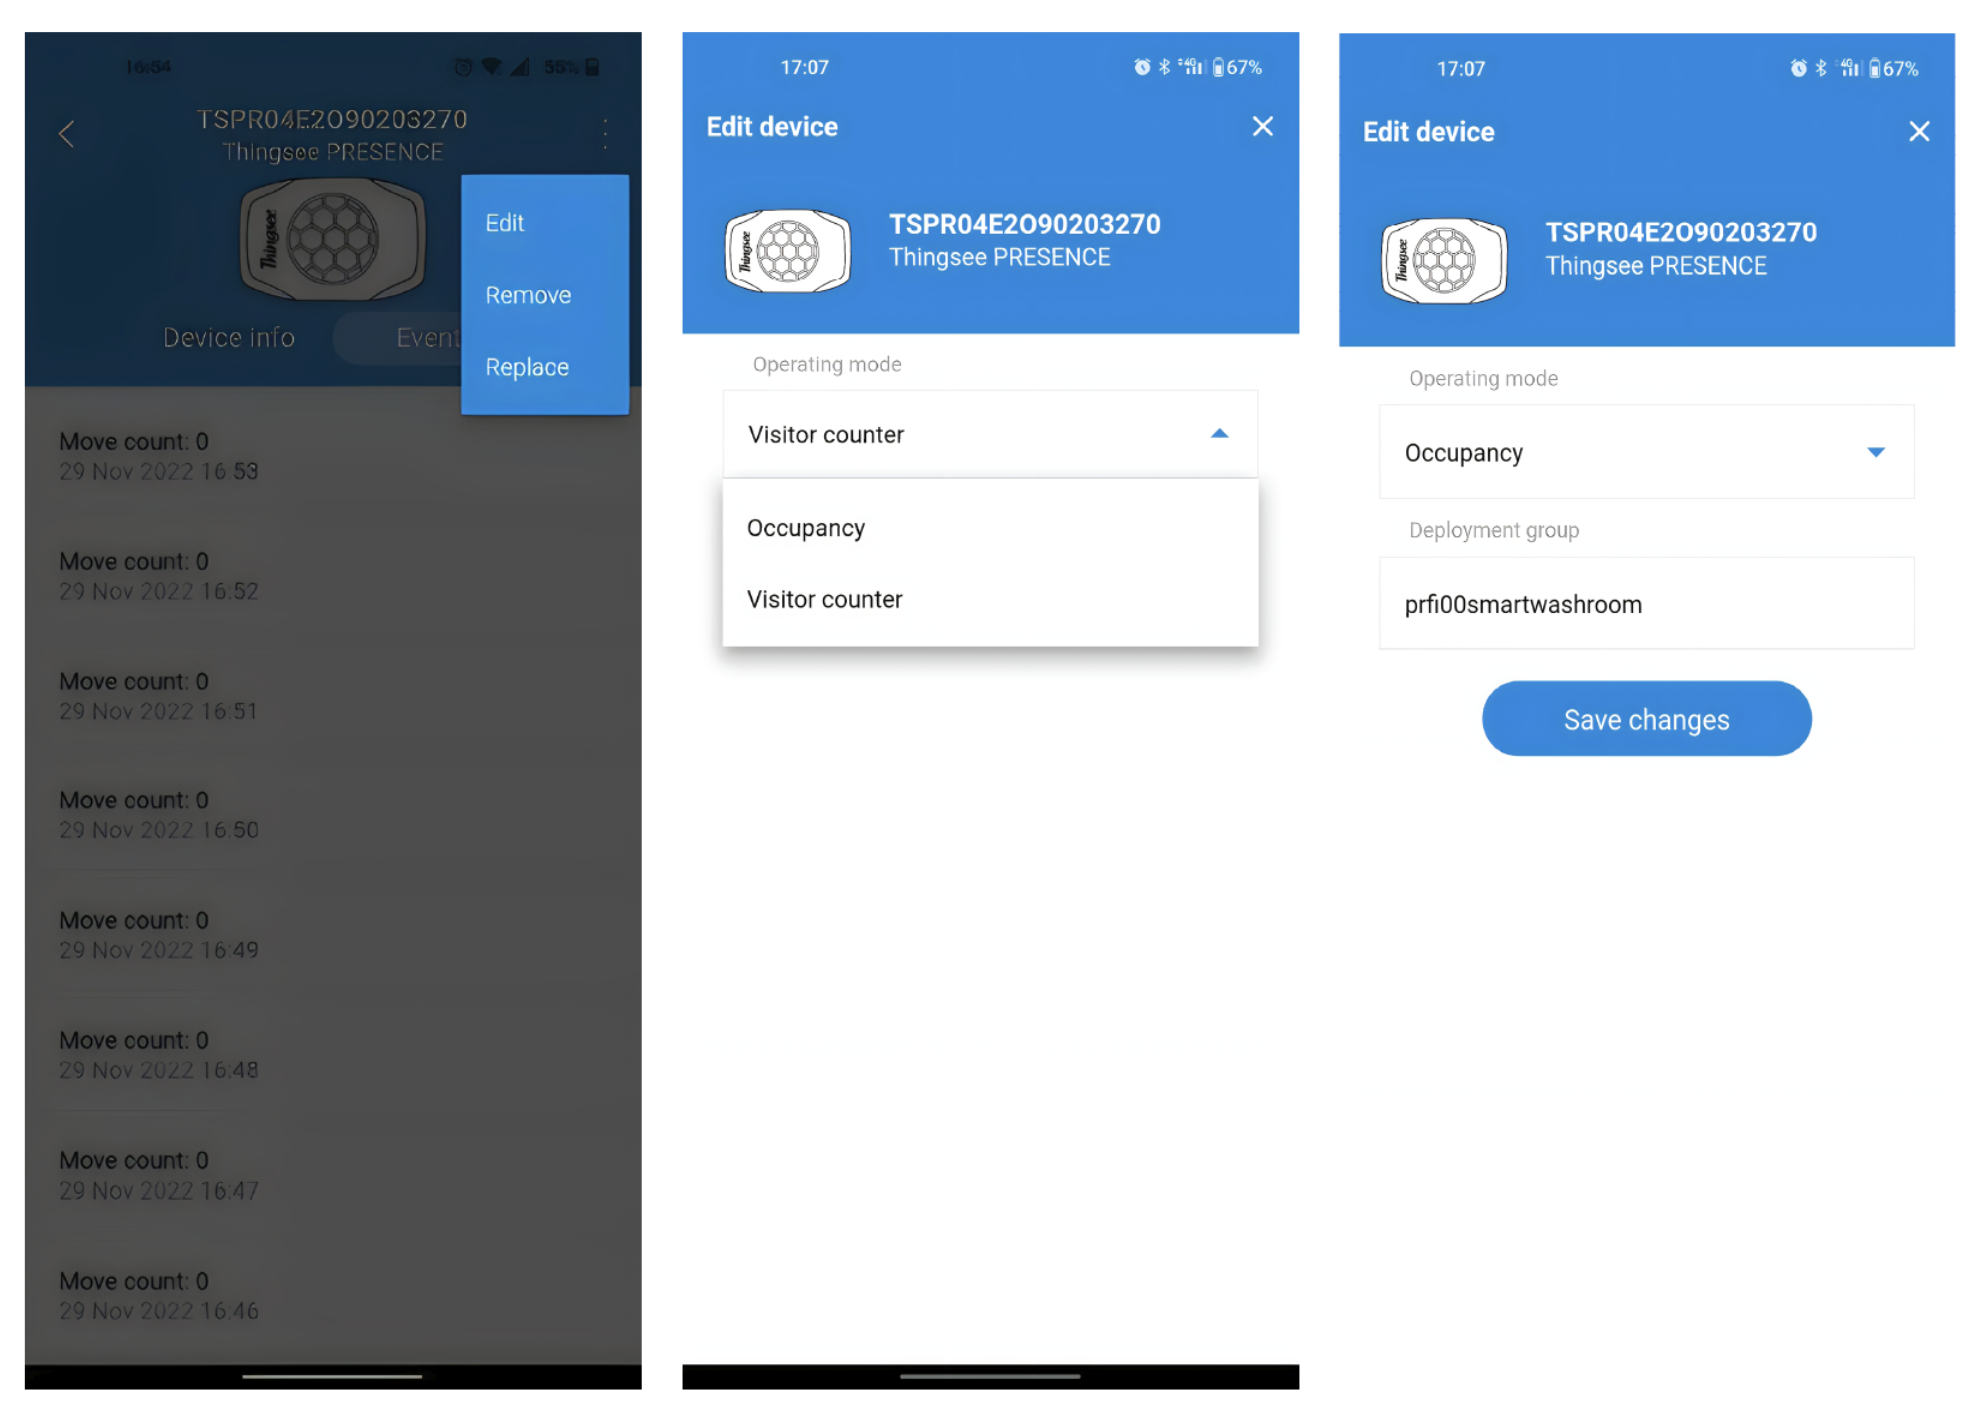
Thingsee device modes

Replace existing devices
You can replace existing devices with new ones with Thingsee Toolbox.
1. In the main view, select the device you want to replace.
2. Go to the menu in the top right corner and select Replace.
3. Confirm your choice, or select Cancel if you don’t want to replace the device.
4. Read the QR code or enter the identification number from the device, and confirm your choice by selecting Replace.
Note: You can’t replace one type of sensor with another type. Only gateways can be replaced with another type of gateway.
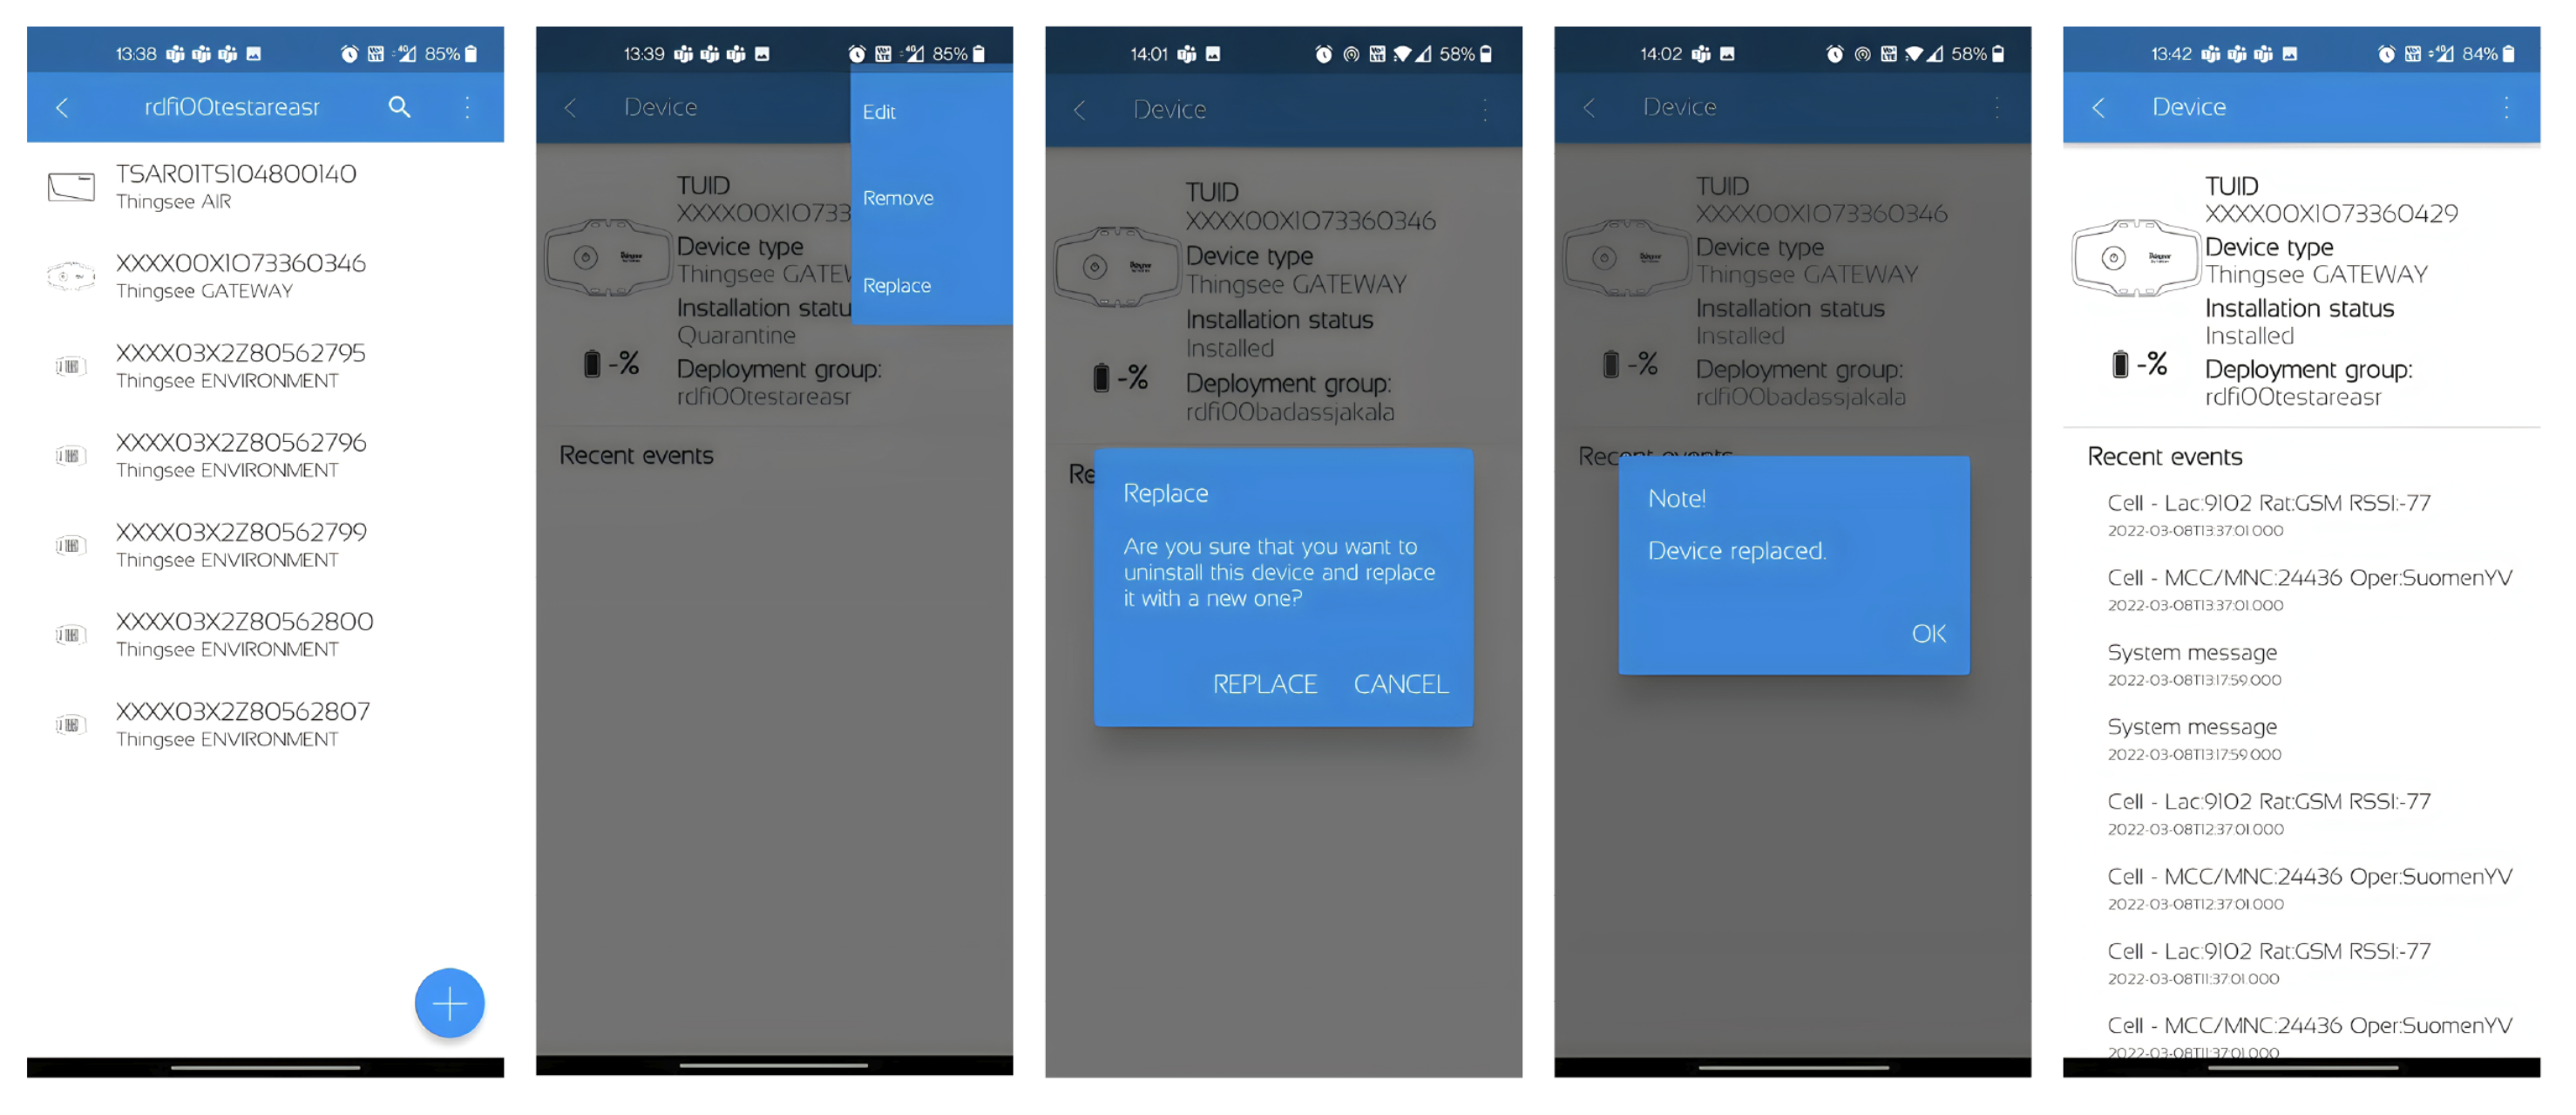
Remove existing devices
1. In the main view, select the device you want to remove.
2. From the menu in the top right corner and select Remove.
3. Confirm your choice, or select Cancel if you don’t want to remove the device.
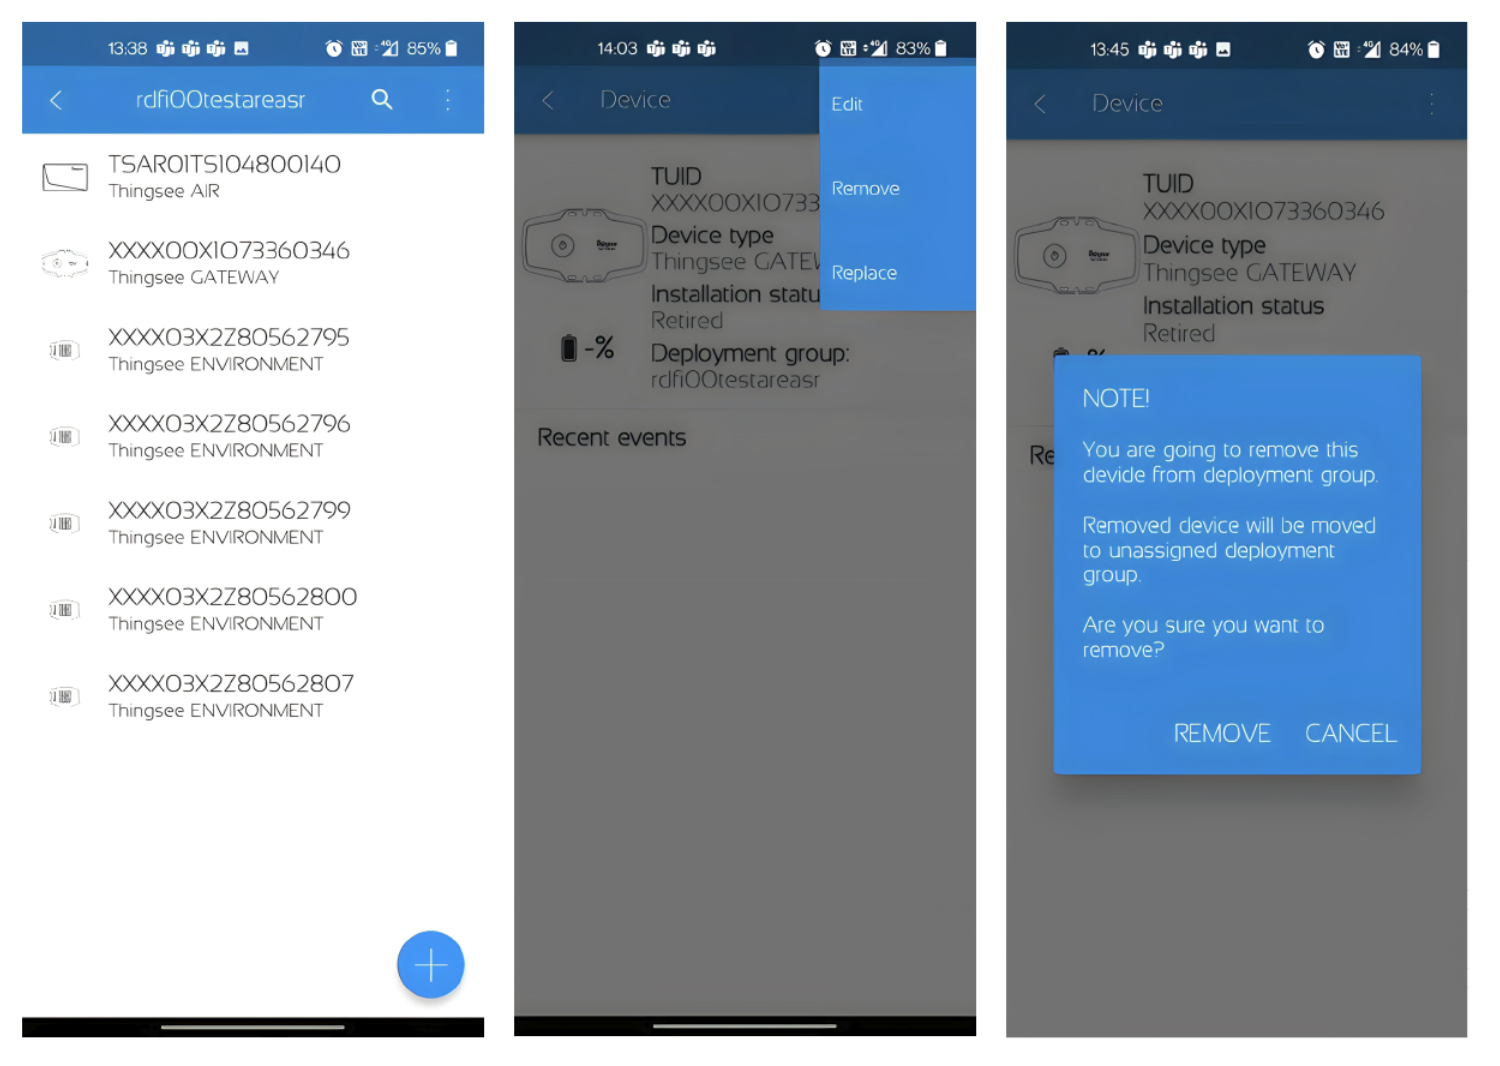
Logging
In the main view, go to Logs to add new log files and view your existing log files.
Logs are used for recording the actions done with Thingsee Toolbox. There can be several logs ongoing at the same time.
Logs can be used for mapping device IDs (tuids) in your system, for example: desk 123 has sensors x, y, and z. Logs are suggested to be used in the maintenance phase if sensors need to be configured or devices need to be changed. Logging makes it easier to share info on any changes with your organization and, if needed, with Haltian customer service.
Note: All log files are visible only on the mobile phone which was used to create them.
To add a new log:
- Title.
- Description: describe what is happening in your log
- Choose which deployment group which will be logged
- Choose the events happening in the log. You can choose one or many
1. Choose Logs on the main view and choose to Add new log file.
2. Fill in all the fields.
Note: The titles and descriptions of the log are visible only in the CVS file and locally on your phone.
3. Press Save.
4. Red recording sign indicates that the recording of the log is ongoing. Now, the log records all events that are selected for the logging.
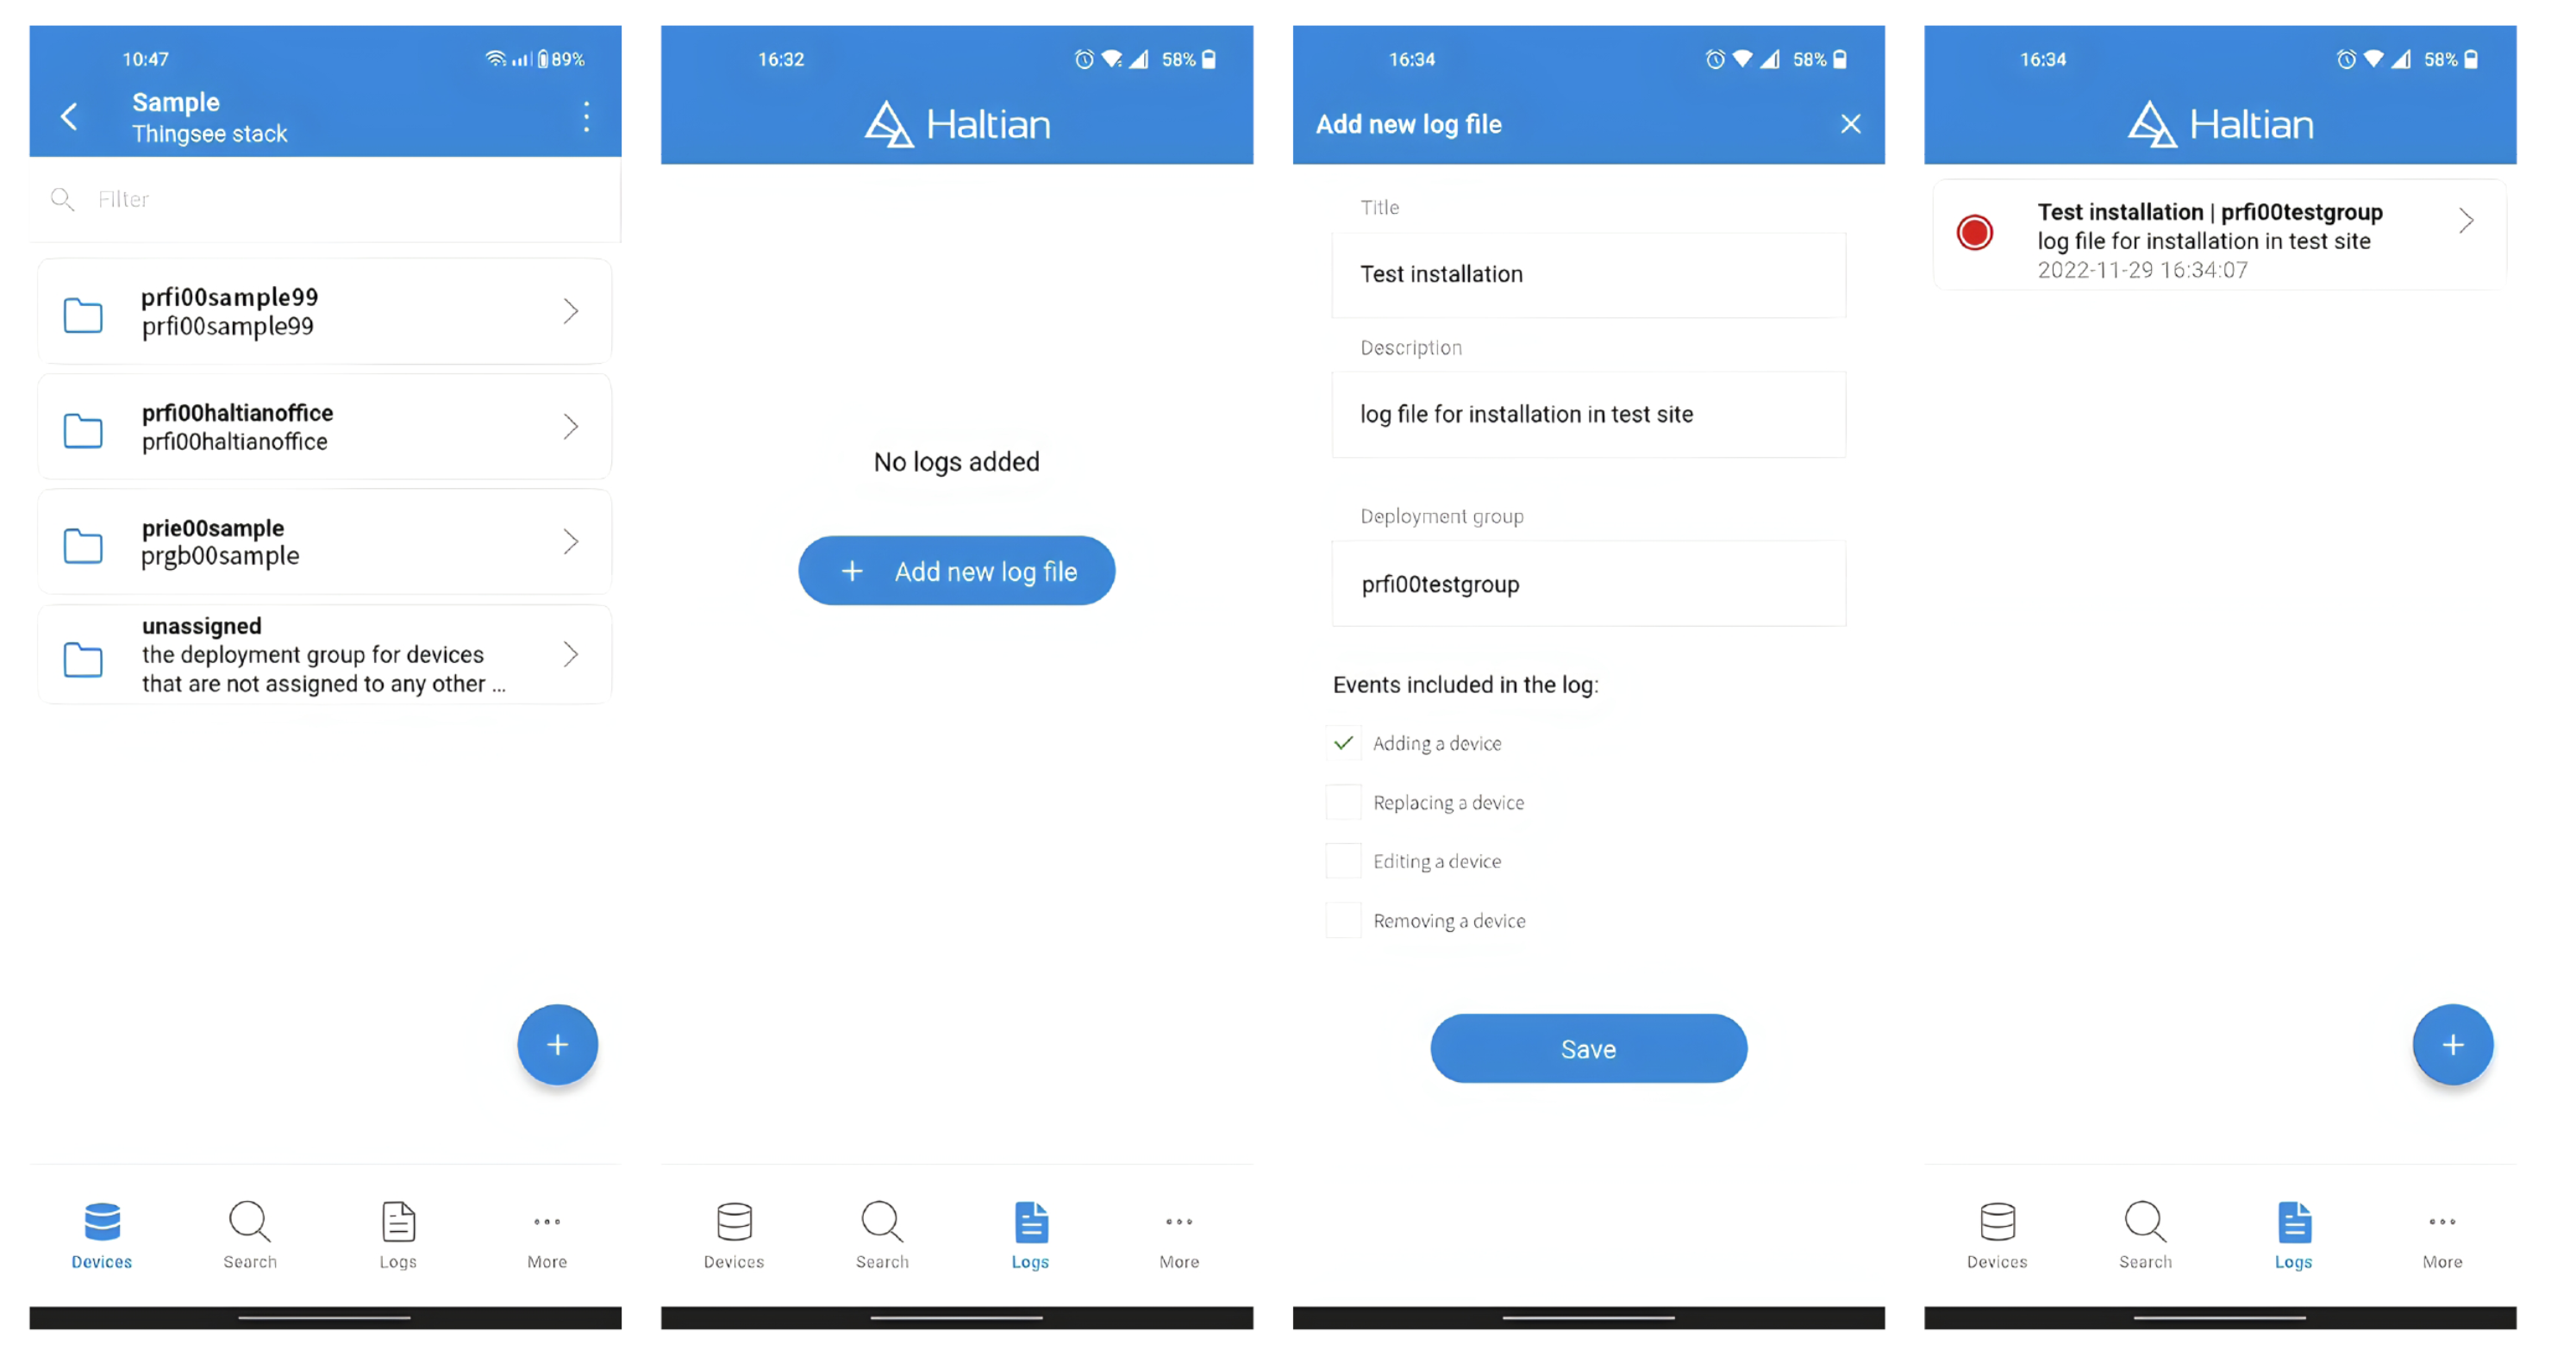
Log file
5. When needed actions are done, select Log and Stop recording from the menu and select Stop recording.
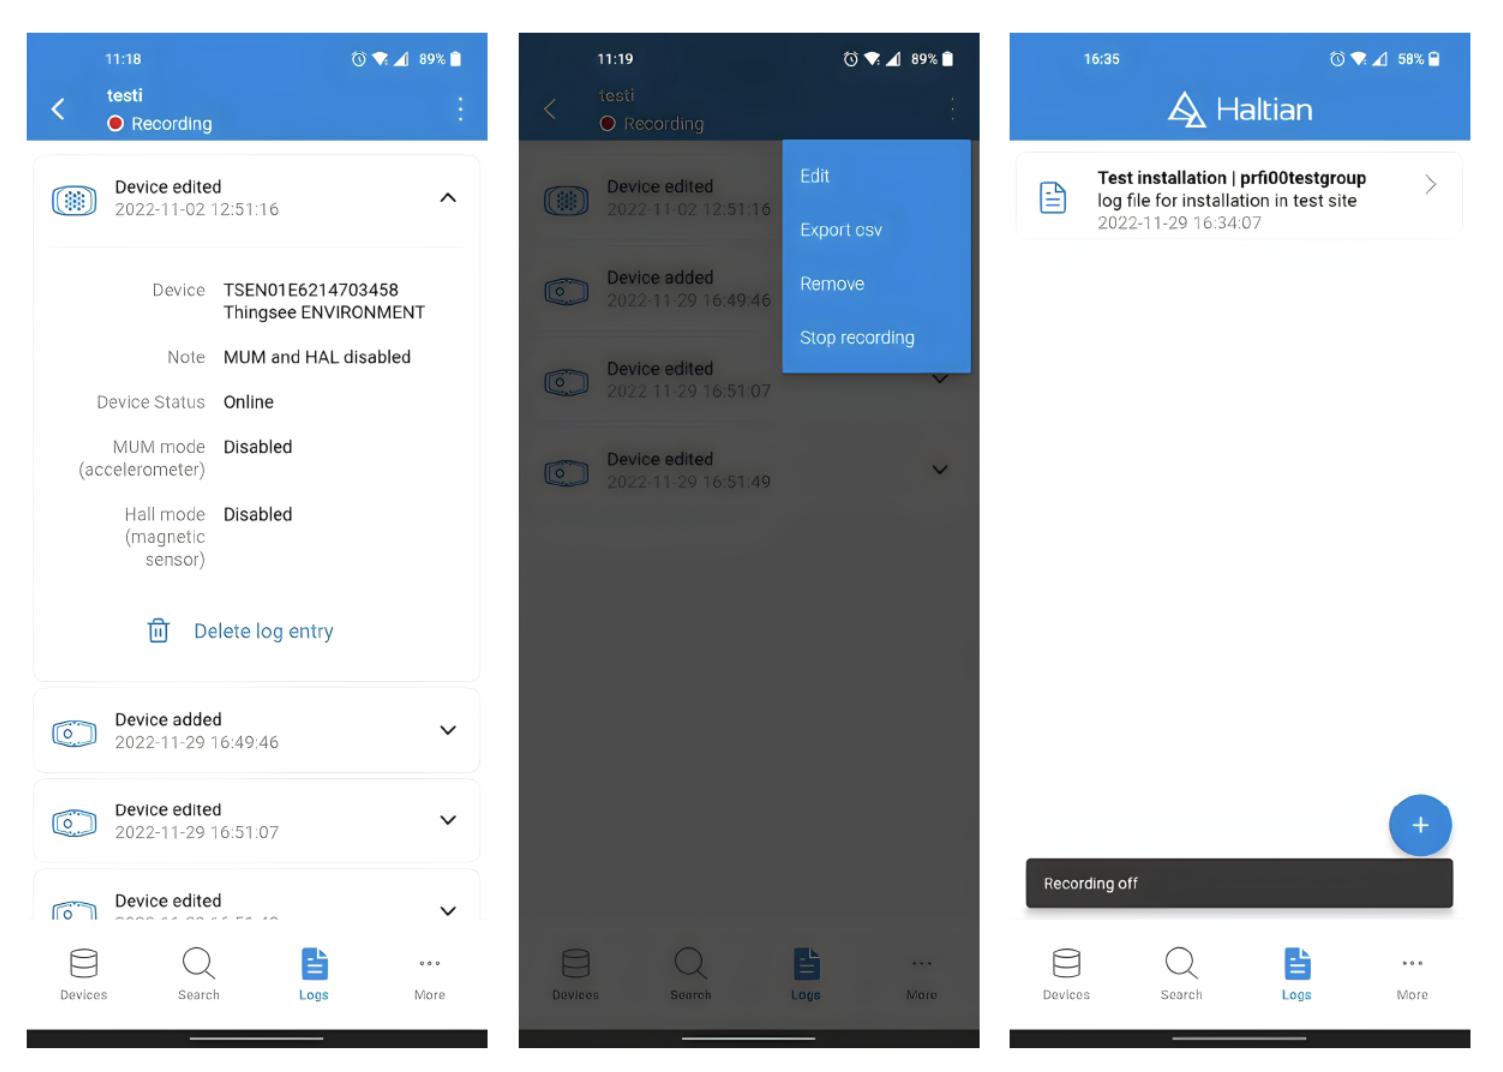
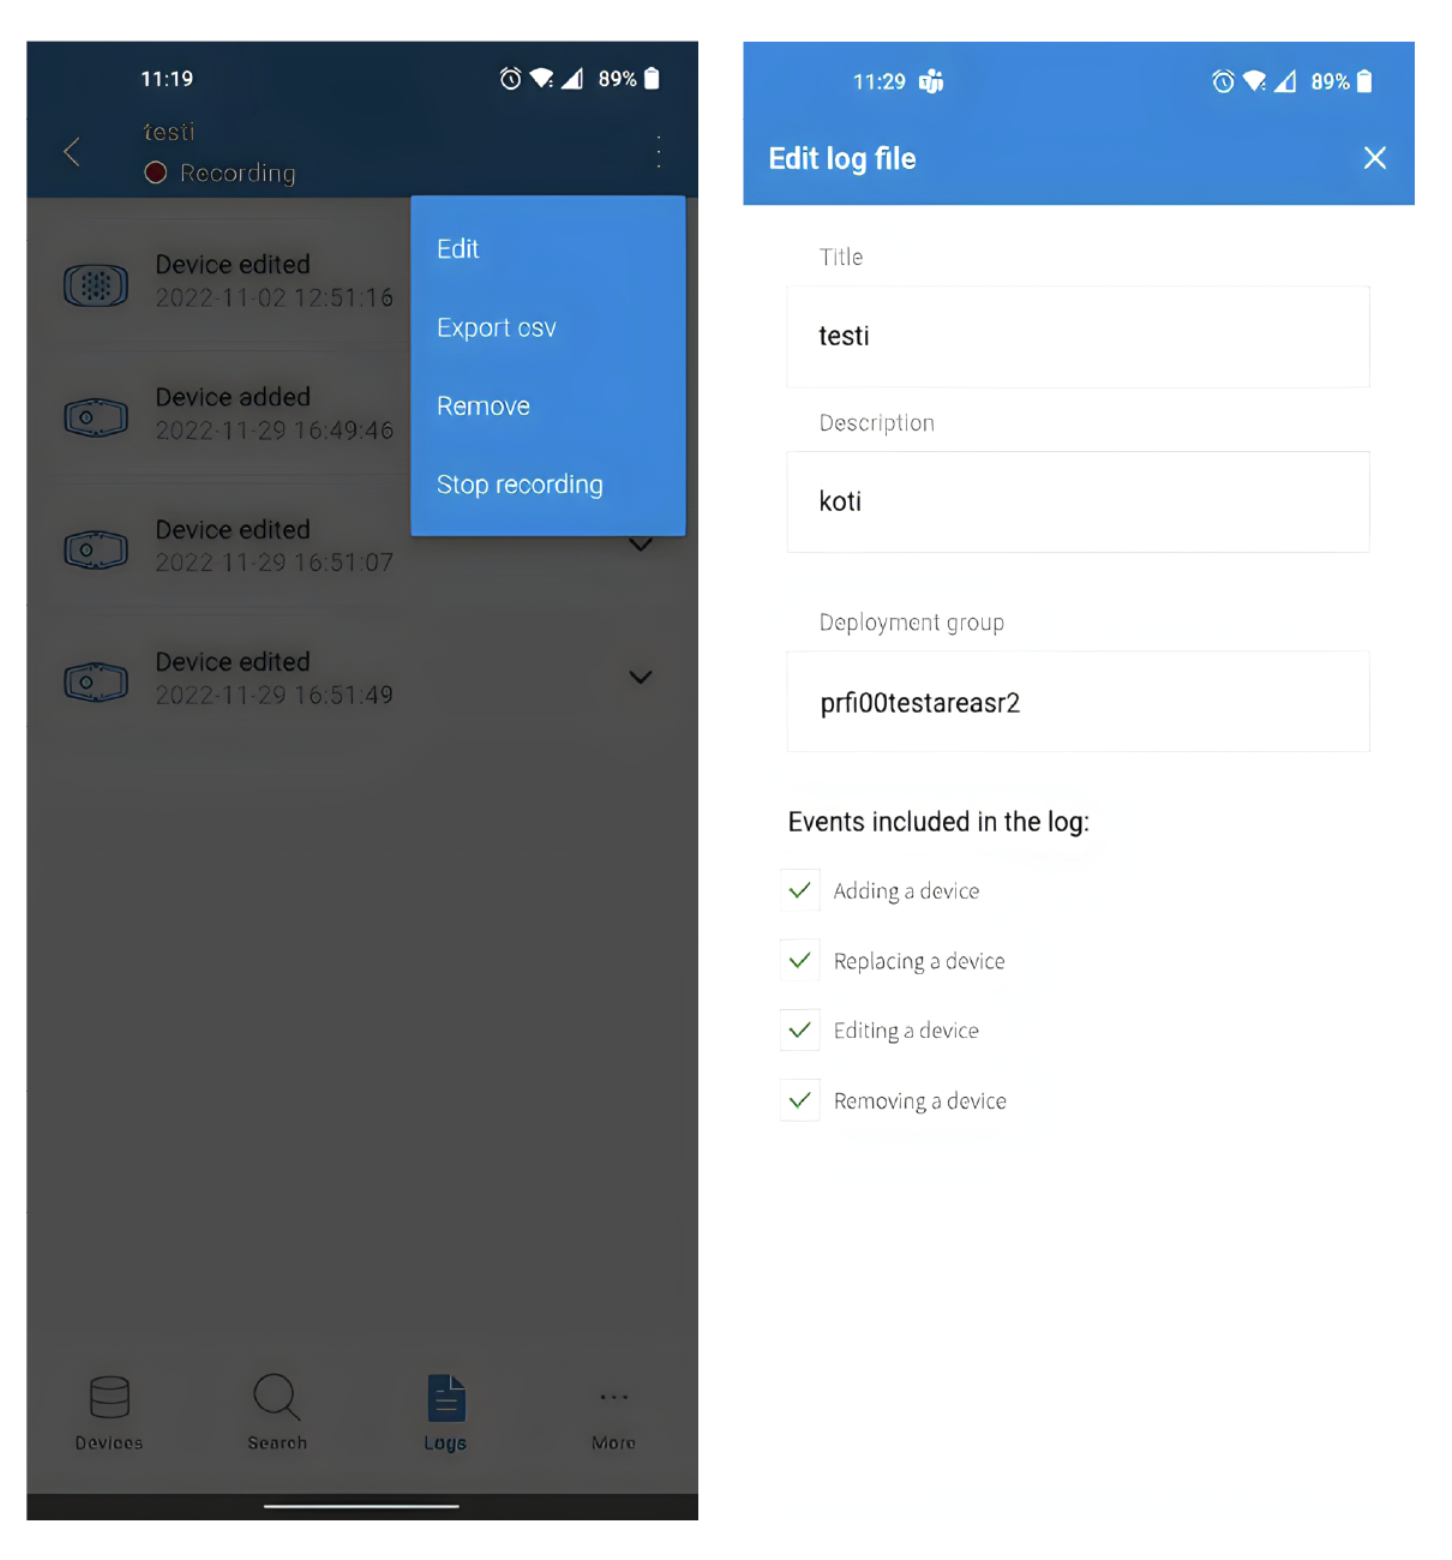
Editing a Log file
You can edit a log file by going to the file and selecting Edit from the menu. Here you can change the title, description, and deployment group to be logged. You can also change the logged events.
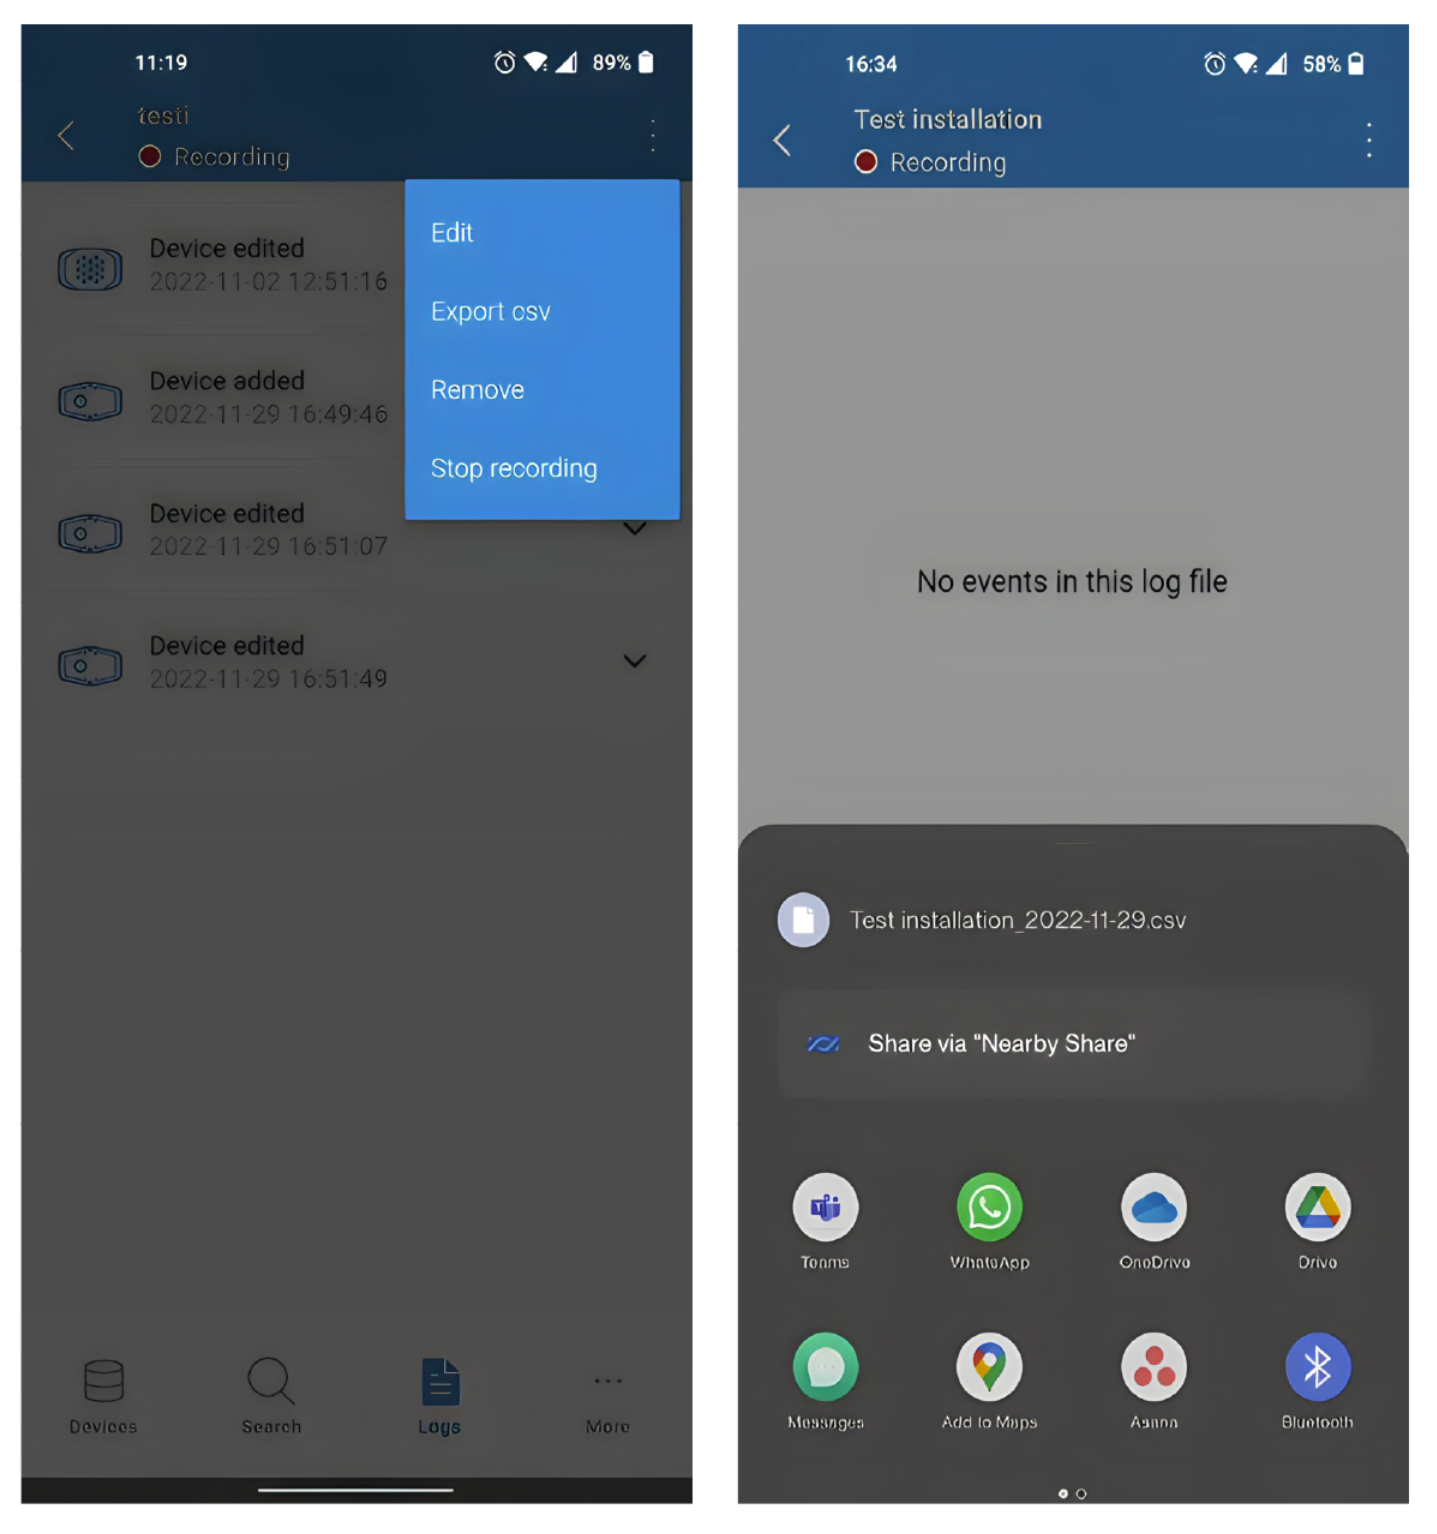
Exporting Log files
You can export Log files as CSV files by choosing Export CVS from the menu. You can then choose your preferred way of sharing the file.
Remove Log files
Remove log files by choosing the file you want to remove, going to the menu, and choosing Remove. Select Remove to confirm, or press Cancel if you don’t want to remove the file.
