On This Page: [hide]
Download PDF
Using Haltian RADAR sensor device
General installation instructions
Things to avoid in installation
Installation
Installation method 1:
Installing Haltian RADAR with attachment tape
Installation method 2:
Installing Haltian RADAR with Screw Mount Plate (accessory)
Using Haltian RADAR for loading dock monitoring
Download PDF
Using Haltian RADAR sensor device
Haltian RADAR measures the distance between the sensor and any surface. The sensor sends a 60GHz radio wave signal and calculates the distance from the time it takes for the wave to return to the sensor from an object in the beam area. The strength of the signal is also measured and with these, RADAR can reliably detect changes in the observed area.
Haltian RADAR can be used to detect if a parking space or loading dock is occupied or not. It can also be used to detect any changes in the observed area for other occupancy monitoring use cases.
Haltian RADAR gives reliable occupancy data and it has an adjustable sensing distance, making the installation flexible and easy.
Haltian RADAR is made to function in any environmental conditions inside or outside. The 60 GHz radar detection remains uncompromised by any natural source of interference such as noise, rain, dust, temperature, object color and material, and direct or indirect light.
General installation instructions
Install Haltian RADAR sensor in front of or above the space you want to monitor. Make sure that the sensor beam is directed toward the area. Install the device, if possible, perpendicular to the center of the measured area. However, depending on the installation spot, you can also position the device at an angle of up to 45 degrees or more. Ensure that the beam accurately covers the observed area, and adjust the sensing distance to avoid detecting objects beyond the intended monitoring zone.
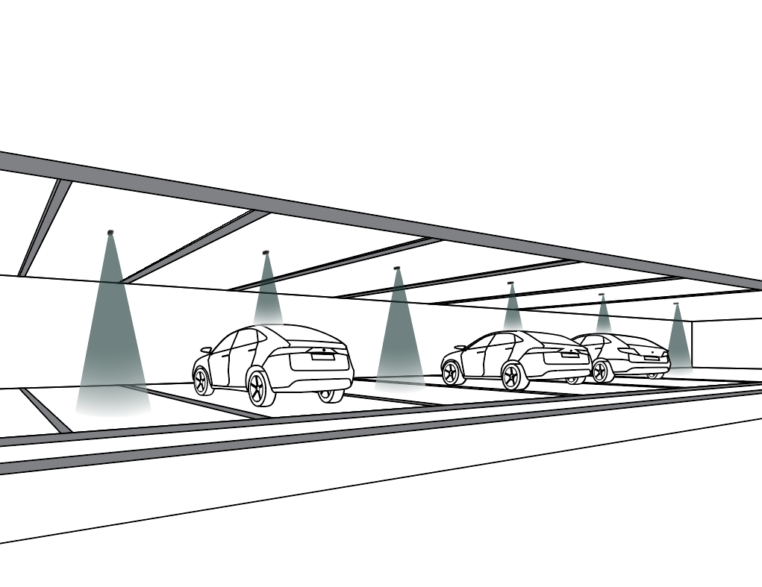
The best positions for parking place monitoring:
On the wall or pole in front of the parking space.
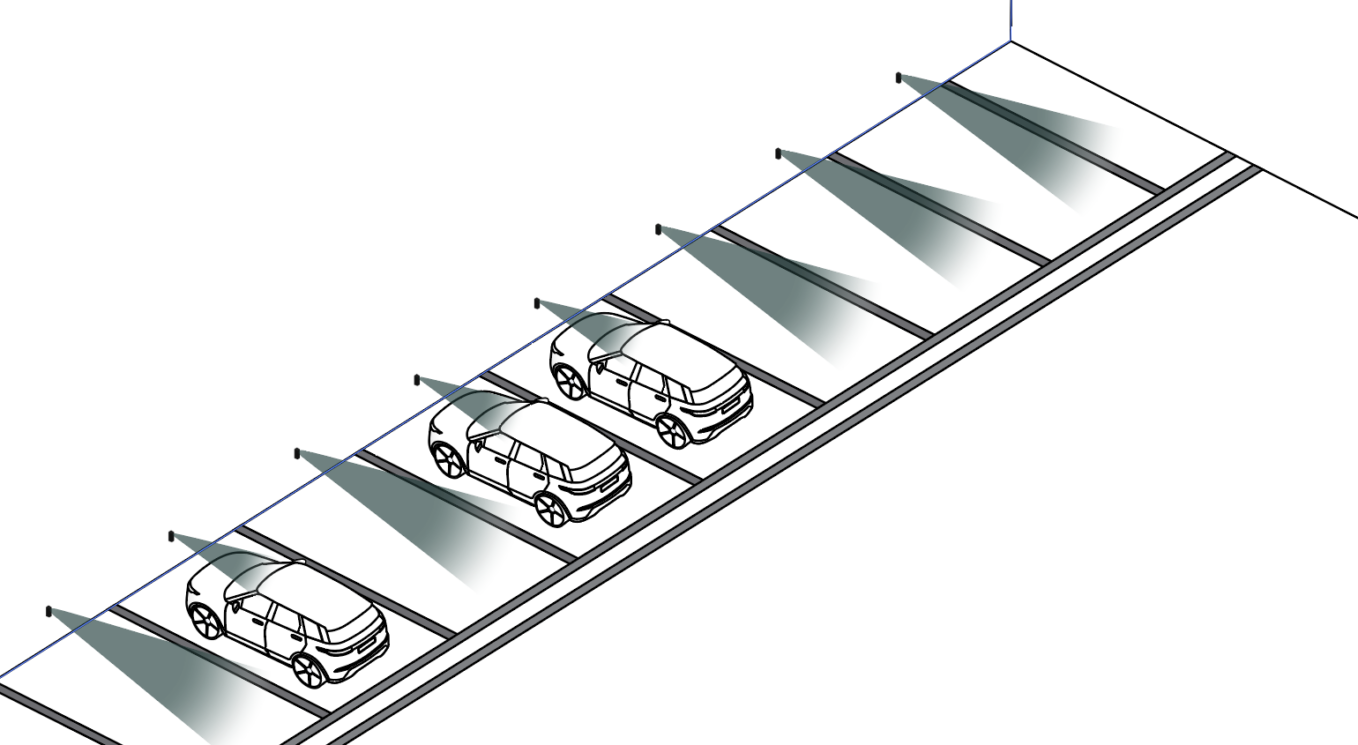
On the ceiling above the parking space.
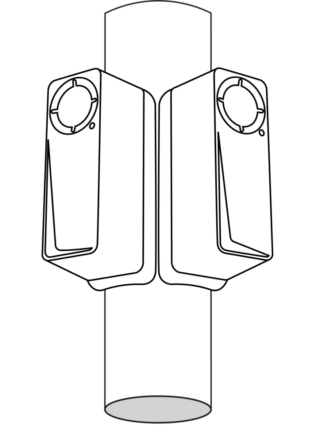
In poles, angled roughly 45 degrees to towards the observed spot. This is particularly important when installing two sensors on one pole detecting occupancy of two adjacent places.
The main thing to consider when choosing the installation method is to ensure a clear view of the detection beam towards the observed area.
Things to avoid in installation
Avoid installing Thingsee products near the following:
- Thick concrete structures or thick fire doors.
- Electrical transformers or thick electrical wires.
- Escalators.
- Nearby halogen lamps, fluorescent lamps or similar lamps with hot surfaces.
- Nearby radio equipment like WiFi routers or any other similar high-power RF transmitters.
- Metal objects blocking the signal between other sensors or the gateway.
- Near elevator motors or similar targets causing a strong magnet field.

Installation
Before installing the sensors, make sure the Thingsee gateway device is installed and connected to a mobile network (LED blinking green).
To identify the sensor, read the QR code on the end of the device with a QR code reader or Thingsee Toolbox application on your mobile device.
Identifying the device is not necessary, but it will help you keep track of your IoT installation and help Haltian support to solve possible issues.
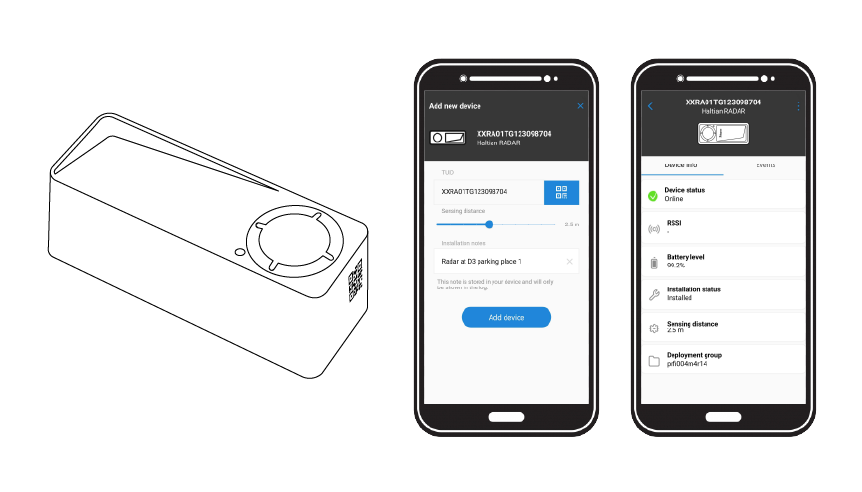
Note: Make sure the sensor is installed max. 20 meters from the next sensor or gateway. This is to ensure a full coverage mesh network between the sensors and the gateway.
Haltian RADAR is powered on by using the magnet included. Place the magnet close to the device’s end as shown in the picture.
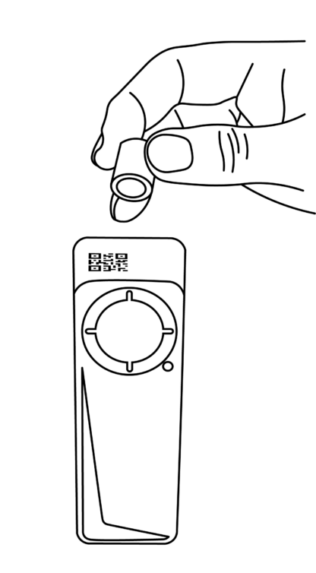
Haltian RADAR has an indication LED that shows the operating status.
Out of the box the device is in deep sleep transport mode indicated with dim green LED blinking every 2 seconds. When the magnet is brought close to the device’s end point, the device will indicate start-up by blinking brightly for 15 seconds. Notice that the first boot(before LED starts blinking) may last about 30 seconds if the Radar detects that a newer OTA firmware update is available and automatically downloads it.
LED statuses:
- Deep sleep mode = Quick, dim green LED blink every 2 seconds
- Start-up phase after using the magnet = device blinks brightly for 15 seconds with two-second intervals. Then switches to blink every 15 seconds for a further 10 minutes.
- Device installed and operating = LED off
The status of an installed device can be checked using the magnet:
- Magnet placed on top of the device, Green LED blinks 3 times with 2 seconds intervals = Connection OK
- Magnet placed on top of the device, Green LED blink once = Device on, but connection failed
- Failed connection means there’s no Wirepas network available, or no gateway connection exists.
Installation method 1:
Installing Haltian RADAR with attachment tape
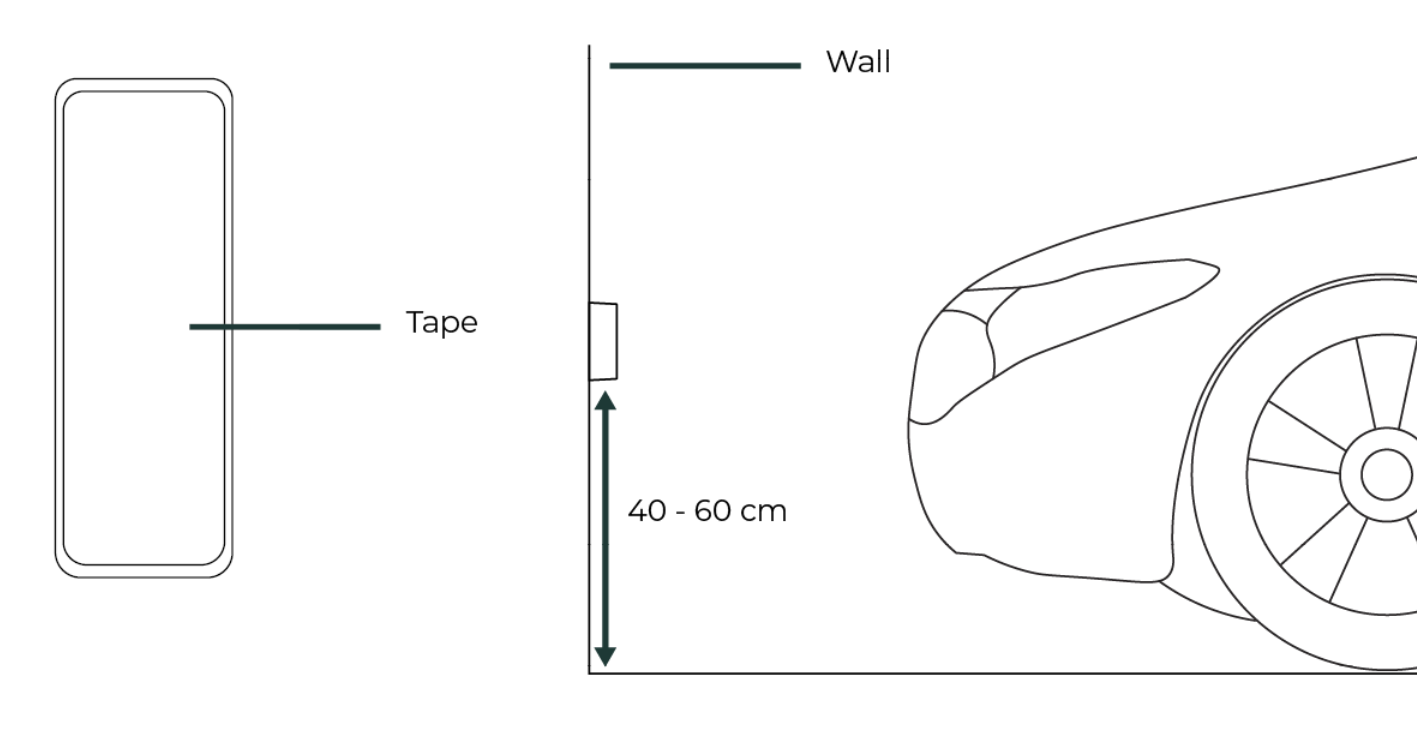
The default attaching method in wall installations is using the included attachment tape. First, remove the tape’s release paper and attach it to the device. Usually, the tape is attached to the back of the device, but the tape can be attached to the sides as well if the installation requires it.
The recommended installation height in wall installations is 40-60cm from the floor.
Clean the installation surface with IPA -solvent (isopropyl alcohol) to remove any grease, dust, or other from the surface. The smoother the surface the better, but the gel tape allows some unevenness. Please note that the recommended temperature for the tape installation is at least +15 degrees. If the surface is much colder, you can pre-warm it using for example hot air blower/heat gun, or gas torch if it can be done safely.
Remove the release paper from the other side and press the device firmly against the surface for a minimum of 30 seconds. Test lightly that the device is well attached and there is no excess movement. The tape will reach its full strength in about 24 hours.
Installation method 2:
Installing Haltian RADAR with Screw Mount Plate (accessory)
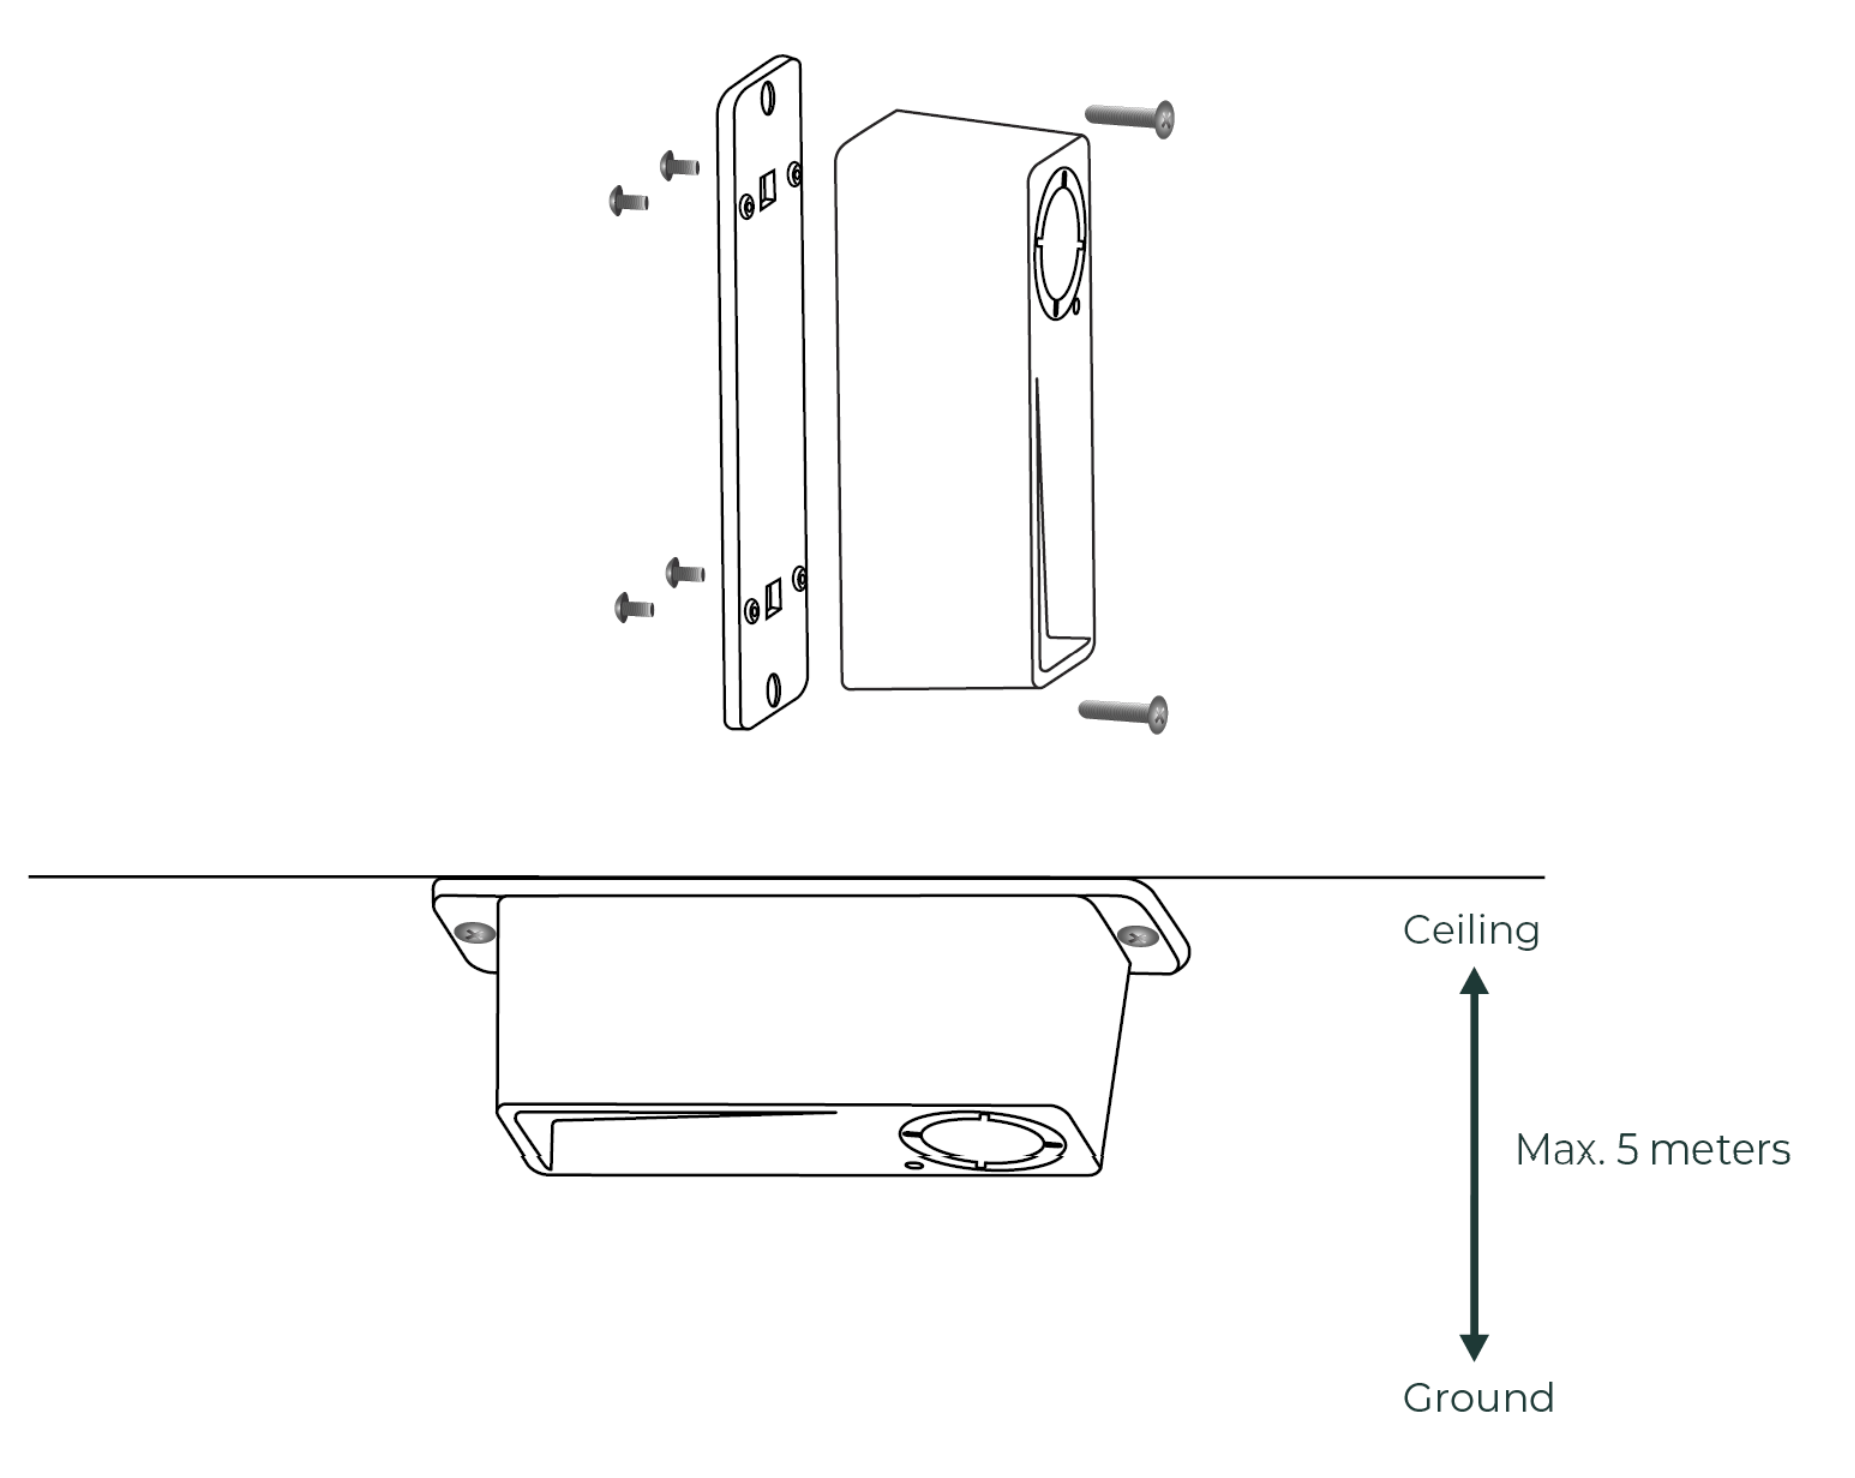
If the installation surface is not suitable for tape, you can use the attachment plate accessory available as a standalone purchase. Ceiling installations should always be done with the Screw Mount Plate. Please note that Haltian takes no responsibility for possible damages caused by falling devices.
Attach the plate to the device using the 4 provided screws.
Then use the 2 provided screws to install the device to the planned surface. Screw anchors are also included and can be used if they work on the surface material.
If the ceiling height is more than 3 meters, you may need to adjust the sensing distance (using the Thingsee Toolbox mobile app) to be more than the default 2 meters. The maximum recommended height is 5 meters. It’s important to note how the sensing area is impacted by installation height (refer to the Detection Capability chapter below).
Using Haltian RADAR for loading dock monitoring
Haltian RADAR sensor can be used for monitoring the occupancy of loading docks. In the loading dock case, Haltian RADAR is always wall-mounted or mounted to the loading dock frame or structures. The best position is in the middle of the dock, but both sides will work as long as the detecting cone still hits the area to be observed. Make sure that the detection cone does not hit the neighbouring loading area to prevent false positives.
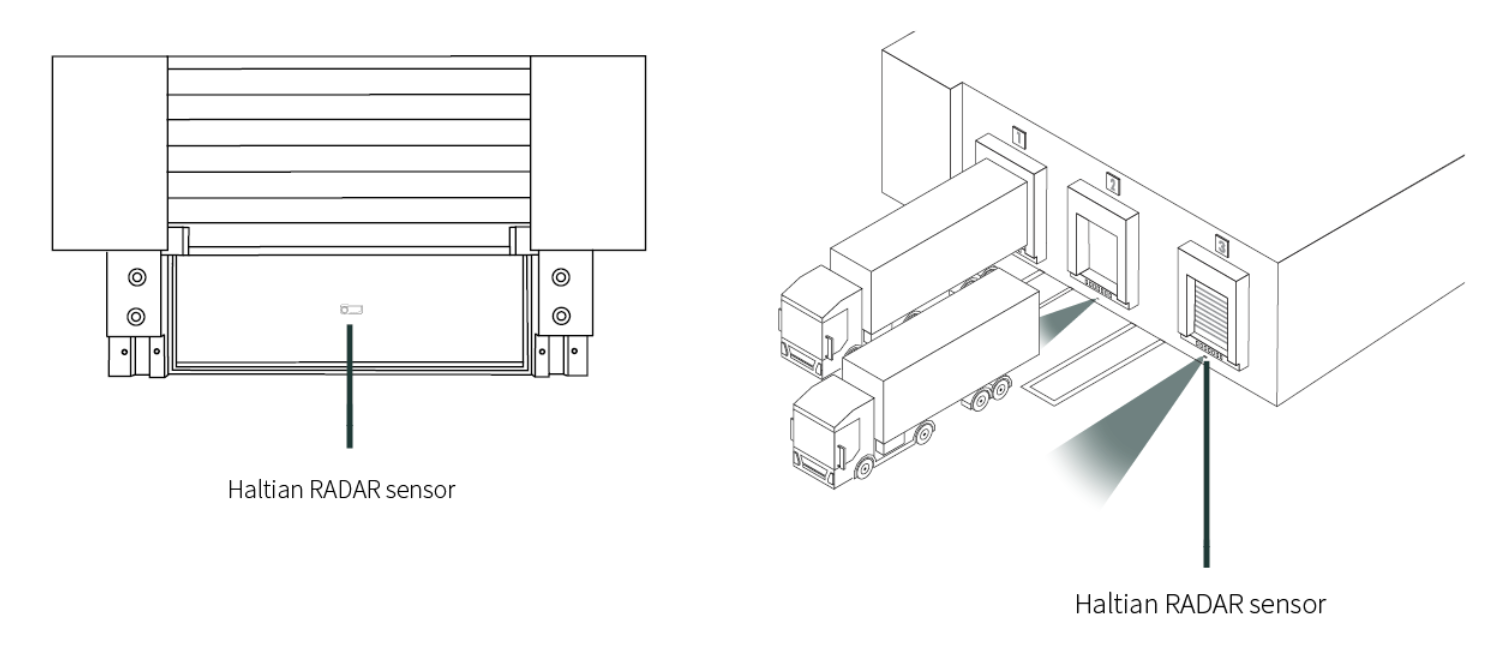
Please check that the installation spot is not impacted by any moving mechanisms in the loading dock during its operation. The RADAR should be installed in a location where it will not be hit or damaged by a truck backing up or approaching the loading dock.
The dock area doesn’t need to be free during the installation which makes the installation possible with minimal disruptions to normal warehouse operations. After installation, Haltian RADAR performs an Echo Level Adjustment (ELA) that automatically sets the detection threshold. If the dock is occupied by e.g. a truck during the installation, Haltian RADAR will show the place as free until the truck leaves.
After this the device finds a new lower threshold level and detects the next truck arriving, informing that the place is now occupied.
The ELA process can be also initiated manually using Thingsee Solution Suite application if there are, for example, new fixed structures brought into the observed area (i.e. new safety railings etc.) and those need to be taken out of the threshold. Without running a new ELA process, Haltian RADAR would always detect the structures and show the place as occupied.