Download PDF
Using Thingsee COUNT sensor device
Thingsee COUNT is installed above a doorway or other passage from where it detects movement that passes beneath the device.
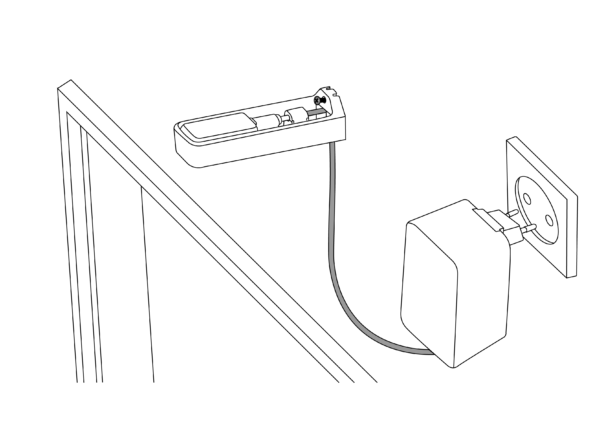
Thingsee COUNT consists of a sensor device unit and a cradle that houses the sensor and prevents the power cable from straining and pulling off. The device is powered by an external power source via a USB connector.
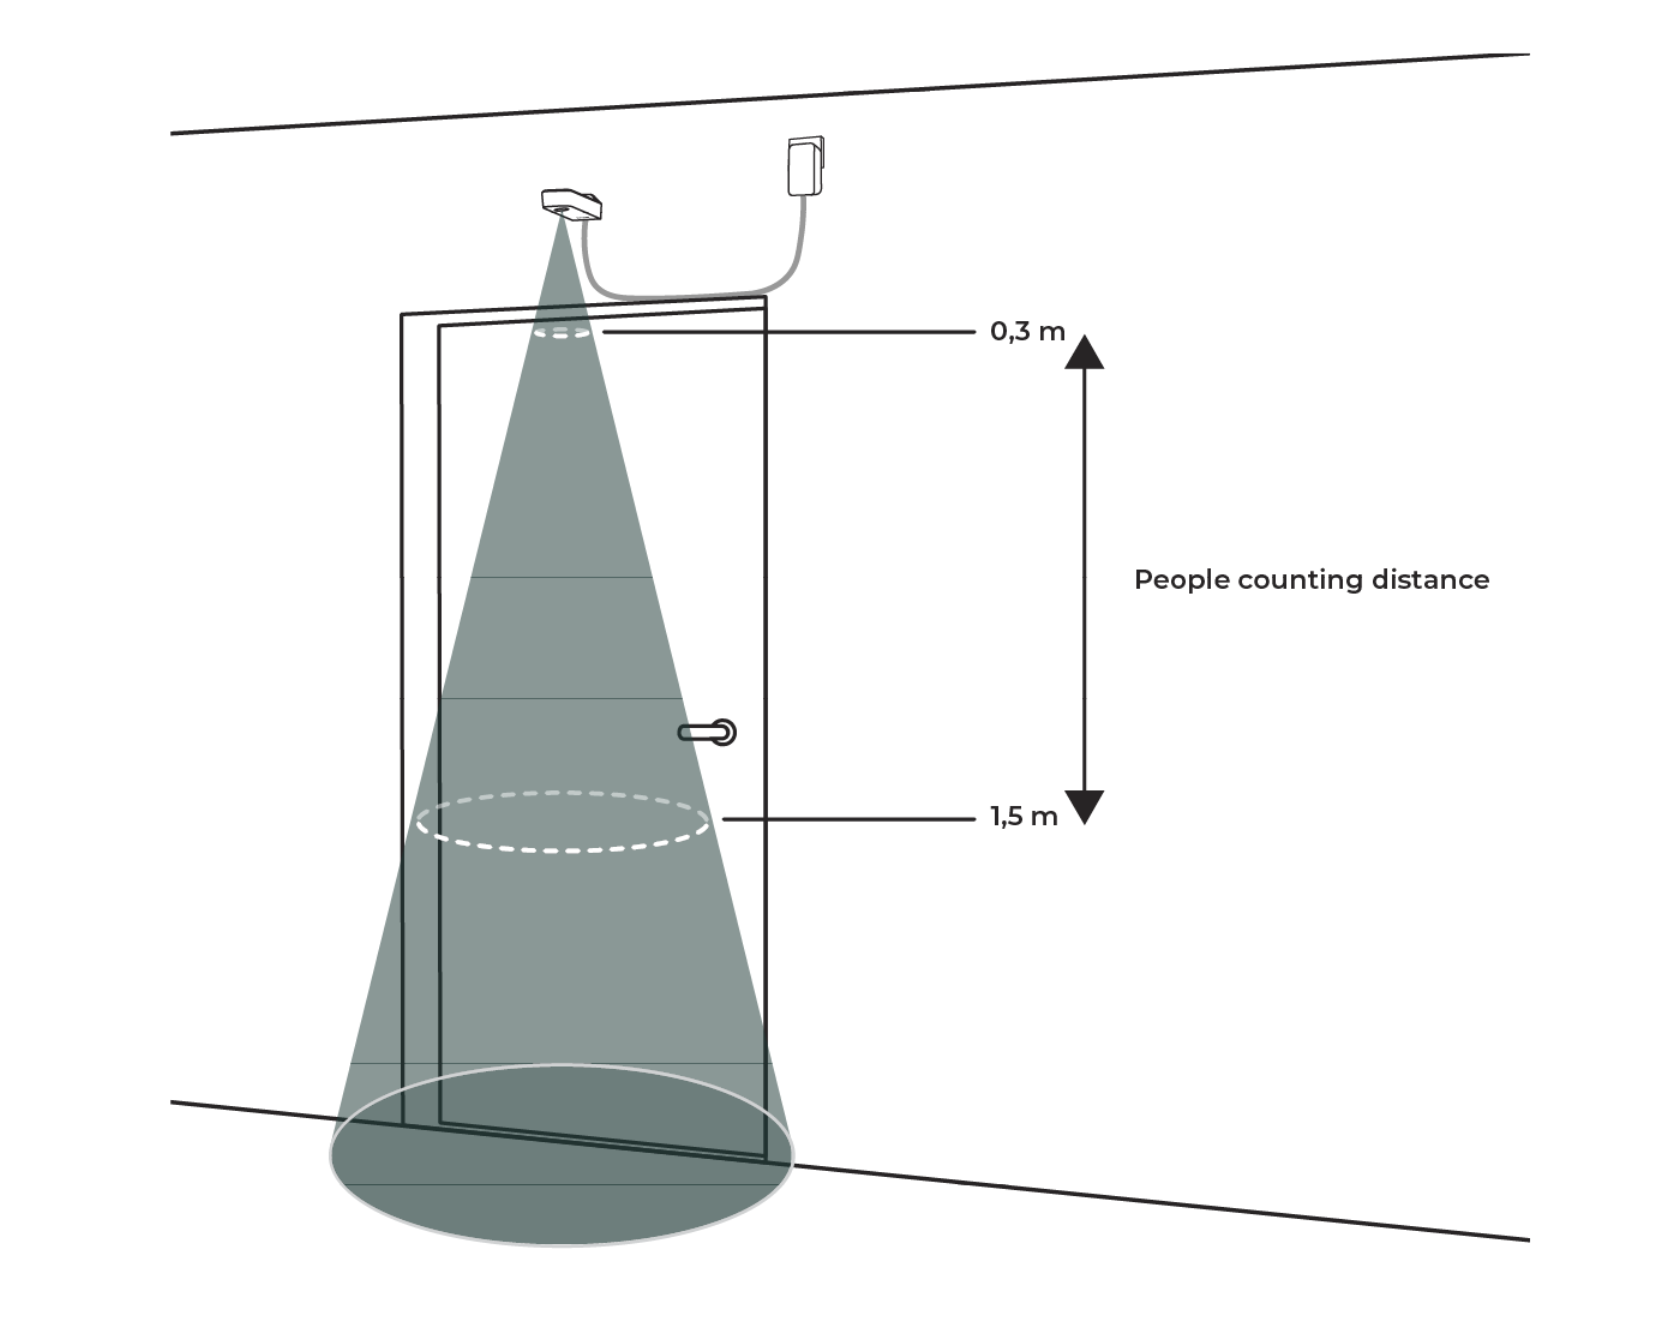
A typical use case for Thingsee COUNT is visitor counting and utilization monitoring for e.g. meeting rooms or other spaces. In general, the device can be placed in any passageway within the limits of the sensor detection capability. Refer to chapter ‘Detection Capability’ for detailed information.
Thingsee COUNT determines the direction of the movement when, for example, people enter and exit a room. The direction is configured during the installation using the Thingsee Toolbox application so that the device knows which side is regarded as moving into the space. The other side is automatically regarded as moving out.
General installation instructions
Selecting the installation spot
Select the installation spot on a wall or other solid surface directly above and in the middle of the passageway (max width 1000mm and max height 2100mm), so that the device cradle can be installed straight and pointing downwards at a 90 degrees angle. Make sure that you have an applicable power outlet near the installation spot.
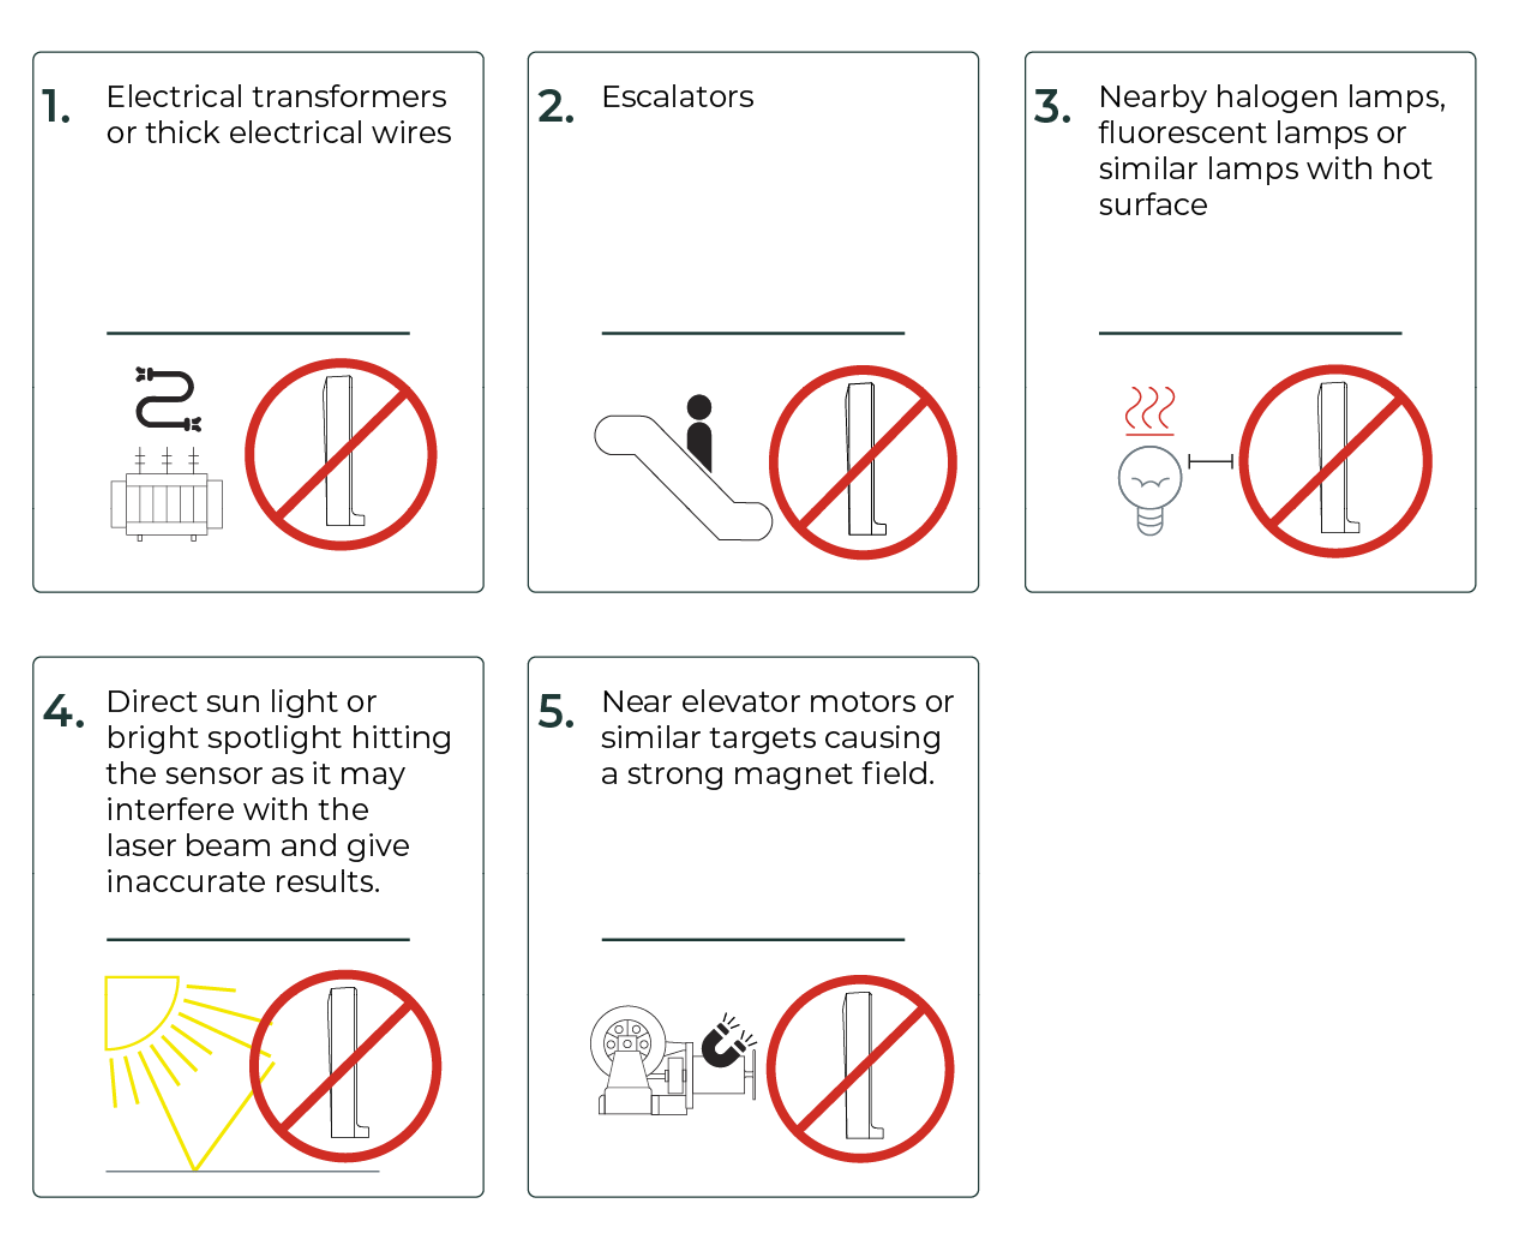
The accuracy of the sensor is affected by exposure to bright sunlight or incandescent/fluorescent/halogen lamps. For optimal functionality, refrain from installing the sensor in areas with prolonged light exposure.
Note: If the electricity is cut off mid usage the sensor’s counter will reset to zero.
The recommended installation height is 230 cm from the floor.
If the passageway has a door, install the device to the side to which the door does not open so that the door’s movements are not registered by the device. If the door has a door pump, also make sure that the pump mechanism’s movements are not registered by the device.
There should be nothing installed on the wall underneath Thingsee COUNT that can disturb the functionality of the device, such as lights or other devices.
Note: If you use screws for the installation, make sure there are no electrical wires, other cables, water pipes or similar beneath the installation surface. If in doubt, consult your facility manager first.
Things to avoid in installation
Avoid installing Thingsee products near the following:
Installation
Before installing the sensors, make sure the Thingsee gateway device is installed and connected to a mobile network (LED blinking green).
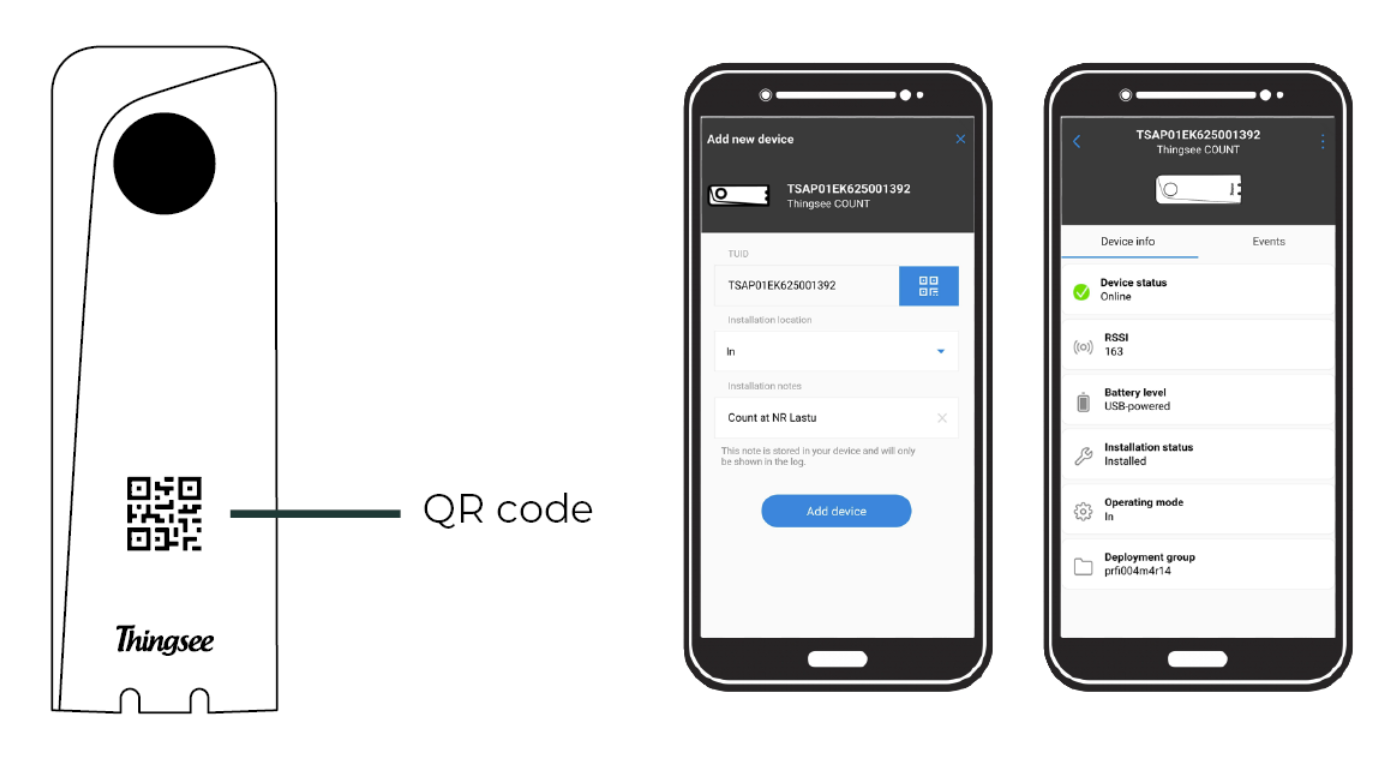
Open the Thingsee Toolbox application on your mobile device and read the QR code on the front of the device. Select the location (IN/OUT) according to the device installation location (inside of the meeting room door or outside of the meeting room door).
Note: Make sure the sensor is installed max. 20 meters from the next sensor or gateway.
Installing the USB cable to Thingsee Count through the Cradle hole
Run the USB cable through the Cradle’s holder and then install the USB cable to the sensor device unit. Make sure the USB cable’s connector springs are upwards as shown in the image when connecting.
You’ll hear a small snap once the cable is all the way in the sensor unit.
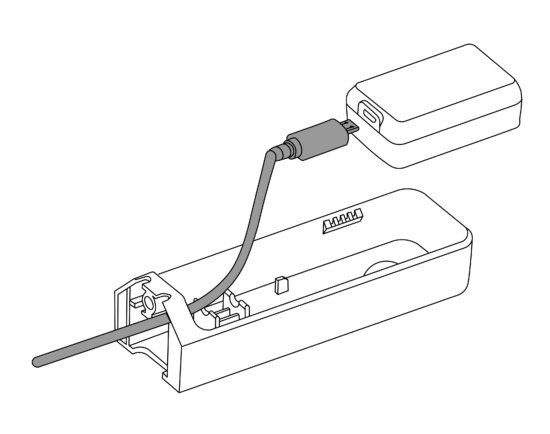
To remove any fingerprints or dirt on the sensor unit’s ‘eyeball’, wipe it with a dry, clean and lint-free cloth.
Installing Thingsee Count to Cradle
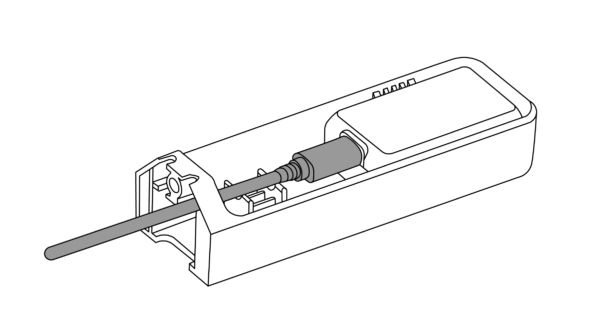
Install the sensor unit to the Cradle. You should hear a subtle snap sound once the sensor sits firmly in place between the two claws.
Now, you can route the USB cable upwards or downwards at the end of the Cradle so that the cable is not squeezed between the cradle and the installation surface.
Installing the Cradle clamp
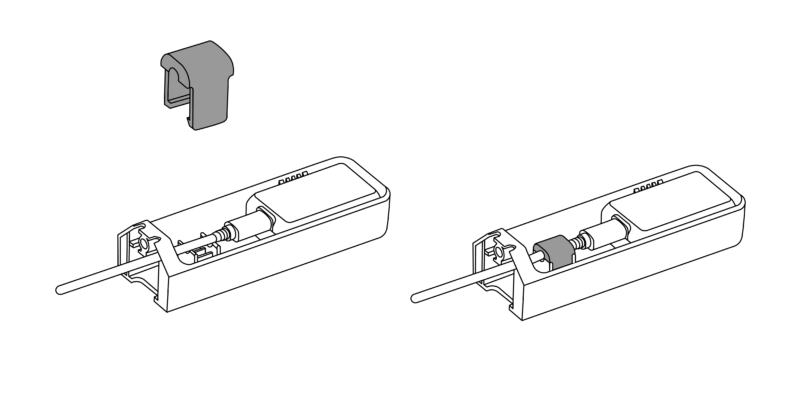
Put the USB cable into the clamp groove. The cable should be straight, not strained, but without any excess slack. Take the Cradle clamp and snap it in its place so that it holds the cable firmly in place.
Installation method 1
Installing the Cradle with the Thingsee Count to a wall with tape
When installing Thingsee COUNT using tape, do it on a smooth surface for better adherence.
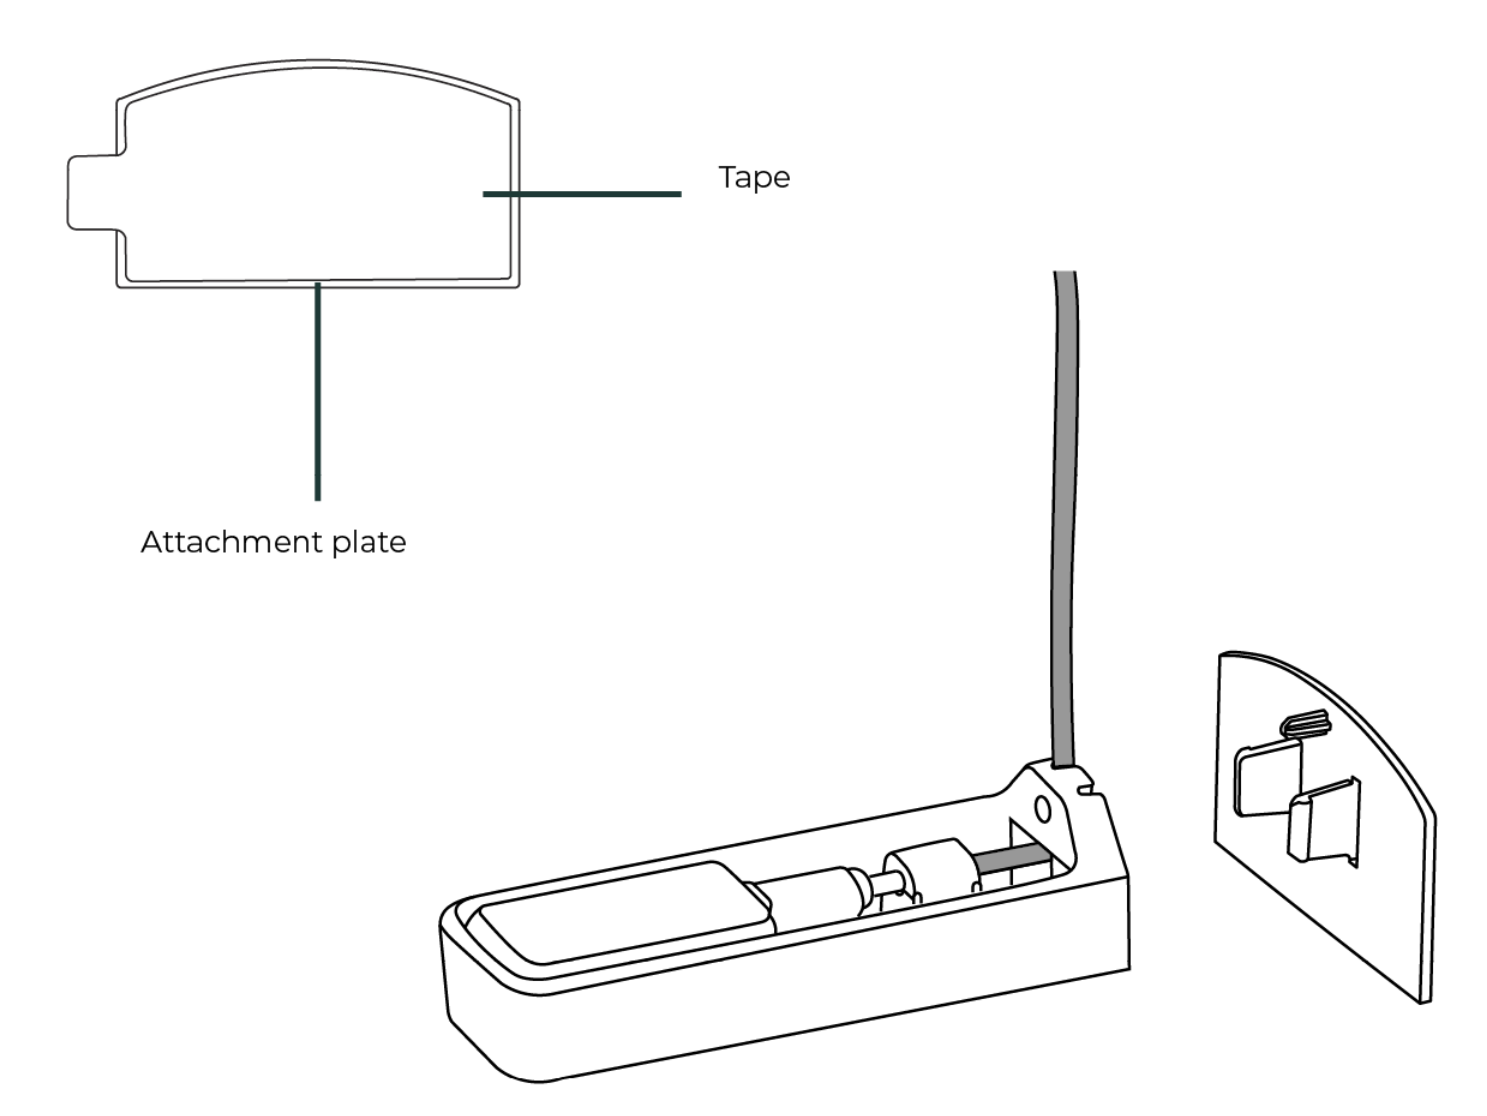
Use the Attachment plate accessory when installing Thingsee COUNT with tapes. Take the plate and snap it in its place at the end of the Cradle.
Make sure the plate is the right way, as shown in the image below, and is all the way attached.
Clean the surface you will attach the sensor to with IPA -solvent (isopropyl alcohol).
Remove the tape’s paper cover and attach the Cradle to its place by pushing it firmly against the surface for a minimum of 5 seconds.
Installation method 2
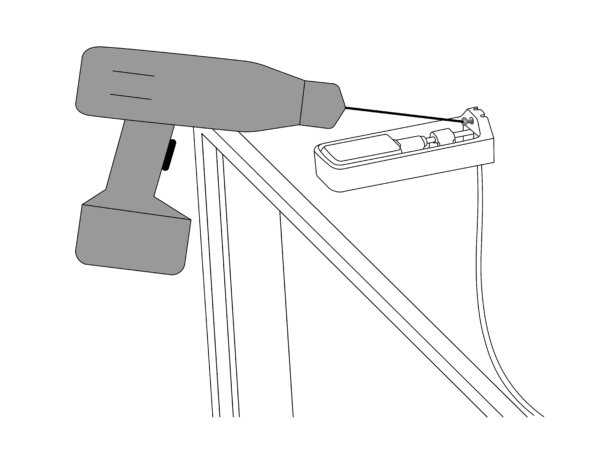
Installing the Cradle with the Thingsee Count to a wall with a screw
Use a long, Torx model screwdriver to screw the cradle to your selected installation spot.
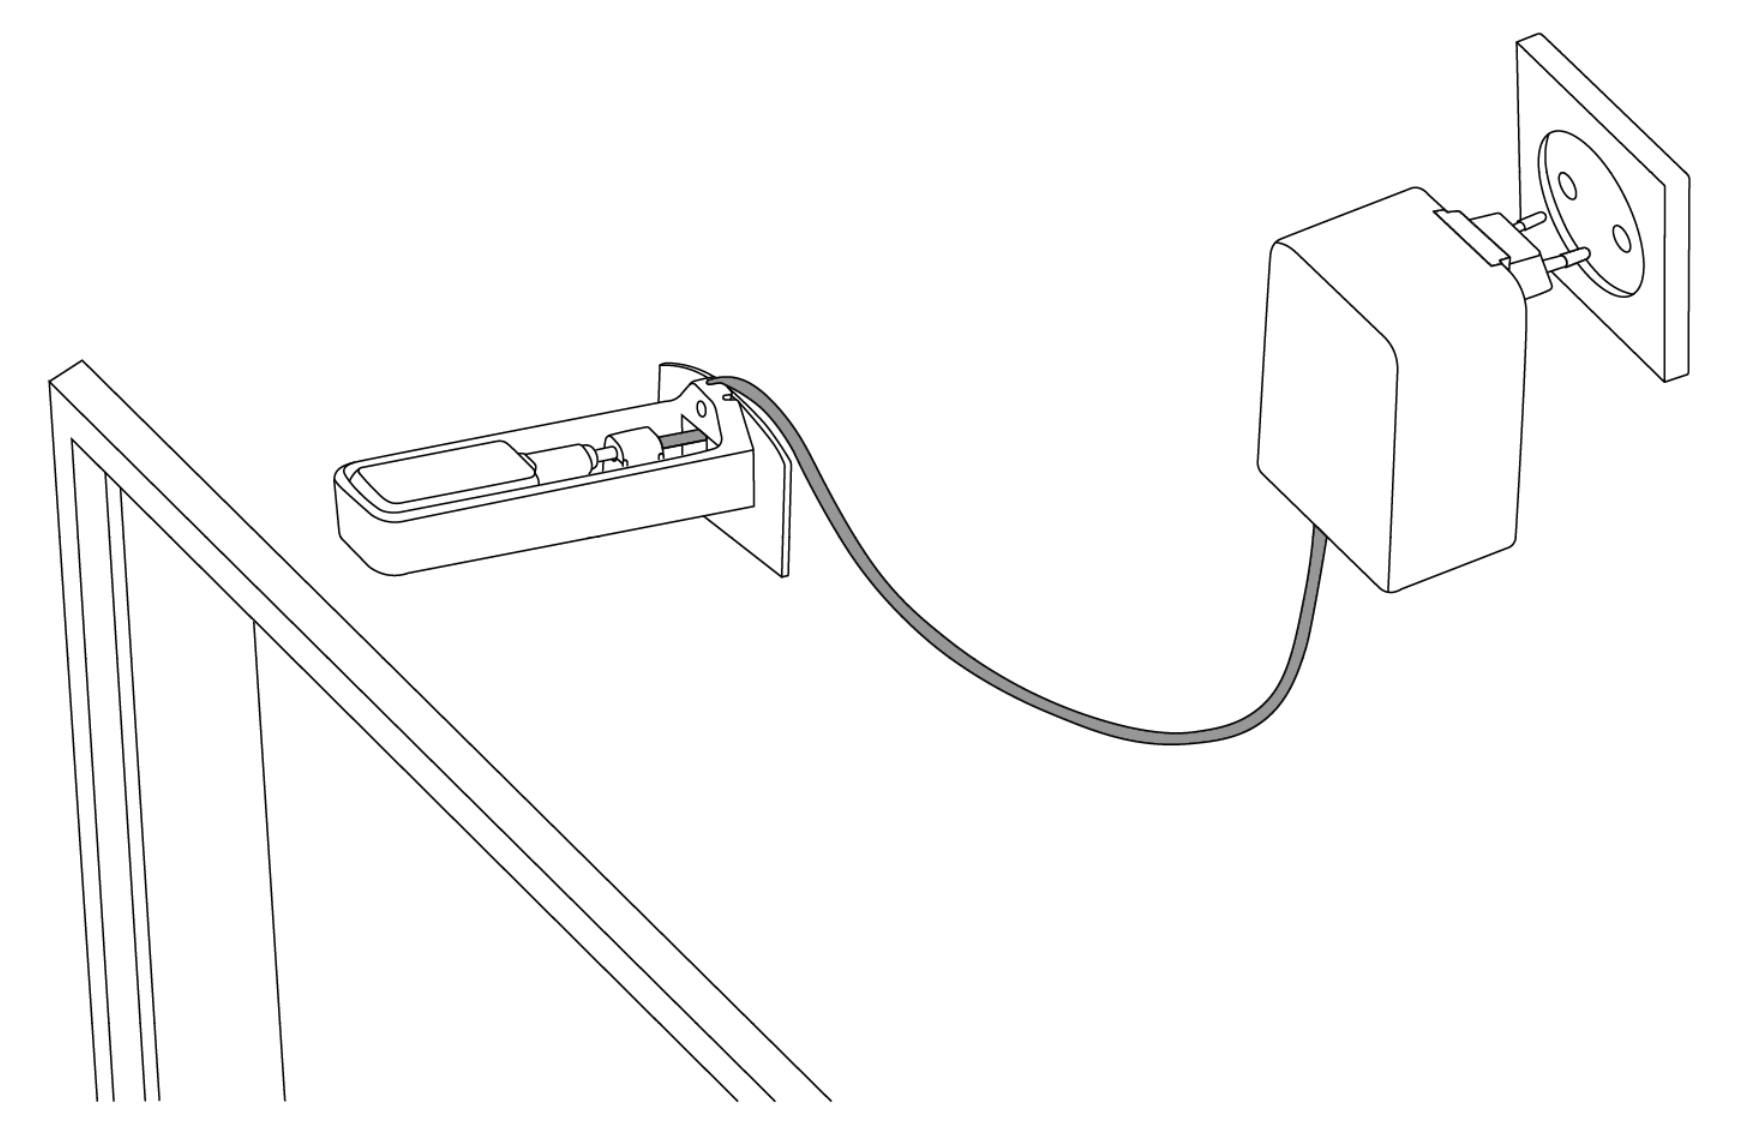
Connect the USB cable to the power supply and connect the power supply to an applicable power outlet.
